Prototyping is a crucial step in the design process, allowing designers to create interactive mockups of their products, test functionality, and gather feedback before moving on to development.
Figma is a powerful design tool that offers robust prototyping capabilities, making it an excellent choice for designers looking to create and share prototypes with ease.
In this article, we will provide an overview of prototyping, explain why Figma is an ideal tool for prototyping, and walk you through the process of creating prototypes in Figma.
2 Million+ Figma Graphic Templates & More With Unlimited Downloads
Download thousands of Figma graphic templates, UI kits, and web templates with an Envato Elements membership. It starts at $16 per month, and gives you unlimited access to a growing library of over 2,000,000 Figma templates, design assets, graphics, themes, photos, and more.
What is Prototyping?
Prototyping is the process of creating a simplified, interactive version of a product to visualize its functionality and design. It allows designers to test the user experience, identify potential issues, and make improvements before committing to the final design. Prototypes can range from simple paper sketches to more advanced, interactive digital mockups.
Why Use Figma for Prototyping?
Figma stands out as an excellent tool for prototyping due to its collaborative nature, easy-to-use interface, and powerful features. Some of the key advantages of using Figma for prototyping include:
- Real-time collaboration: Figma allows multiple users to work on a design simultaneously, making it easy to gather feedback and iterate on your prototype quickly.
- Cloud-based: Figma is accessible through your web browser, which means your files are always up-to-date and available from any device.
- Intuitive interface: Figma’s user-friendly interface makes it easy to learn and navigate, allowing designers to create prototypes efficiently.
- Advanced prototyping features: Figma offers a wide array of prototyping features, such as transitions, animations, and component states, which allow you to create realistic and engaging prototypes.
- Sharing and feedback: Figma makes it easy to share your prototypes with clients or teammates and gather feedback directly within the app.
With these advantages in mind, it’s easy to see why Figma has become a popular choice for designers looking to create effective and engaging prototypes.
Creating a Prototype in Figma
To create a prototype in Figma, follow these steps:
1. Design your screens
Begin by designing the individual screens or pages of your product in Figma. Ensure that all the necessary elements, such as buttons, navigation, and content, are included in your design.
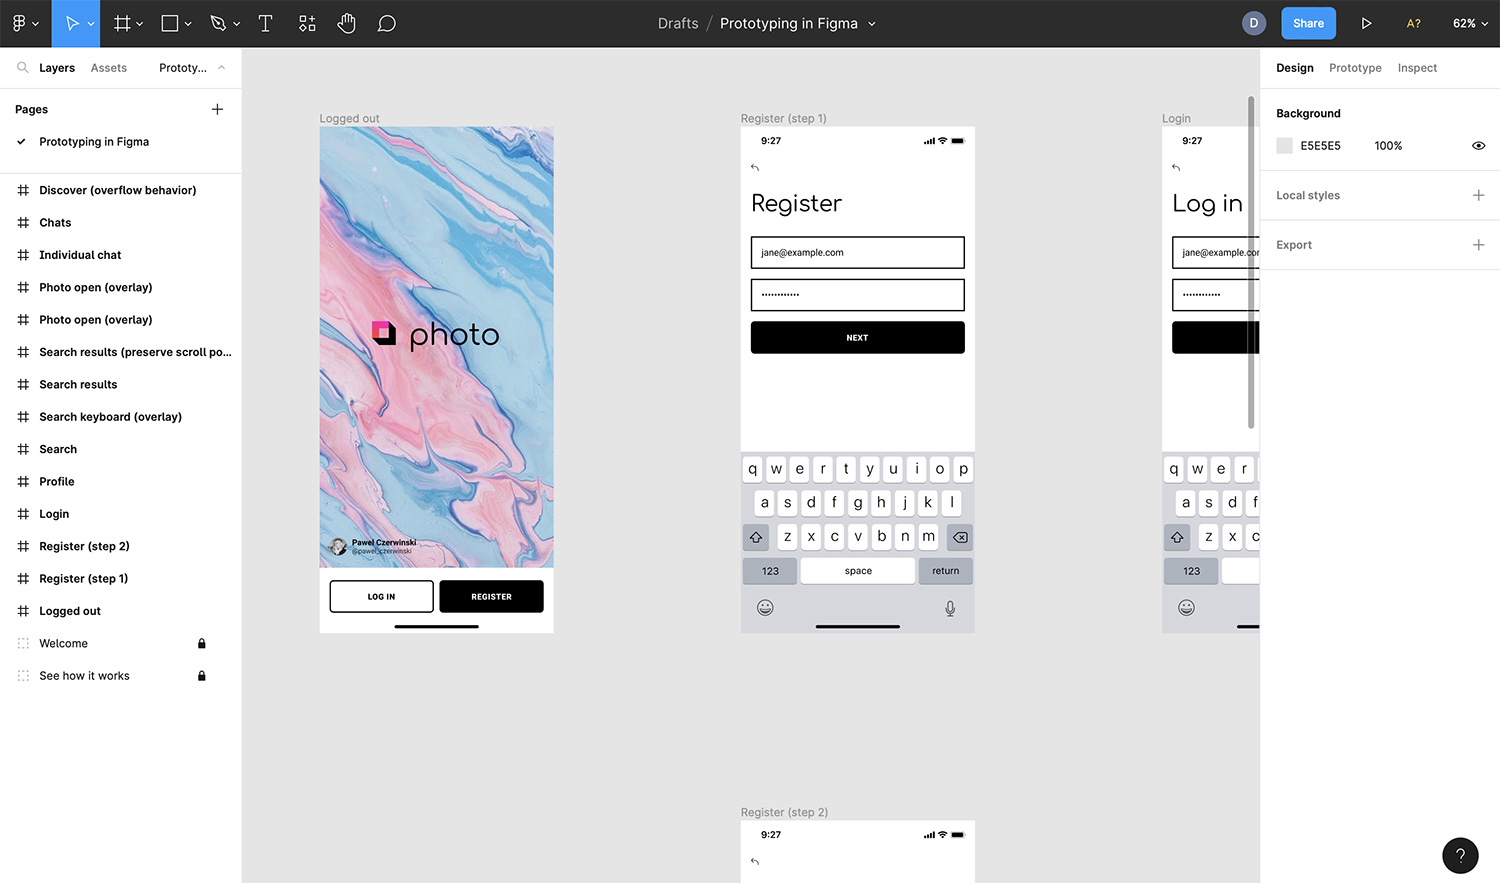
2. Switch to Prototype mode
In the top-right corner of the Figma interface, click the “Prototype” tab to enter Prototype mode. This mode enables you to create connections between screens and add interactivity to your design.
3. Create connections between screens
Select an object or layer on your first screen that should trigger a transition, such as a button or a menu item. In the right-hand panel, click the “+” icon next to the “Interactions” section. Drag the connection handle (circle with a plus sign) to the target screen or frame you want to navigate to when the object is clicked or tapped.
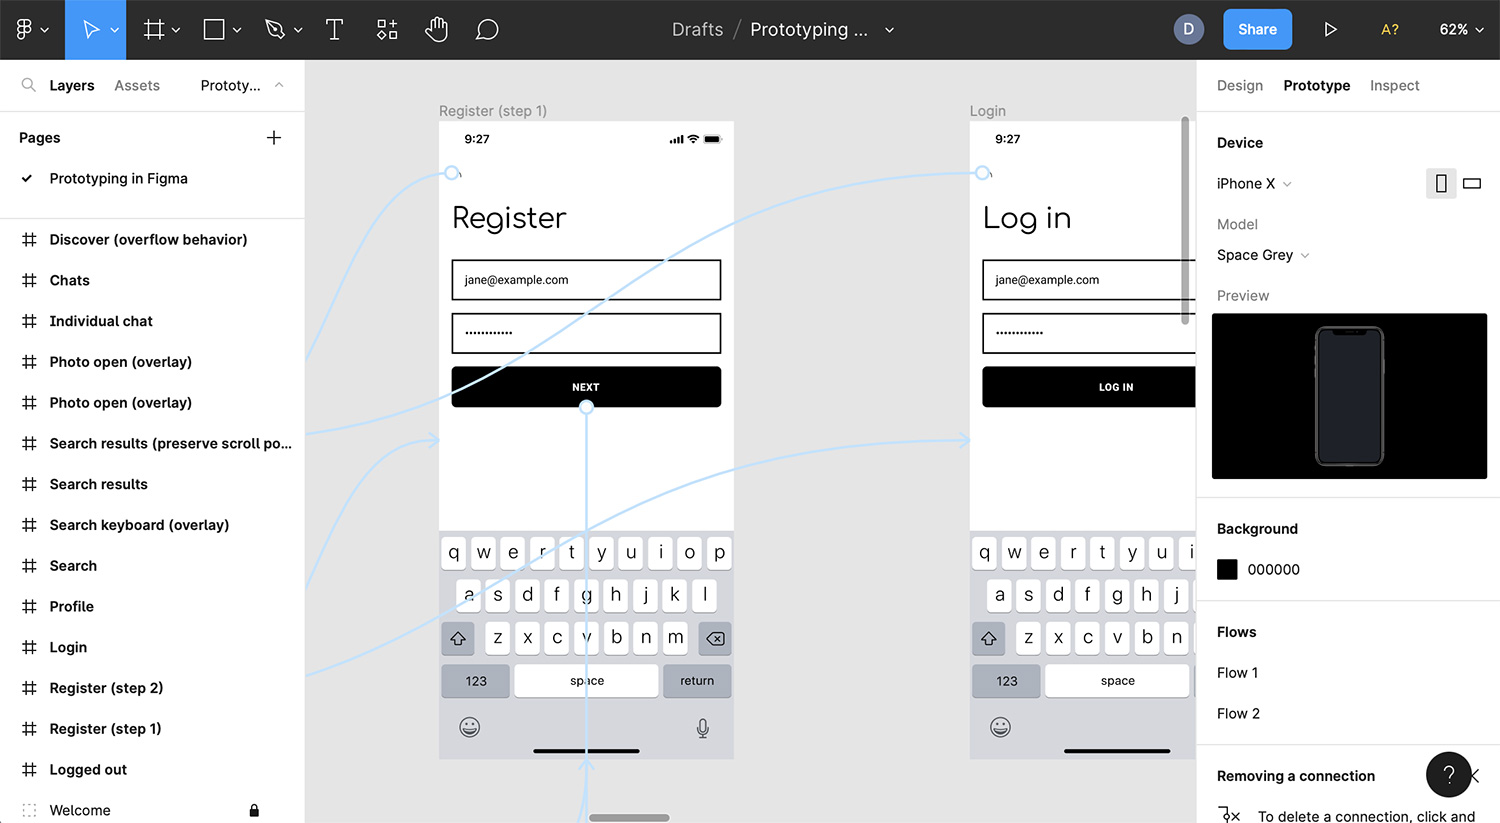
4. Configure the interaction
After connecting the screens, configure the interaction details in the right-hand panel. Choose an interaction type (e.g., “On Click” or “On Hover”), set the desired animation or transition (e.g., “Instant,” “Dissolve,” or “Smart Animate”), and adjust any additional options, such as duration and easing.
5. Repeat the process for all screens
Continue creating connections and configuring interactions for all the screens in your prototype. Ensure that you’ve covered all the necessary user flows and interactions.
6. Preview your prototype
To preview your prototype, click the “Present” button in the top-right corner of the Figma interface or press Ctrl + P (Cmd + P on macOS). This will open a new browser window with your interactive prototype. Test the functionality, navigation, and transitions to ensure everything works as expected.
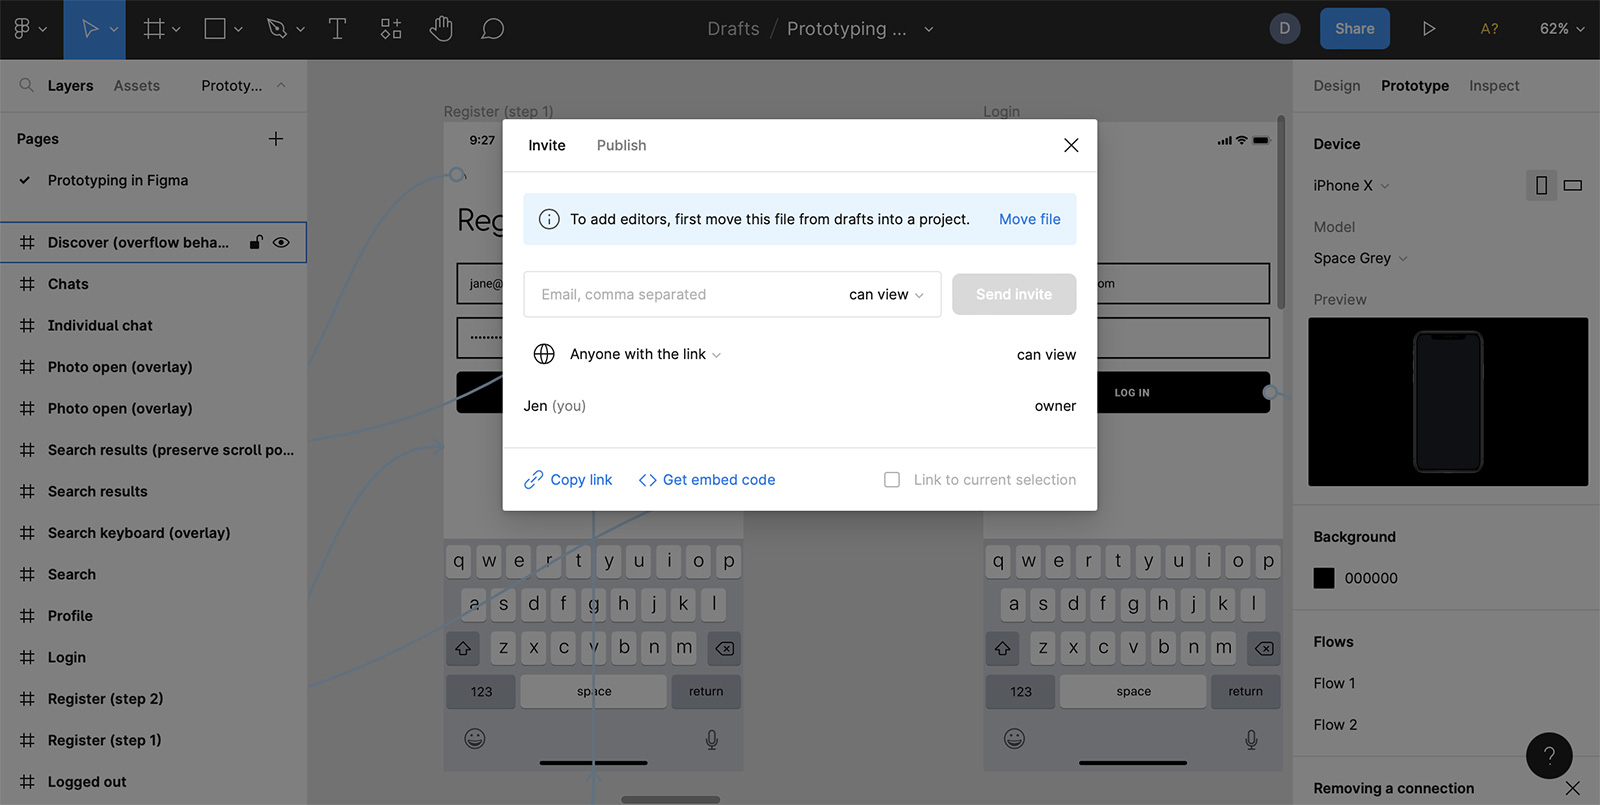
7. Share your prototype
To share your prototype with clients, teammates, or stakeholders, click the “Share” button in the top-right corner of the Figma interface. Adjust the sharing settings as needed and copy the link to your prototype. Users with the link can view and interact with the prototype, as well as leave comments and feedback directly in Figma.
Tips for Prototyping in Figma
To make the most of Figma’s prototyping features, keep these tips in mind:
- Use components and instances: Utilize components and instances to maintain consistency across your prototype and simplify updates.
- Organize your layers and frames: Keep your Figma file organized with well-named layers, frames, and pages. This makes it easier to navigate your prototype and find the elements you need.
- Take advantage of overlays: Use overlays to display modals, pop-ups, or menus without duplicating content across multiple screens.
- Experiment with animations: Leverage Figma’s Smart Animate and other animation features to create engaging and dynamic prototypes.
- Collaborate and gather feedback: Make the most of Figma’s collaborative features by sharing your prototype and gathering feedback from clients and teammates early and often.
By following these steps and tips, you can create interactive, engaging, and effective prototypes in Figma. Prototyping is a critical part of the design process, and Figma’s powerful and user-friendly features make it an ideal choice for designers looking to bring their ideas to life.
Source link