Acquiring a solid foundation in electronics and programming starts with understanding the basics, tinkering, and expanding one’s knowledge base through practical experiences. The Elegoo UNO Project Super Starter Kit with UNO R3 provides every budding electronics and programming enthusiast with the opportunity to explore the world of electronics.
To ease the learning and teaching process for both students and educators, the Elegoo UNO Project Super Starter Kit provides the tools and tutorials required to build with the kit. To understand the excellent resources it brings to the table, a detailed review of the kit’s features and projects will be provided to help you make the decision about purchasing one.
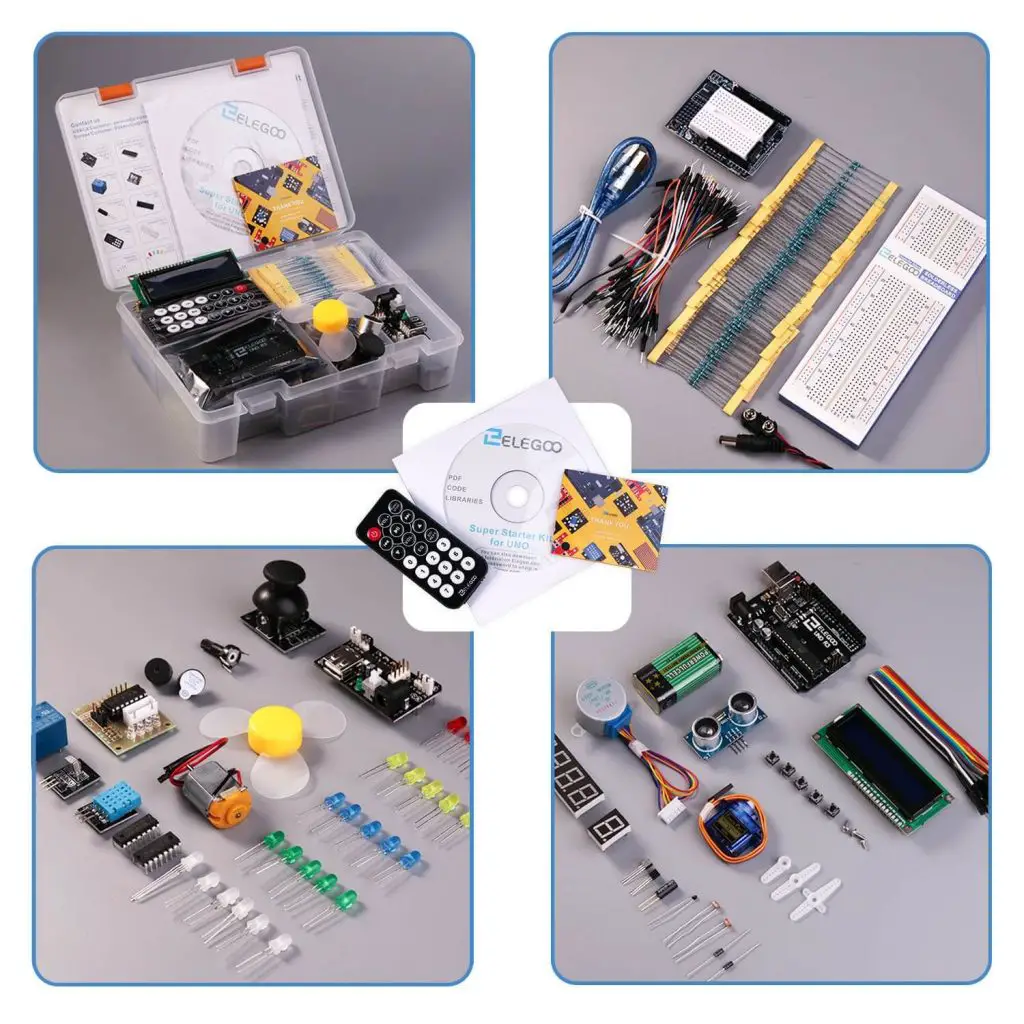
Starting with the electronics components in the kit, it is easy to note that the kit comes with a variety of components that can be leveraged to accomplish diverse projects. The kit contains:
- A UNO R3 Controller Board
- An LCD 1602 Module (with pin header)
- Breadboard Expansion Board
- Power Supply Module
- Joystick Module
- IR Receiver
- Servo Motor
- Stepper Motor
- ULN2003 Stepper Motor Driver Board
- Ultrasonic Sensor
- DHT11 Temperature and Humidity Module
- A 9Volts Battery
- 65 Jumper Wire
- USB Cable 1pcs
- Active Buzzer 1pcs
- Passive Buzzer 1pcs
- Potentiometer 1pcs
- 5V Relay 1pcs
- Breadboard 1pcs
- Remote 1pcs
- Tilt Switch 5pcs
- Button (small) 1pcs
- 1 digit 7-segment Display 1pcs
- 4 digit 7-segment Display 5pcs
- Yellow LED 5pcs
- Blue LED 5pcs
- Green LED 5pcs
- Red LED 1pcs
- RGB LED 2pcs
- Photo resistor 1pcs
- Thermistor 2pcs
- Diode Rectifier (1N4007) 2pcs
- NPN Transistor (PN2222) 1pcs
- IC 74HC595 120pcs
- Resistor 10pcs
- Female-to-male DuPont Wire.
- Instruction Manual
Getting Started with the Elegoo UNO Project Super Starter Kit
Experienced electronics and programming enthusiasts will immediately understand the possibilities attached to this kit and every component in it…but it is a starter kit. This means it is geared towards first-time users than experts thus a brief explanation of the most important components in the kit is required.
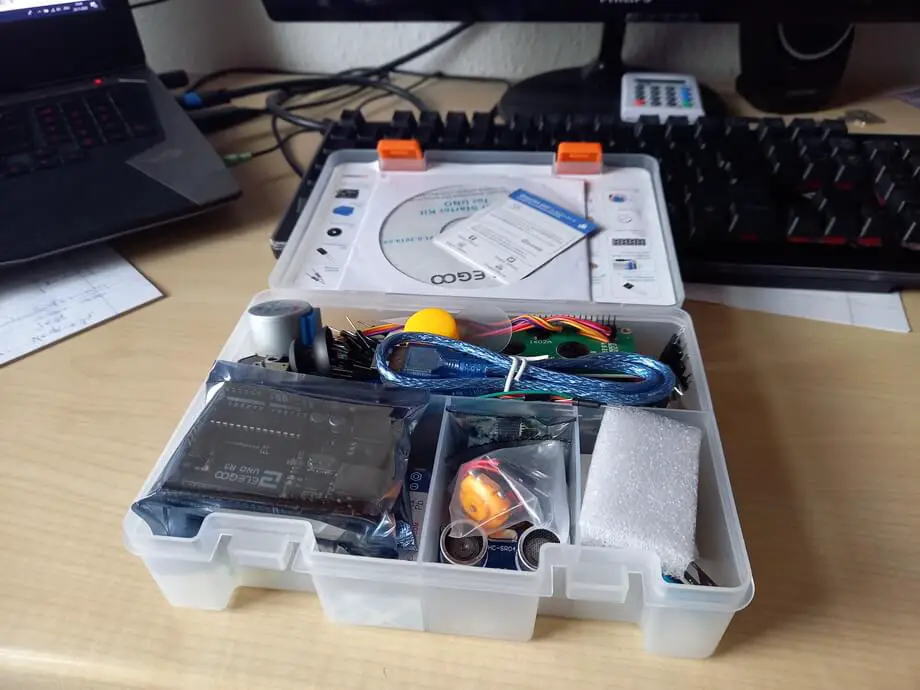
Thankfully, the super starter kit comes with an instructional manual or guide in the form of a CD. The guide includes sample codes for specific projects attached to a specific component, an extensive library and details about each component you will be working with. Thus, it is expected that you rely heavily on the instructions in your starter pack CD to get a better understanding of what the kit is capable of and the very important role of the Arduino Integrated Development Environment (IDE) in executing projects.
Now, no Arduino project can be started without an IDE. The integrated development environment is the platform for writing your codes which directs the Arduino board and the breadboard expansion on what action to take. The IDE is installed on a computer and provides you with the interface and tools for coding. You can download the Arduino IDE for this particular kit from the Elegoo website here.
Once downloaded, you’re finally ready to immerse yourself into the DIY electronics world the starter kit provides. Lastly, plug the Arduino board to your computer so it can begin receiving instructions. Plugging the Arduino board to your computers is as easy as simply connecting the accompanying USB board to both the Arduino board and your computer.
Lessons You Should Take Advantage of with the Super Starter Kit
The good people at Elegoo provide every user with 24 lessons right out of the kit. These lessons can be found in the instructions CD highlighted above and it is the best way to get familiar with using an Arduino board and provisioning electronics components.
And what do the lessons cover?
The 24 lessons you get in the tutorial focuses on the important basics such as the process of loading specific program or code libraries and assigning them to folders for specific components and use cases, how to attach external electronic components such as the LED lights and LCD display screen to the Arduino board. The basics then lead into some practical lessons such as programming a timer or clock onto the LCD module and setting up the temperature and humidity module to read the temperature of your environment.
The lessons in the tutorials Elegoo provide right out of the kit prepares you for undertaking more complex projects which the components in the kit support. The fourth lesson is where the action starts and you’ll be introduced to the RGB LED project which involves getting the multicolored LED lights in the kit to form a strip with the lights coming on in specified sequences. As expected, the codes and instructions for executing the RGB LED project have been provided in the official Elegoo tutorials.
Sample Tasks to Consider Doing with the Elegoo UNO Project Super Starter Kit
Learning the lessons Elegoo provides is simply the beginning of the journey to becoming proficient in electronics DIY tasks. The Elegoo UNO super starter kit is such a powerful tool which allows you to explore further than the lessons in the official tutorial. Here, 2 sample projects or tasks will be included which you can explore.
The basics of this project involve the use of an ultrasonic sensor to measure distances. The most important components this project requires are the Ultrasonic sensor, the UNO R3, the expansion board, and the LCD display which displays the distance measured and can be found in the kit.
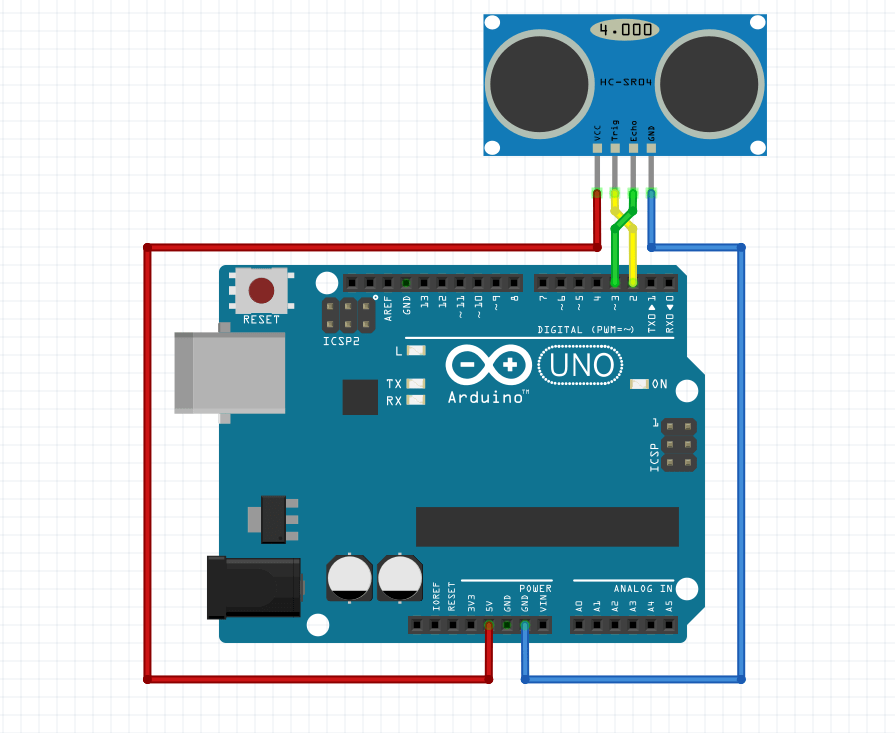
The project involves connecting the expansion board to the UNO using wires and wiring the Ultrasonic sensor and the LCD display to the breadboard. To get the Ultrasonic distance measurement project working, you will also need to input the required code into the Arduino IDE. You can find the details for wiring and the code for this project here.
Joystick Control of a DC Motor
This project takes things up a notch by attempting to control the direction and speed at which a DC motor rotates using a joystick. Note that the Elegoo Super Starter Kit provides the most important components for it which include the joystick, the DC motor, and an Arduino UNO R3.
The project involves wiring the UNO R3 with the breadboard to extend its functionalities and installing the DC motor and joystick to the breadboard. If successfully done, the DC motors speed and direction can be manipulated using a joystick. You can find the details and code for this project here.
Conclusion
Source link
