One of the big selling points of Cloudera Data Platform (CDP) is their mature managed service offering. These are easy to deploy on-premises, in the public cloud or as part of a hybrid solution.
The end-to-end architecture we introduced in the first article of our series makes heavy use of some of these services:
- DataFlow is powered by Apache NiFi and allows us to transport data from a large variety of sources to a large variety of destinations. We make use of DataFlow to ingest data from an API and transport it to our Data Lake hosted on AWS S3.
- Data Engineering builds on Apache Spark and offers powerful features to streamline and operationalize data pipelines. In our architecture, the Data Engineering service is used to run Spark jobs that transform our data and load the results to our analytical data store, the Data Warehouse.
- Data Warehouse is a self-service analytics solution enabling business users to access vast amounts of data. It supports Apache Iceberg, a modern data format used to store ingested and transformed data. Finally, we serve our data via the Data Visualization feature that is built-in the Data Warehouse service.
This article is the third in a series of six:
This article documents the activation of these services in the CDP Public Cloud environment previously deployed in Amazon Web Services (AWS). Following the deployment process, we provide a list of resources that CDP creates on your AWS account and a ballpark cost estimate. Make sure your environment and data lake are fully deployed and available before proceeding.
First, two important remarks:
- This deployment is based on Cloudera’s quickstart recommendations for DataFlow, Data Engineering and Data Warehouse. It aims to provide you with a functional environment as quickly as possible but is not optimized for production use.
- The resources created on your AWS account during this deployment are not free. You are going to incur some cost. Whenever you practice with cloud-based solutions, remember to release your resources when done to avoid unwanted cost.
With all that said, let’s get on the way. CDP Public Cloud services are enabled via the Cloudera console or the CDP CLI, assuming you installed it as described in the first part of the series. Both approaches are covered: We first deploy services via the console and provide the CLI commands in the the Add Services from your Terminal section below.
Add Services via the Console
This approach is recommended if you are new to CDP and/or AWS. It is slower but gives you a better idea of the various steps involved in the deployment process. If you did not install and configure the CDP CLI and the AWS CLI, this is your only option.
Enabling DataFlow
The first service we’re adding to our infrastructure is DataFlow:
-
To begin, access the Cloudera console and select DataFlow:
-
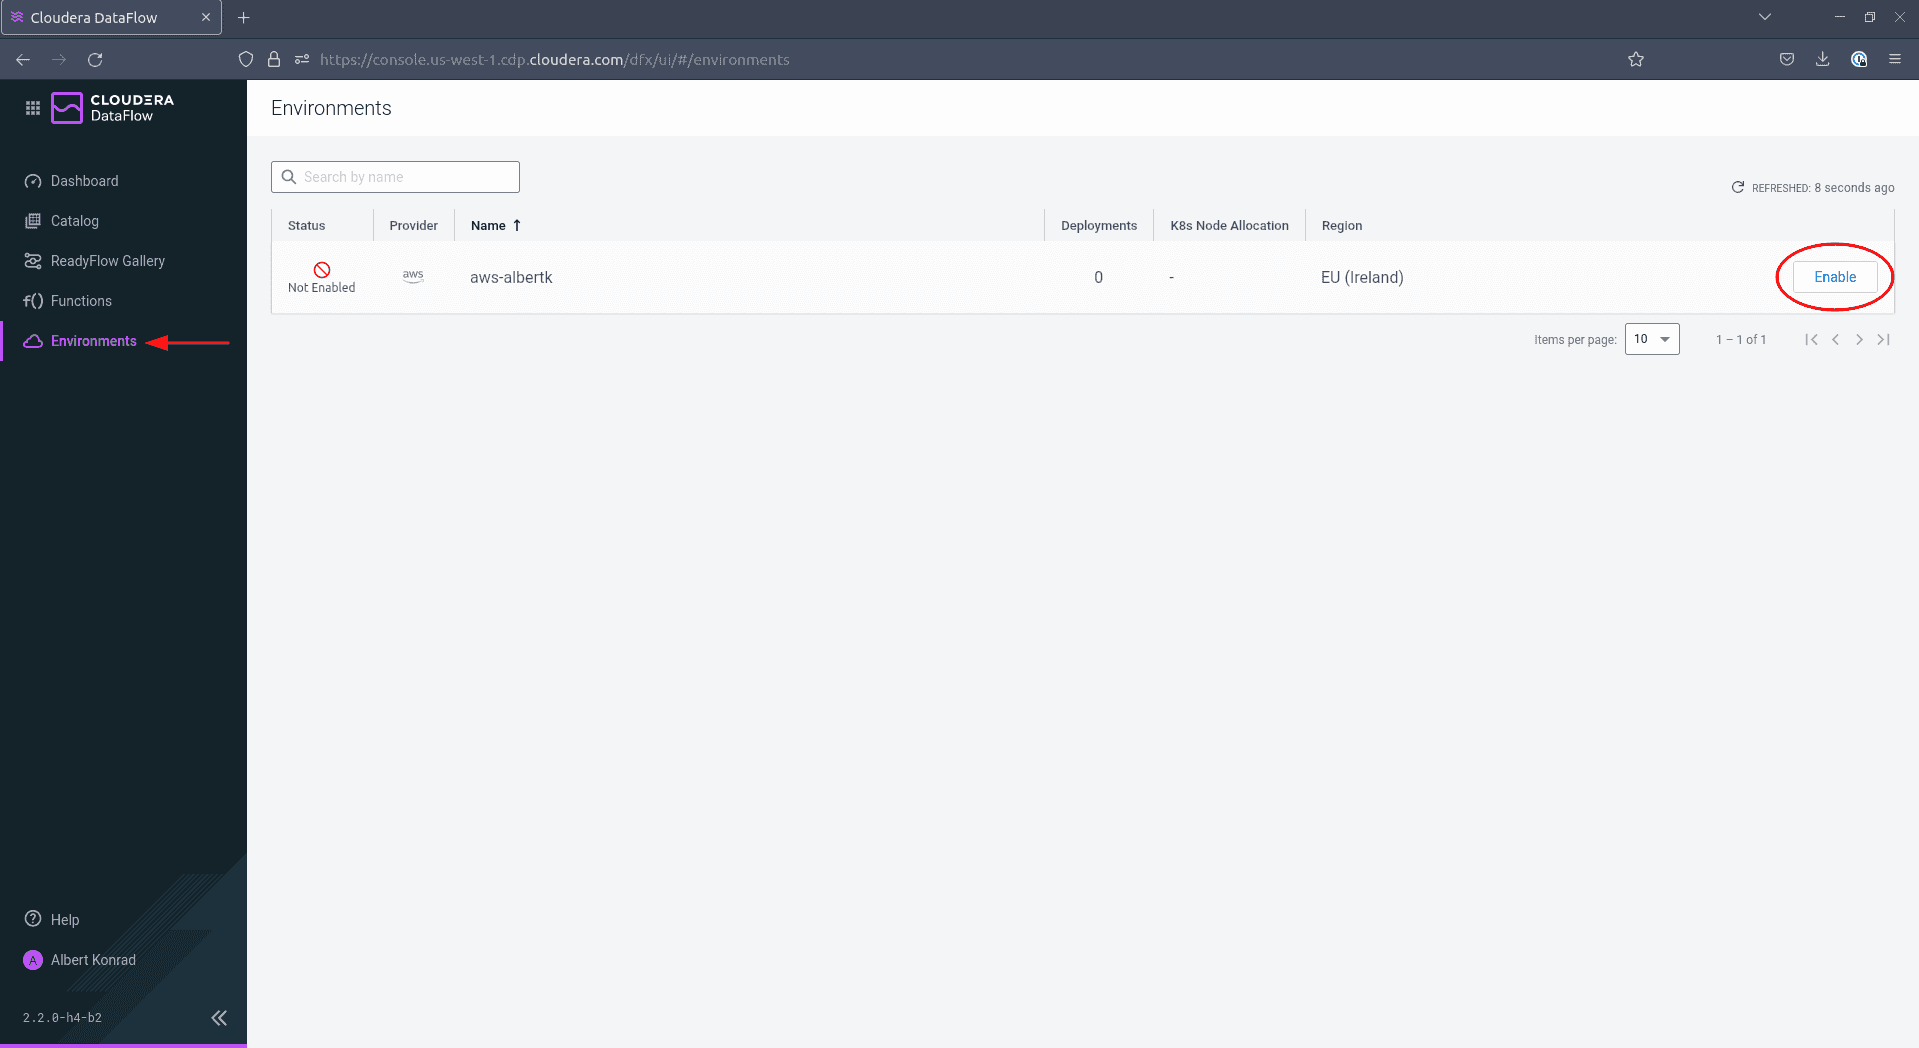
Navigate to Environments and click Enable next to your environment:
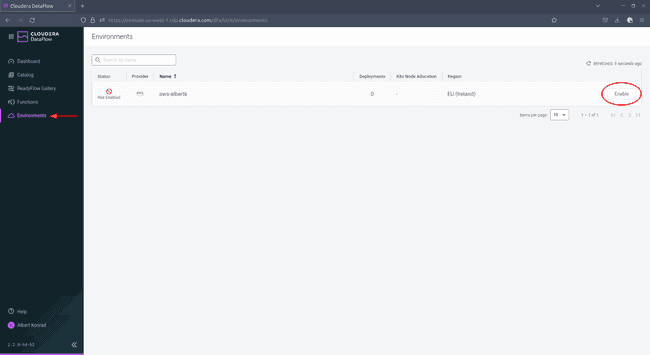
-
In the configuration screen, be sure to tick the box next to
Enable Public Endpoint. This permits you to configure your DataFlow via the provided web interface without further configuration. Leave the remaining settings at their default values. Adding tags is optional but recommended. When done, click Enable.


After 45 to 60 minutes, the DataFlow service is enabled.
Enable Data Engineering
The next service we enable for our environment is Data Engineering:
-
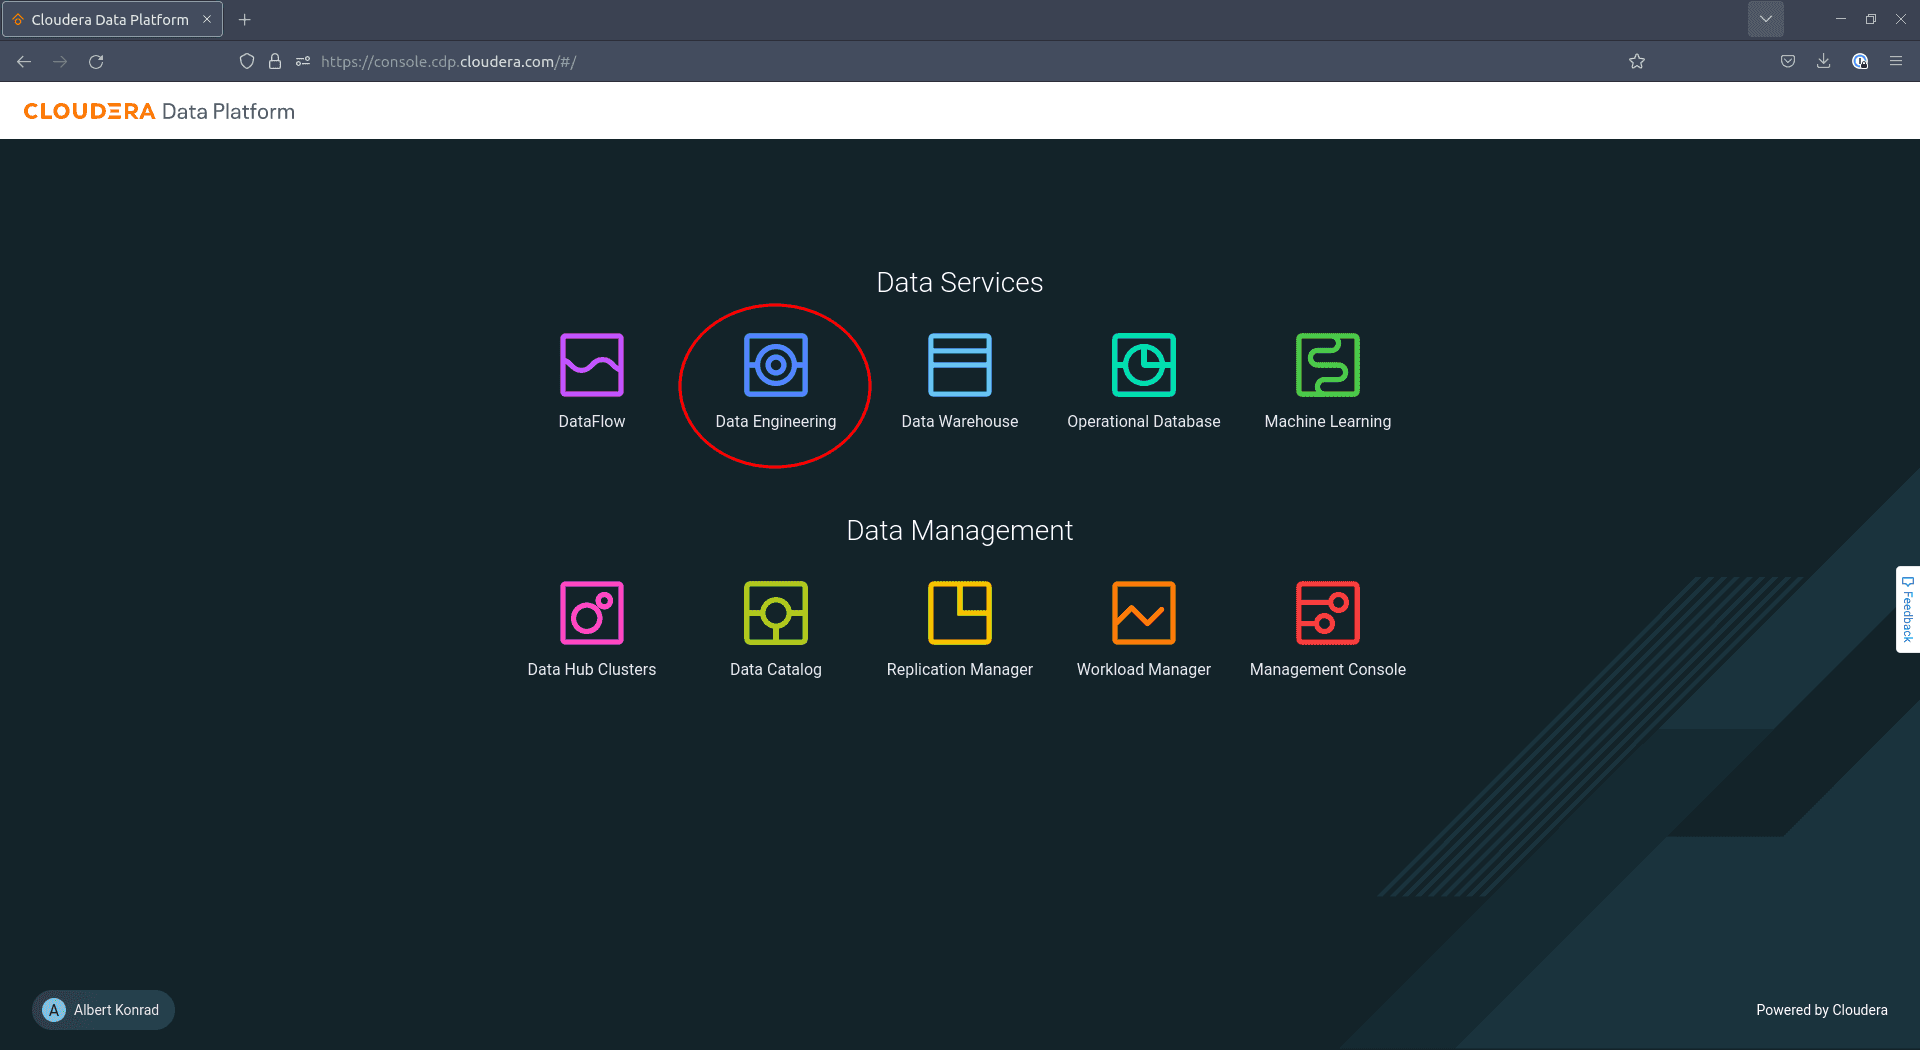
Access the Cloudera console and select Data Engineering:

-
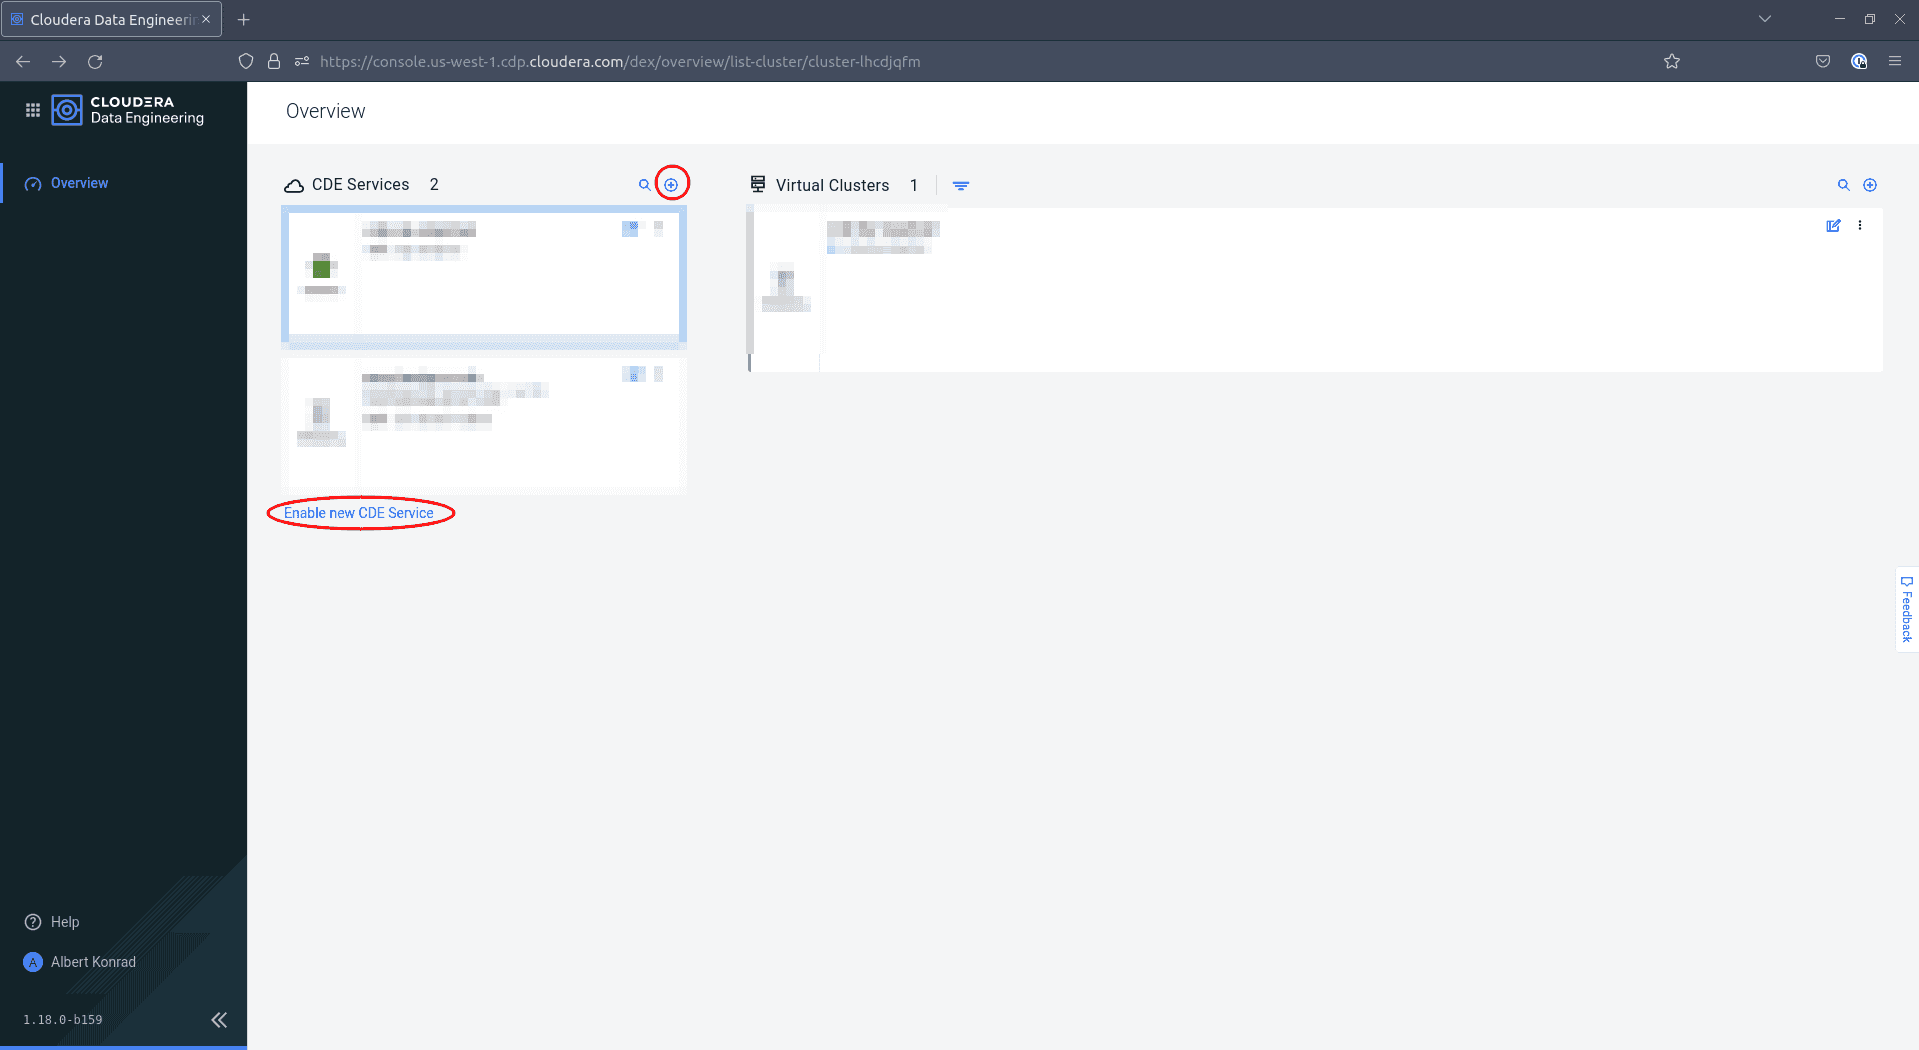
Click either on the small ’+’ icon or on Enable new CDE Service:

-
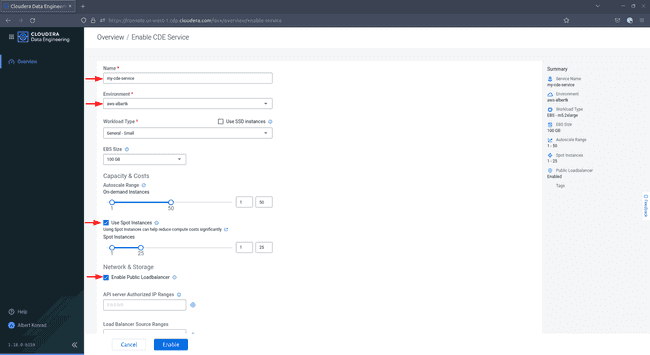
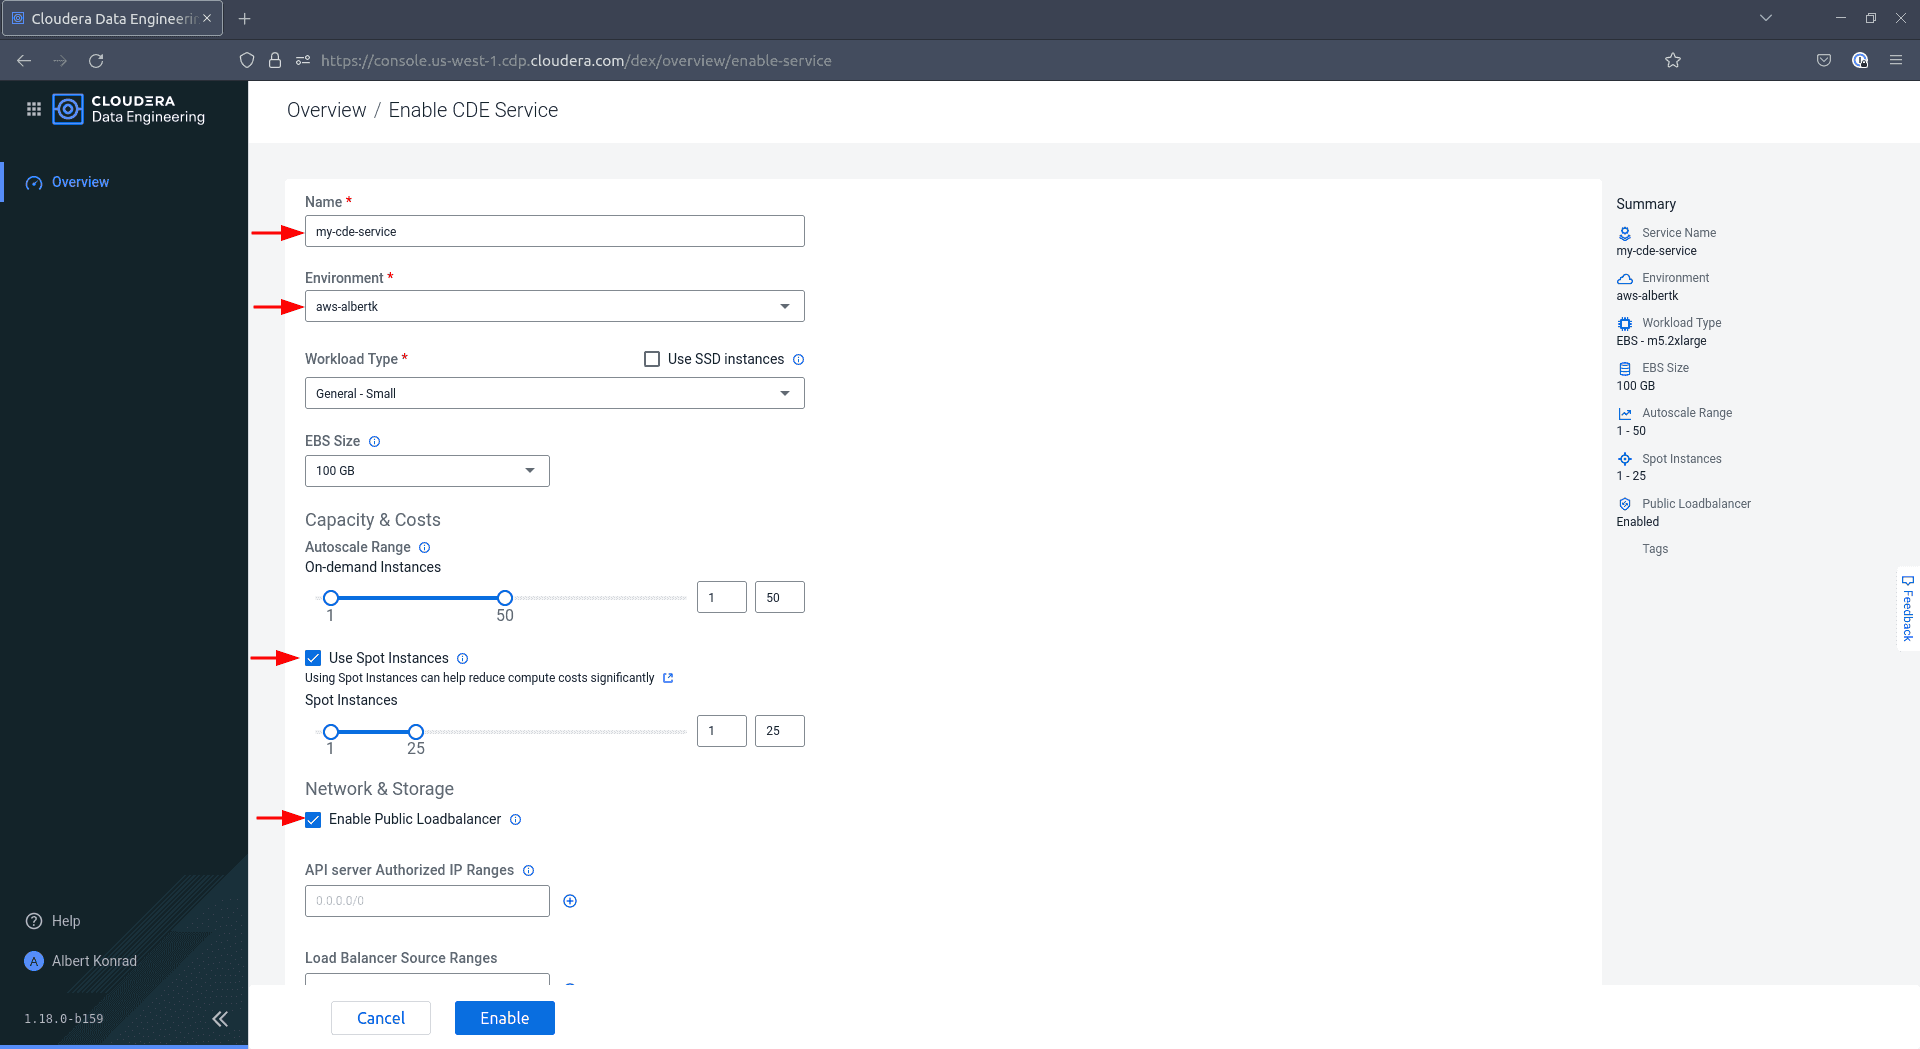
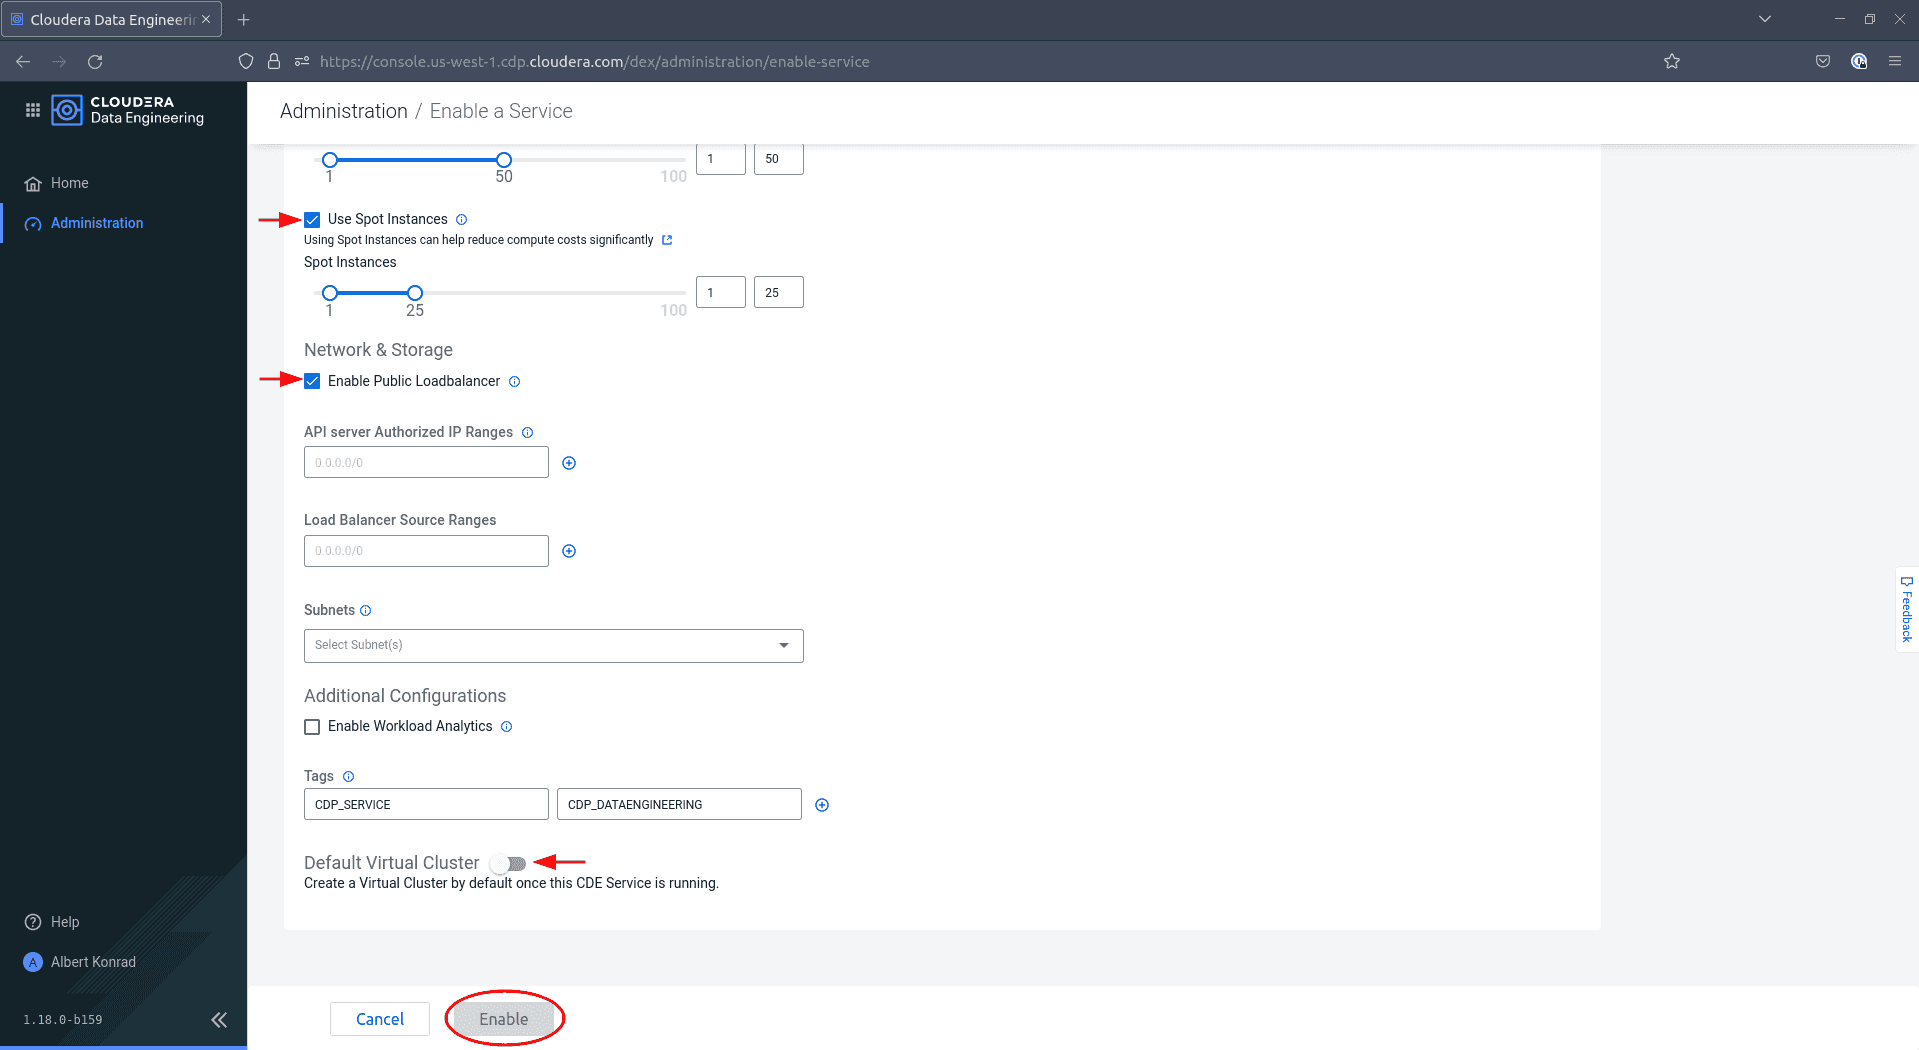
In the Enable CDP Service dialog, enter a name for your service and choose your CDP environment from the drop-down. Select a workload type and a storage size. For the purpose of this demo, the default selection
General - Smalland100 GBare sufficient. TickUse Spot InstancesandEnable Public Load Balancer.
-
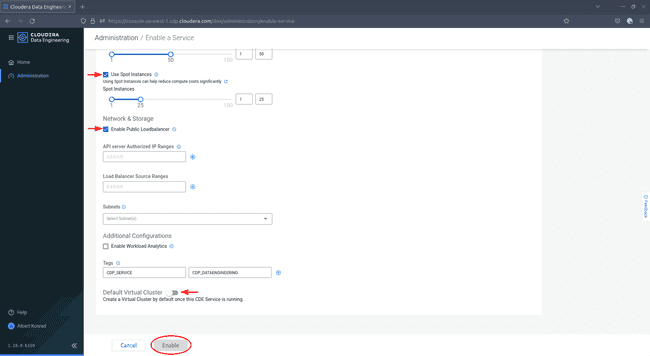
Scroll down, optionally add tags and deactivate the
Default VirtualClusteroption, then click Enable.
After 60 to 90 minutes, the Data Engineering service is enabled. The next step is the creation of a virtual cluster to submit workfloads.
-
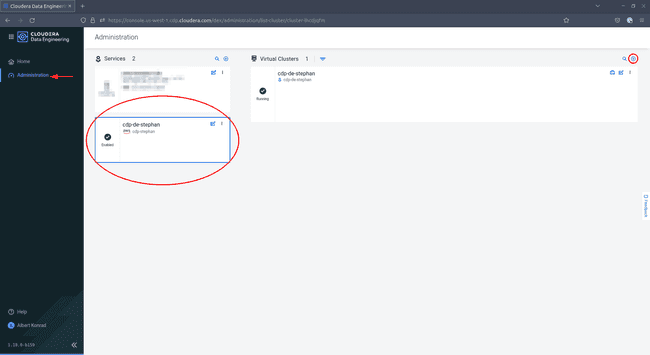
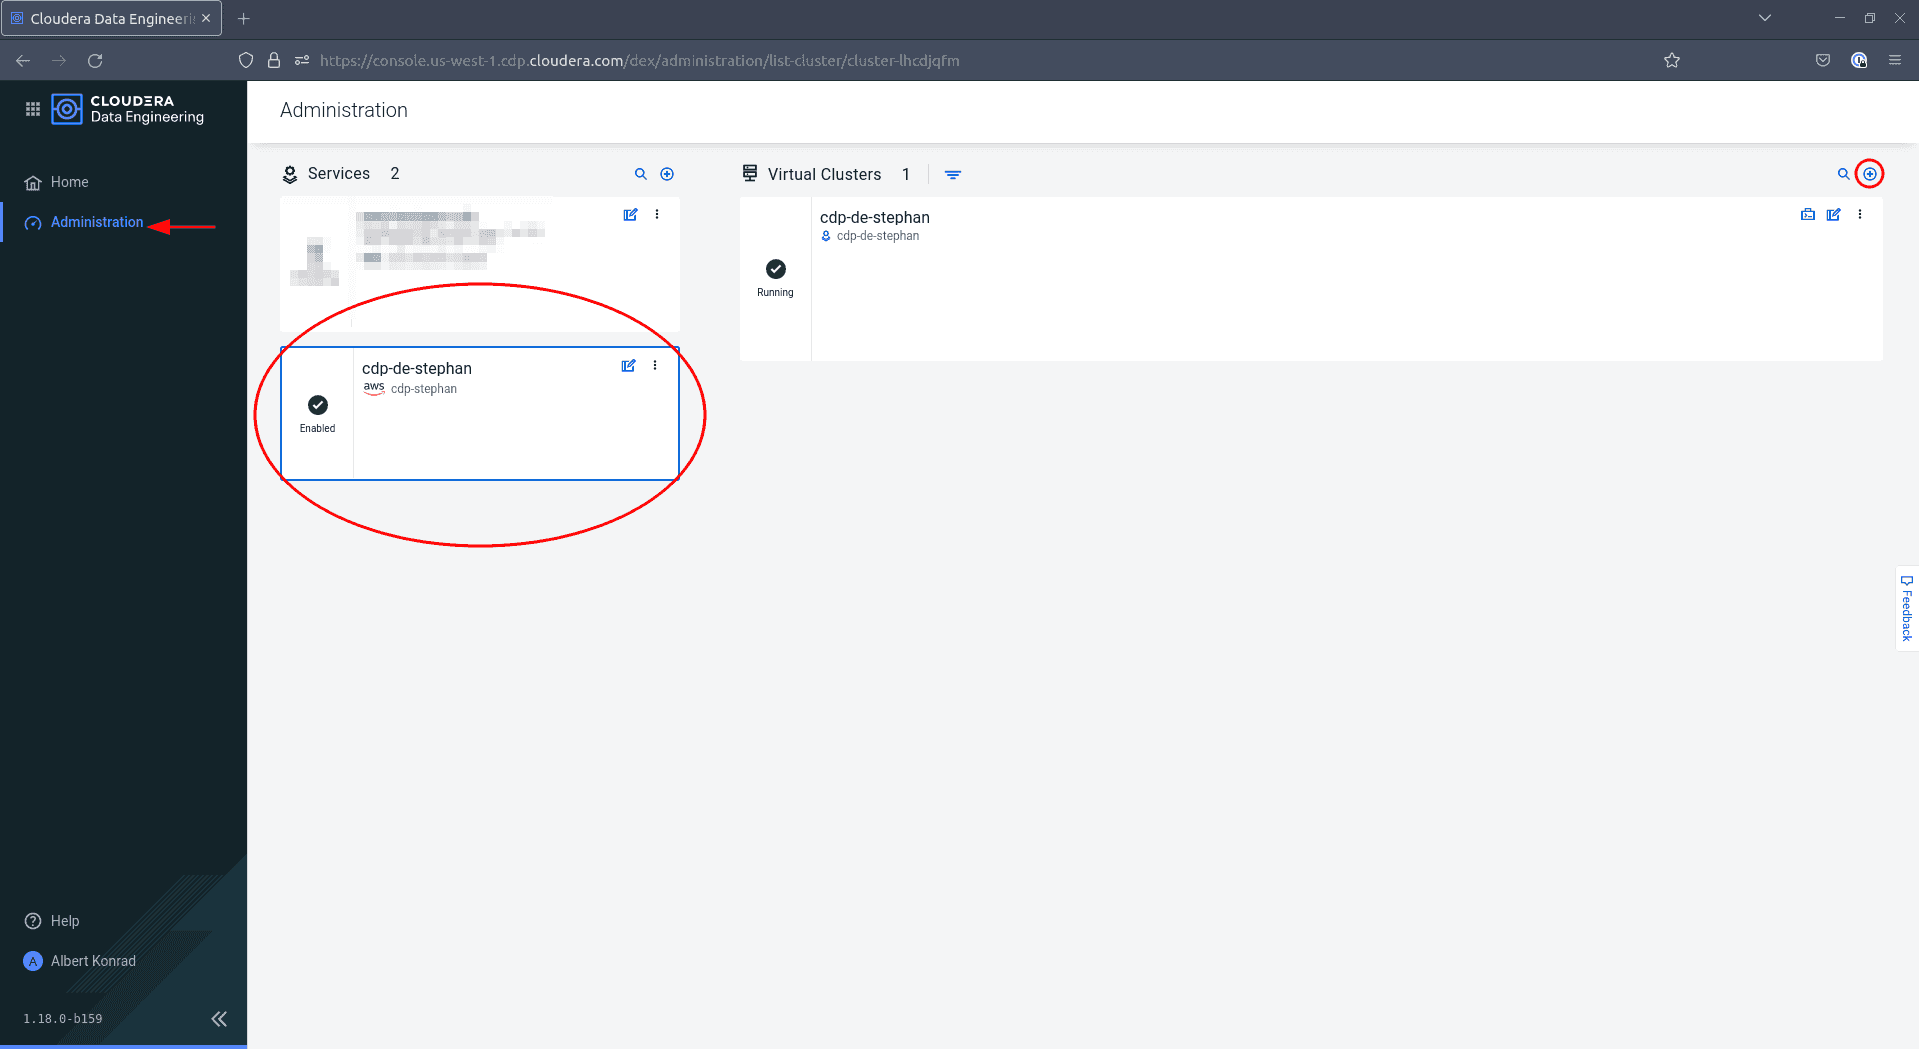
Navigate back to the Data Engineering service. You might notice that the navigation menu on the left has changed. Select Administration, then select your environment and click the ’+’ icon on the top right to add a new virtual cluster:
-
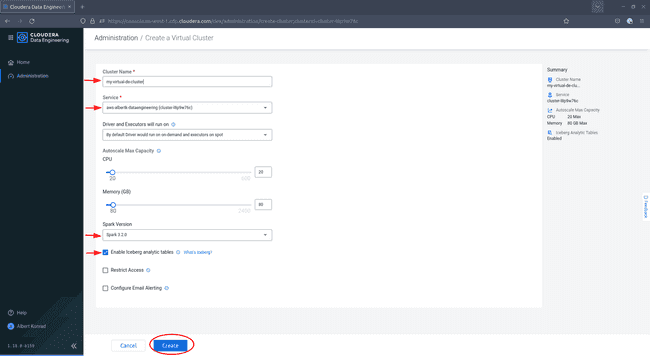
In the Create a Virtual Cluster dialog, provide a name for your cluster and ensure the correct service is selected. Choose Spark version
3.x.xand tick the box next toEnable Iceberg analytics tables, then click Create:
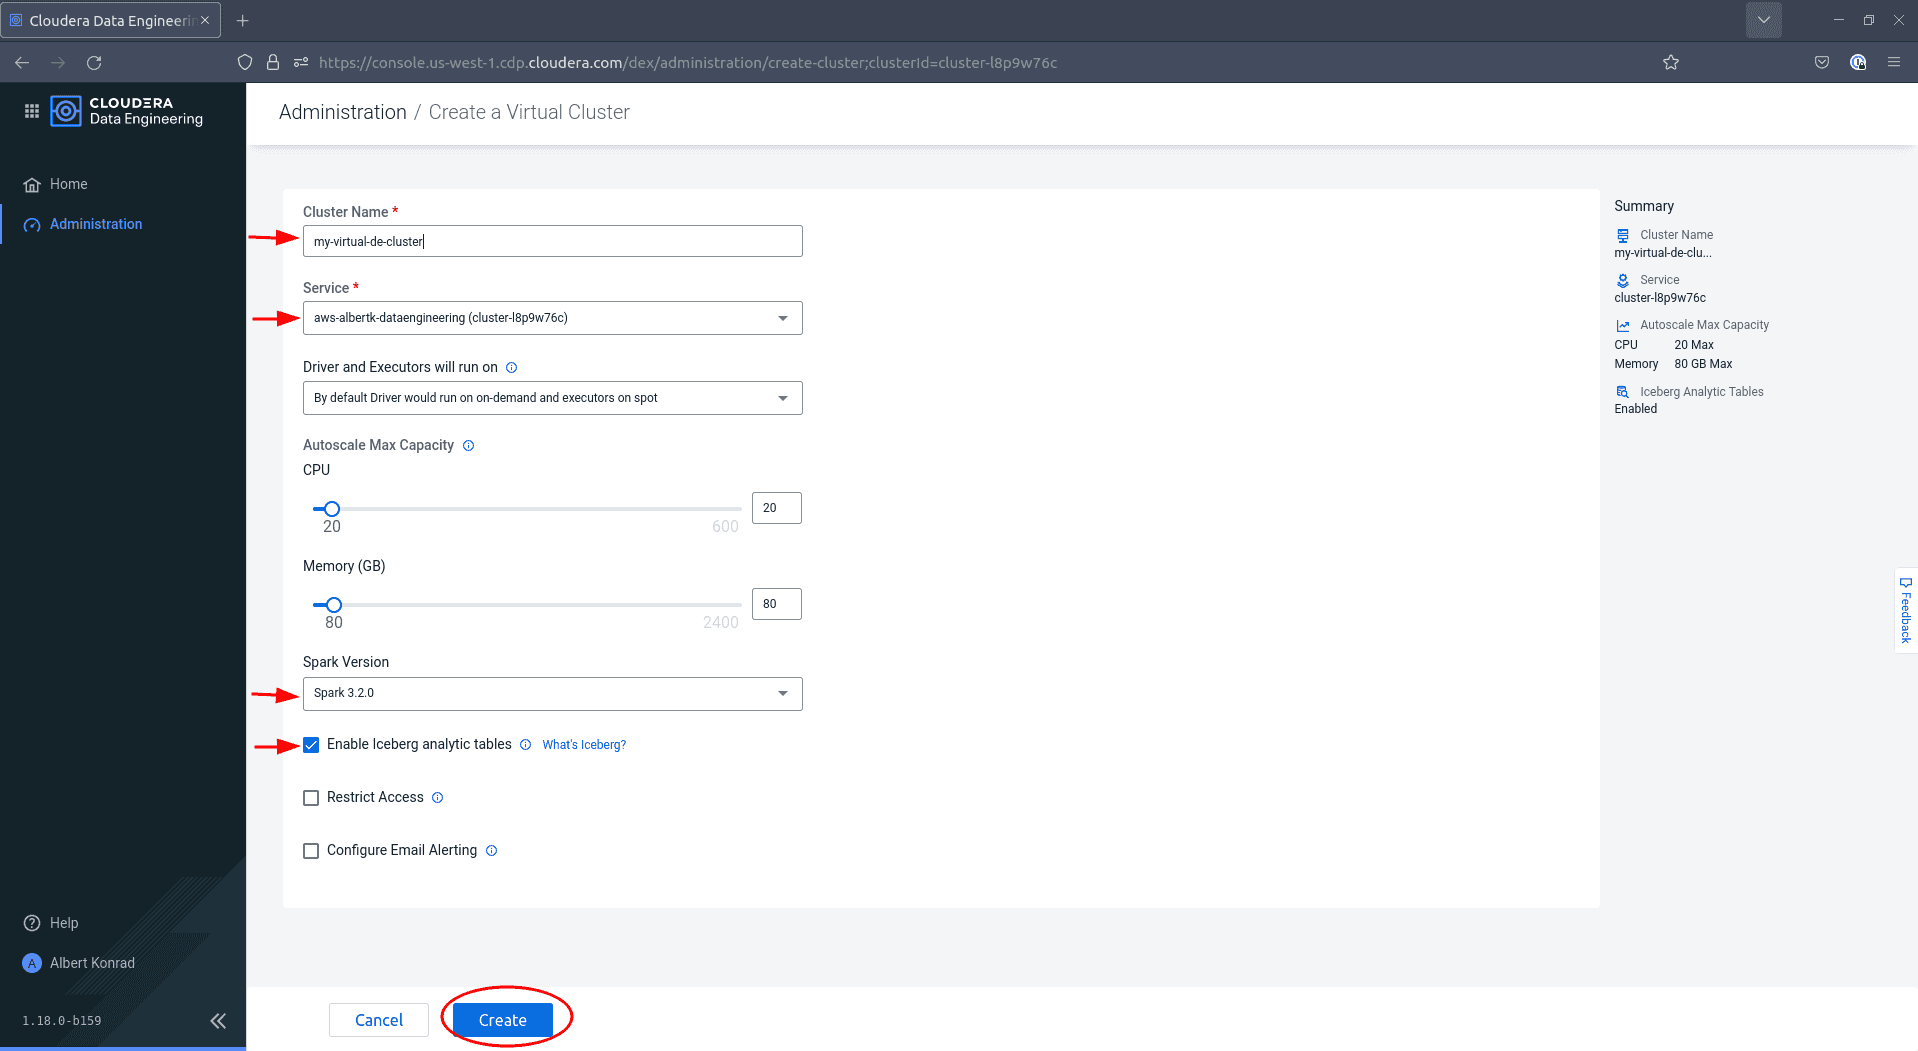
Your Data Engineering service is fully available once your virtual cluster has launched.
Enable Data Warehouse
The final service we enable for our environment is the Data Warehouse, the analytics tool in which we store and serve our processed data.
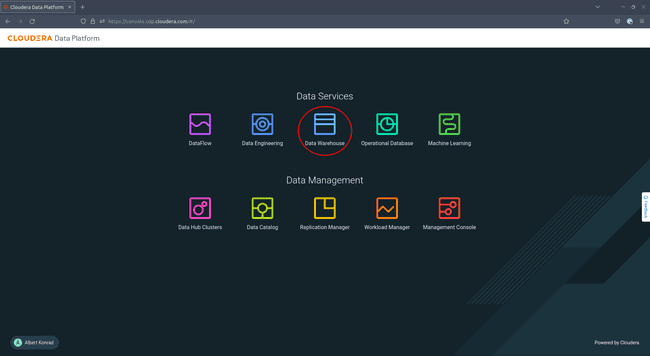
-
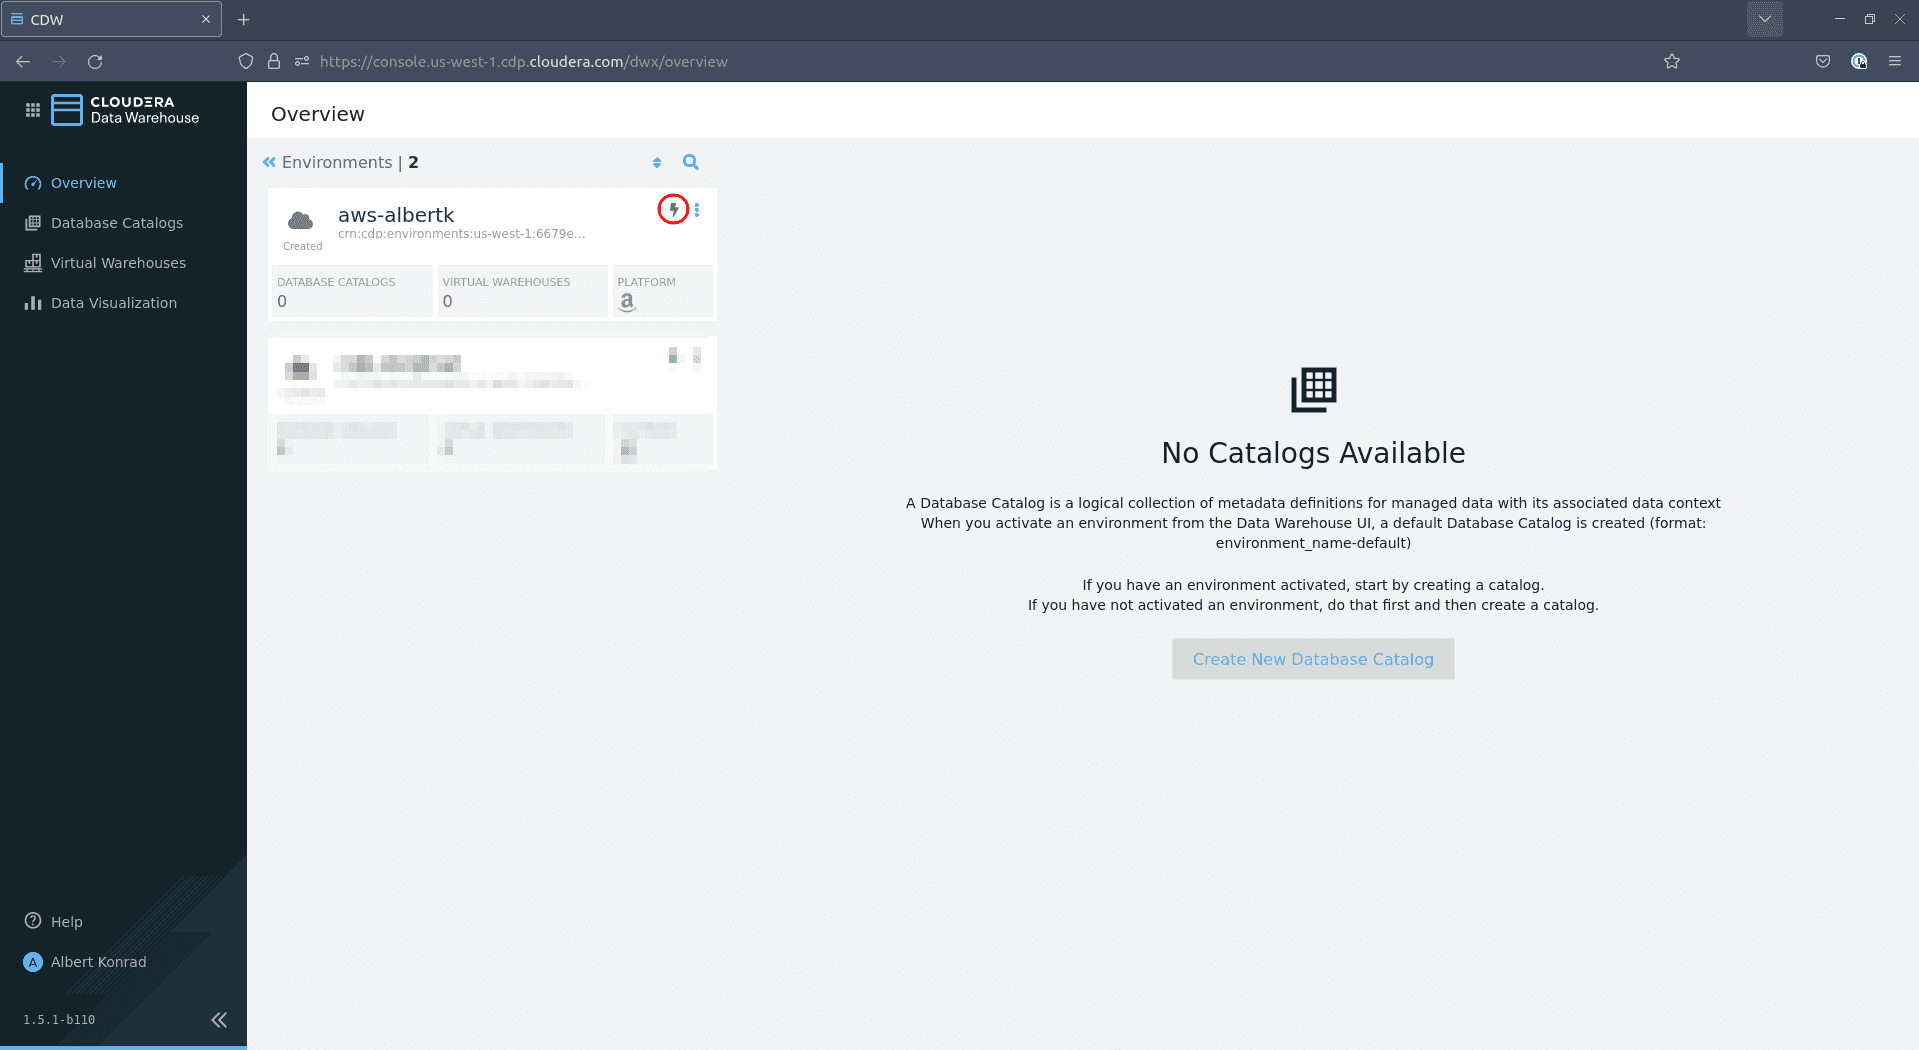
To begin, access your Cloudera console and navigate to Data Warehouse:
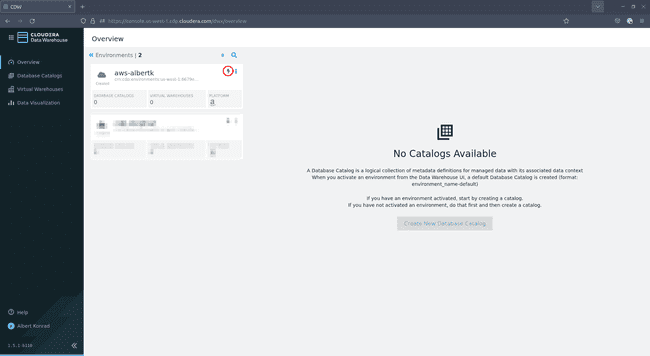
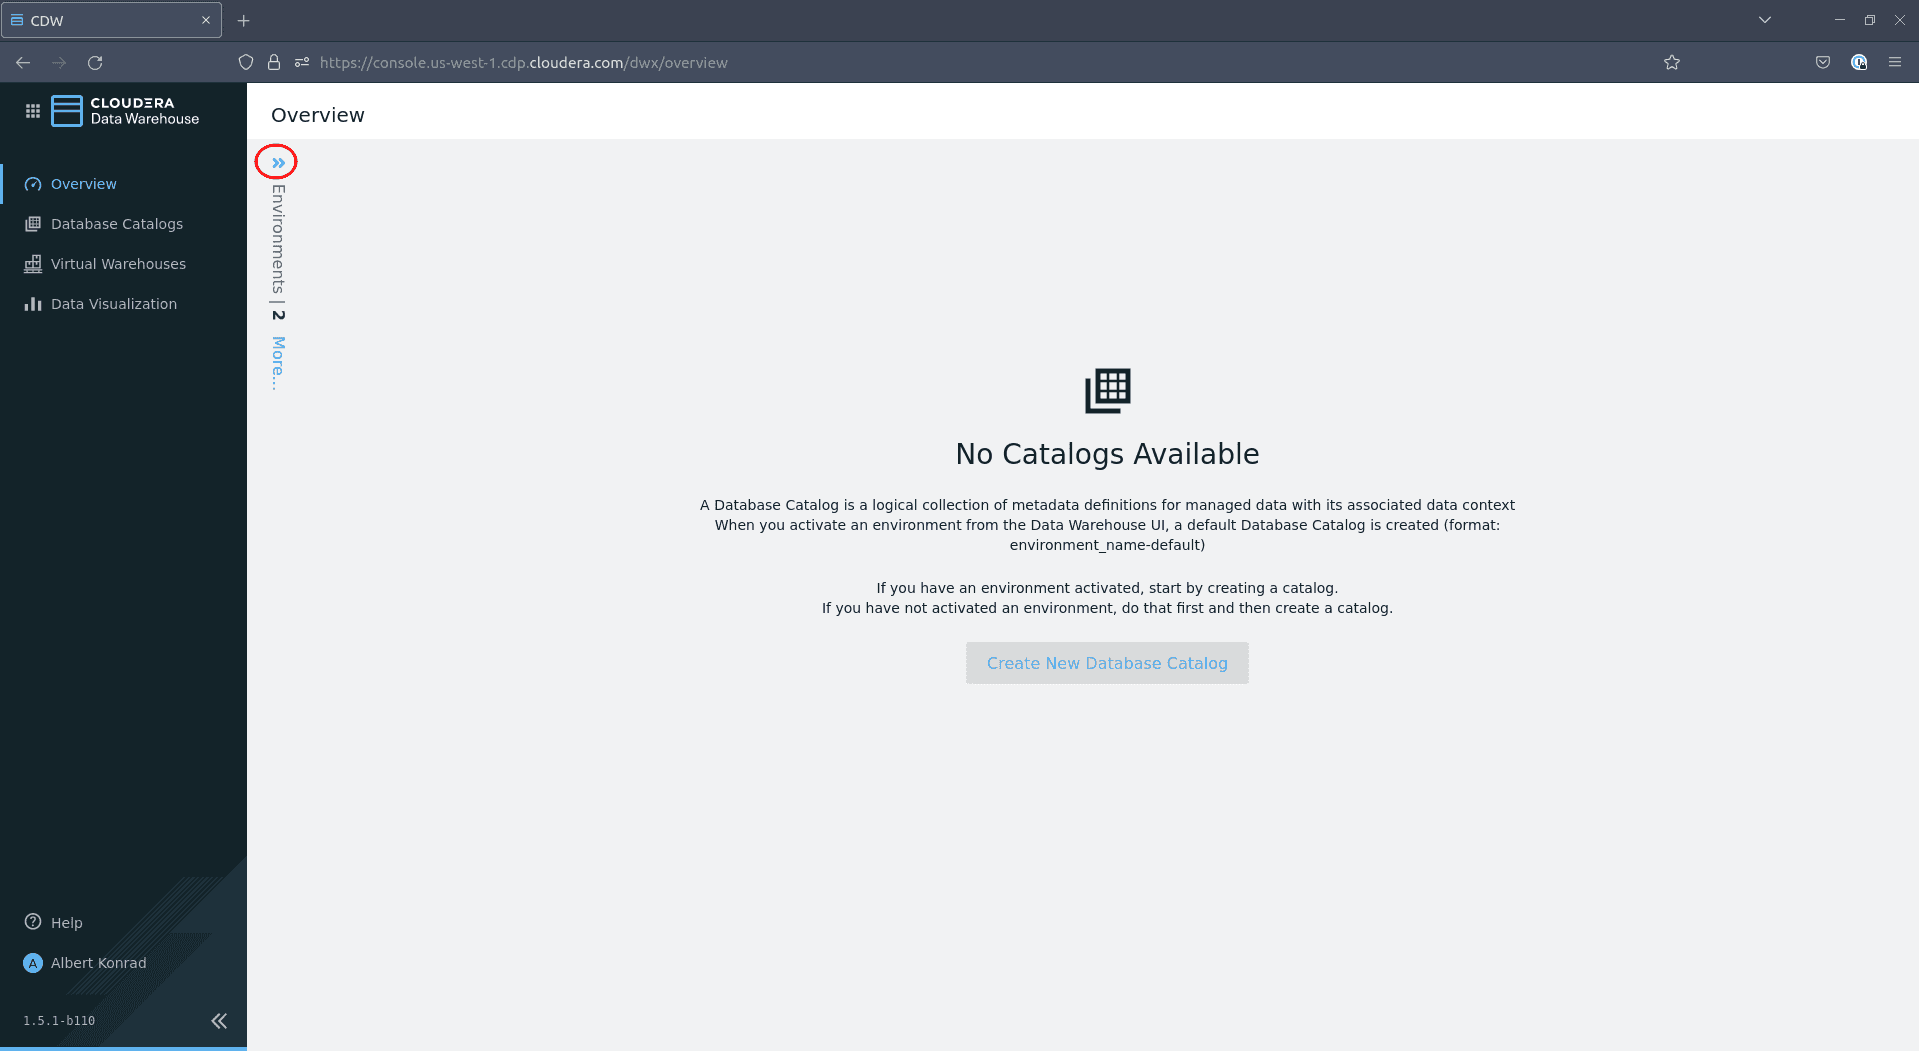
-
In the Data Warehouse overview screen, click on the small blue chevrons on the top left:

-
In the menu that opens, select your environment and click on the little green lightning icon:
-
In the activation dialog, select
Public Load Balancer, Private Executorsand click ACTIVATE:


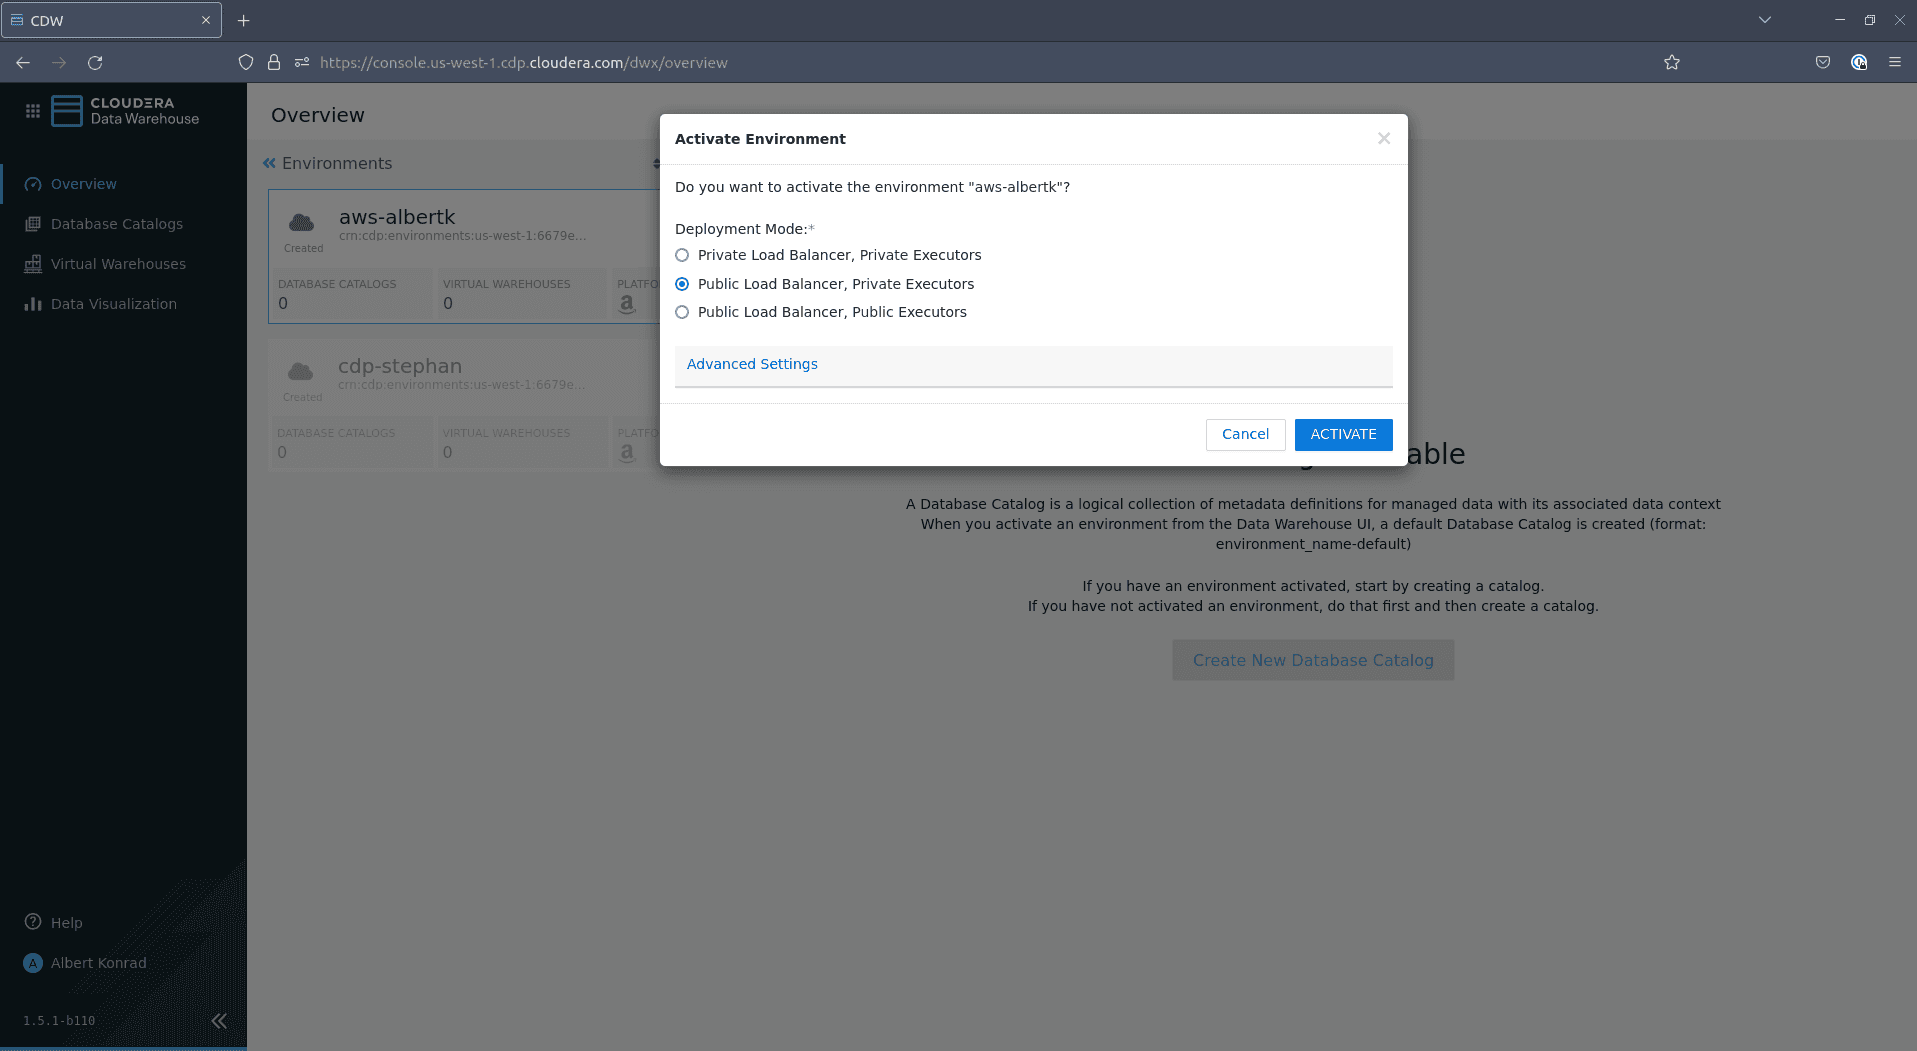
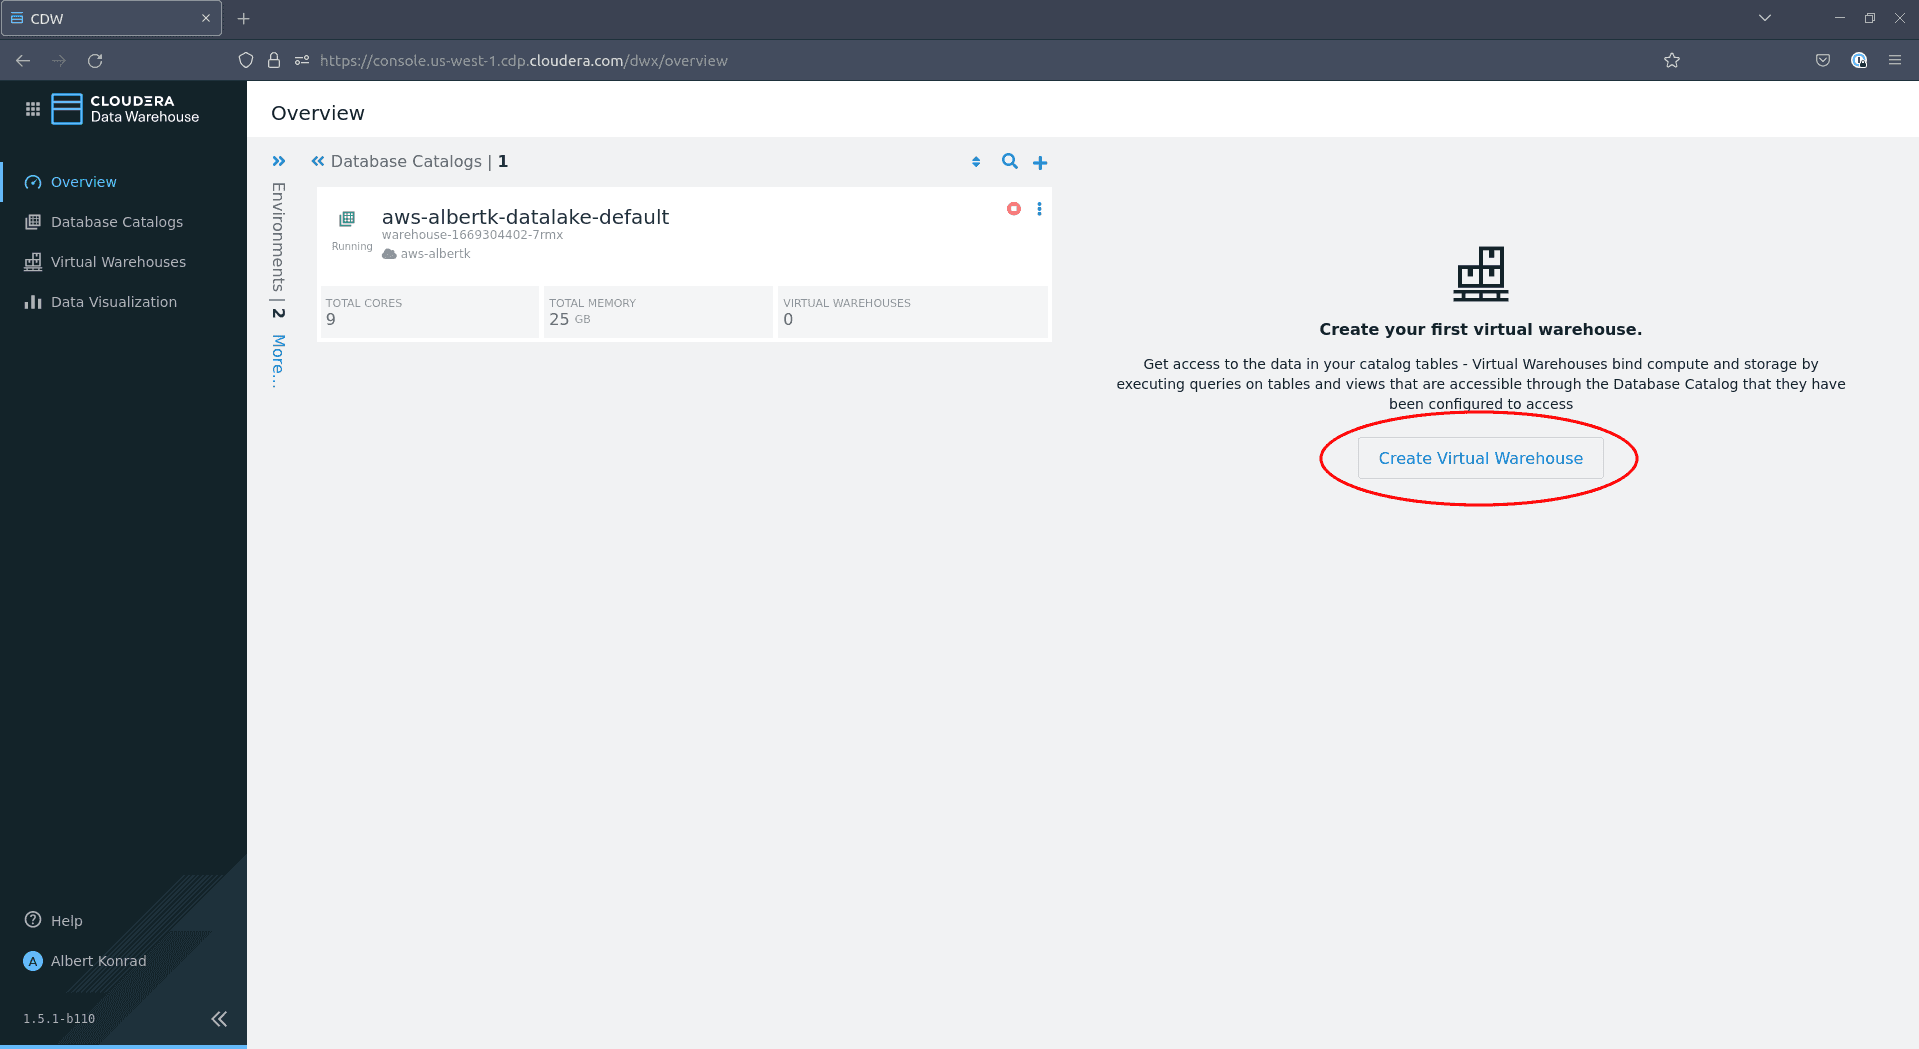
You are now launching your Data Warehouse service. This should take about 20 minutes. Once launched, enable a virtual warehouse to host workloads:
-
Navigate back to the Data Warehouse overview screen and click on Create Virtual Warehouse:

-
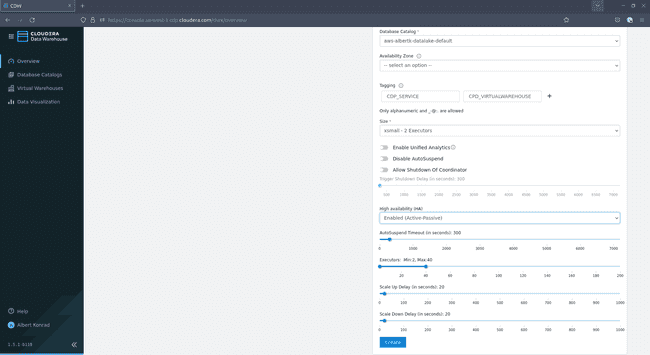
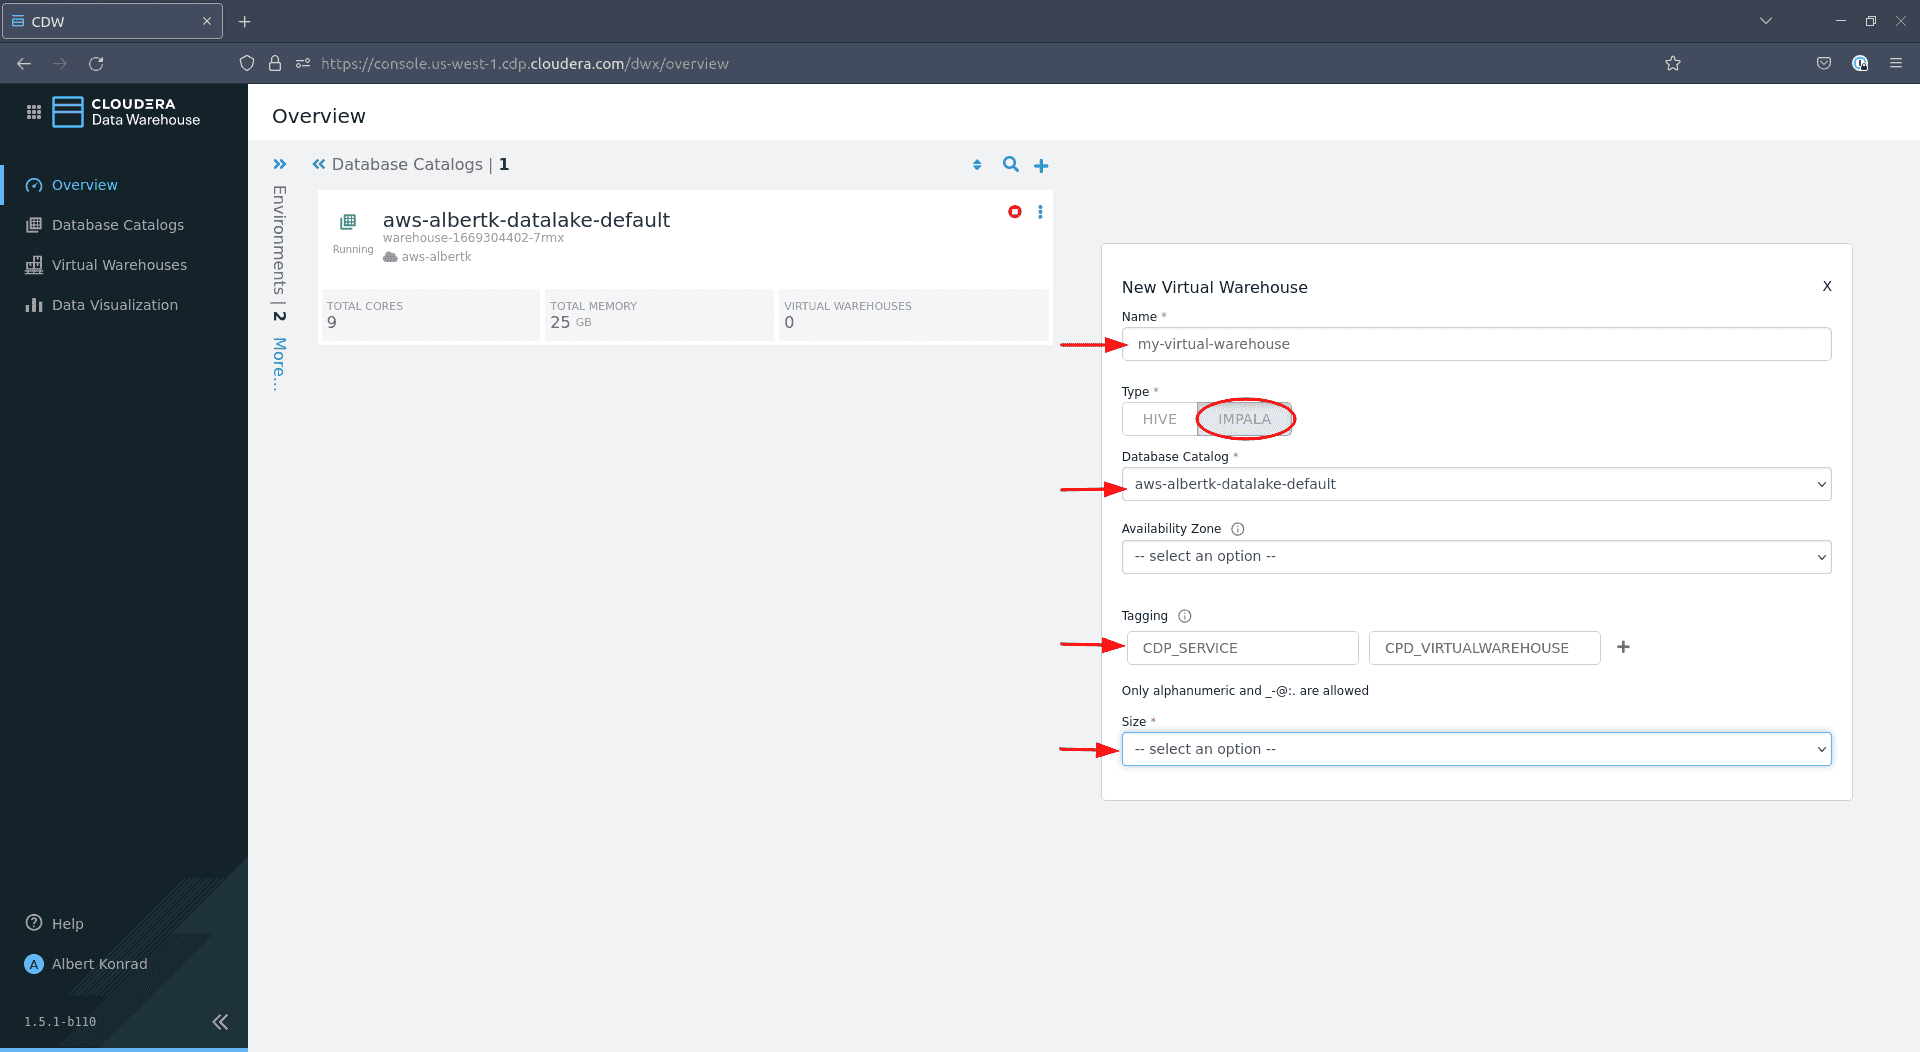
In the dialog that opens, provide a name for your virtual warehouse. Select
Impala, leave Database Catalog at the default choice, optionally add tags and choose a Size:

-
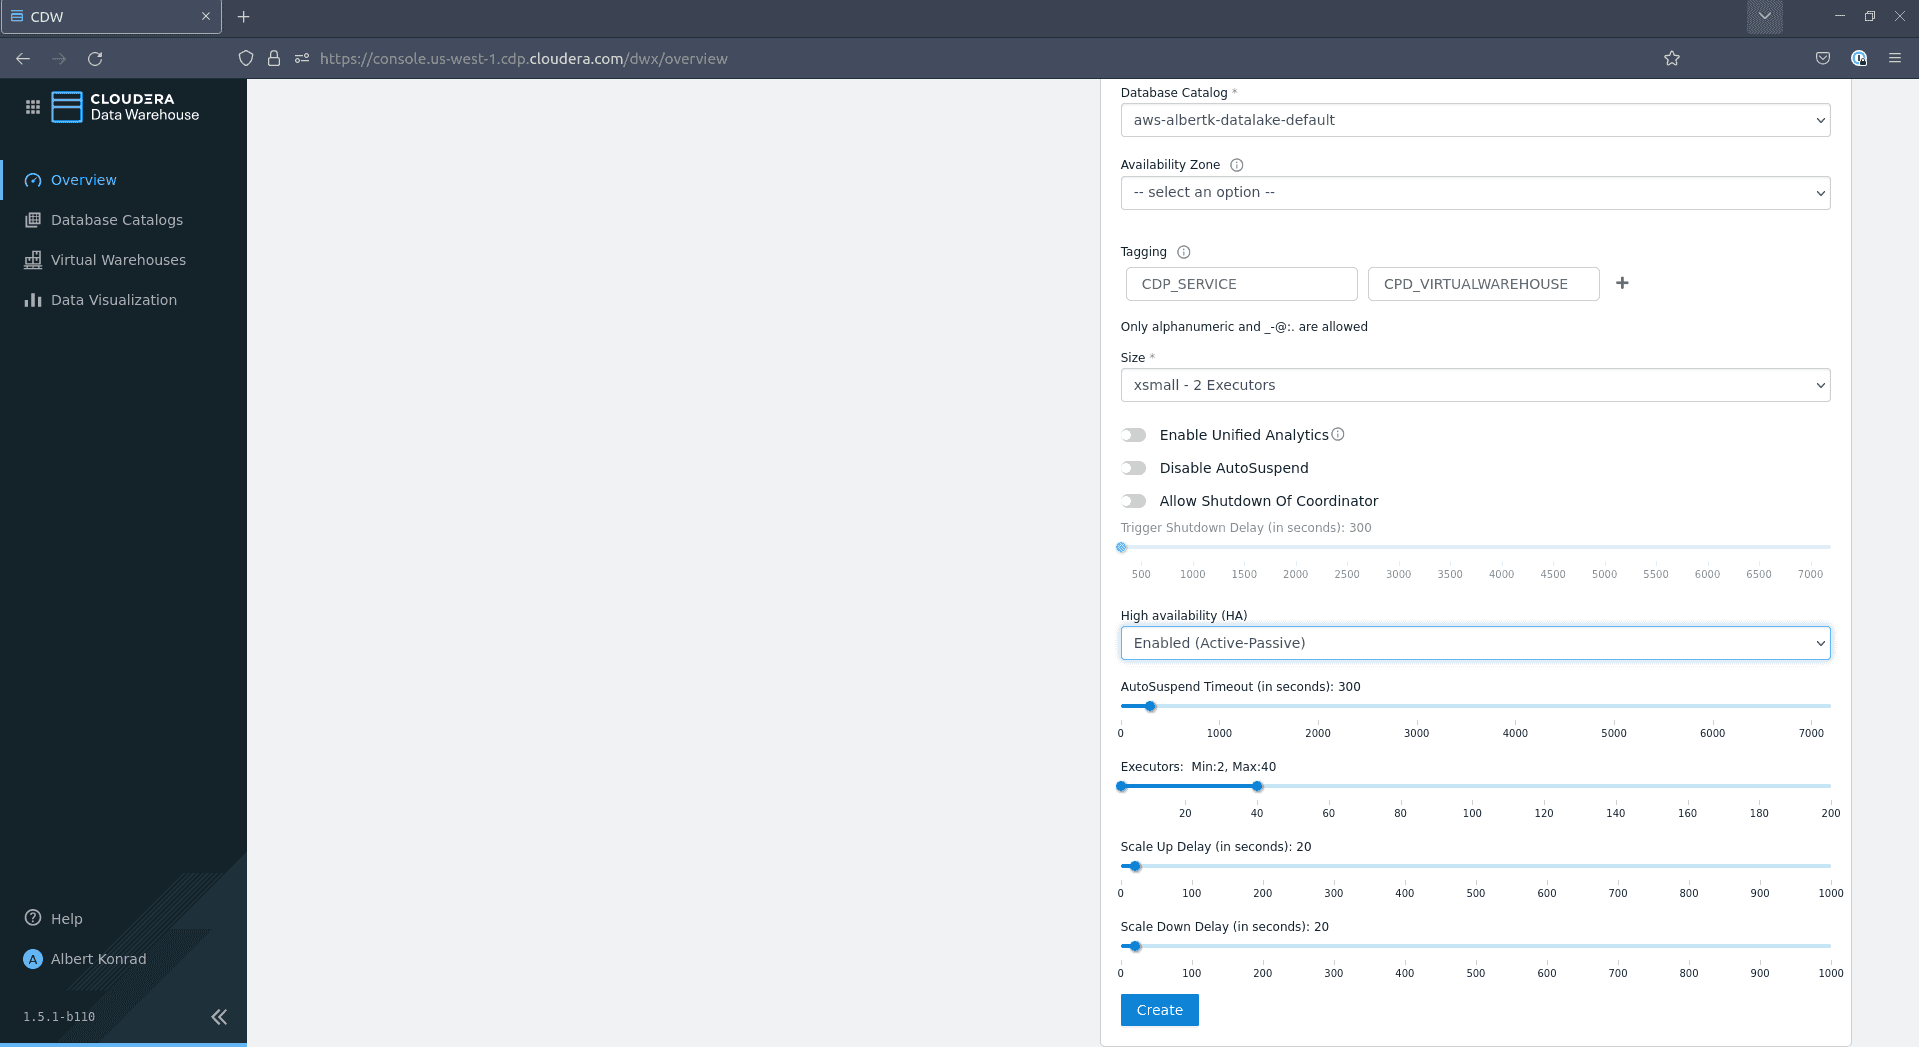
Assuming you want to test the infrastructure yourself,
xsmall - 2 executorsshould be sufficient. The size of your warehouse might require some tweaking if you plan to support multiple concurrent users. Leave the other options at their default settings and click Create:
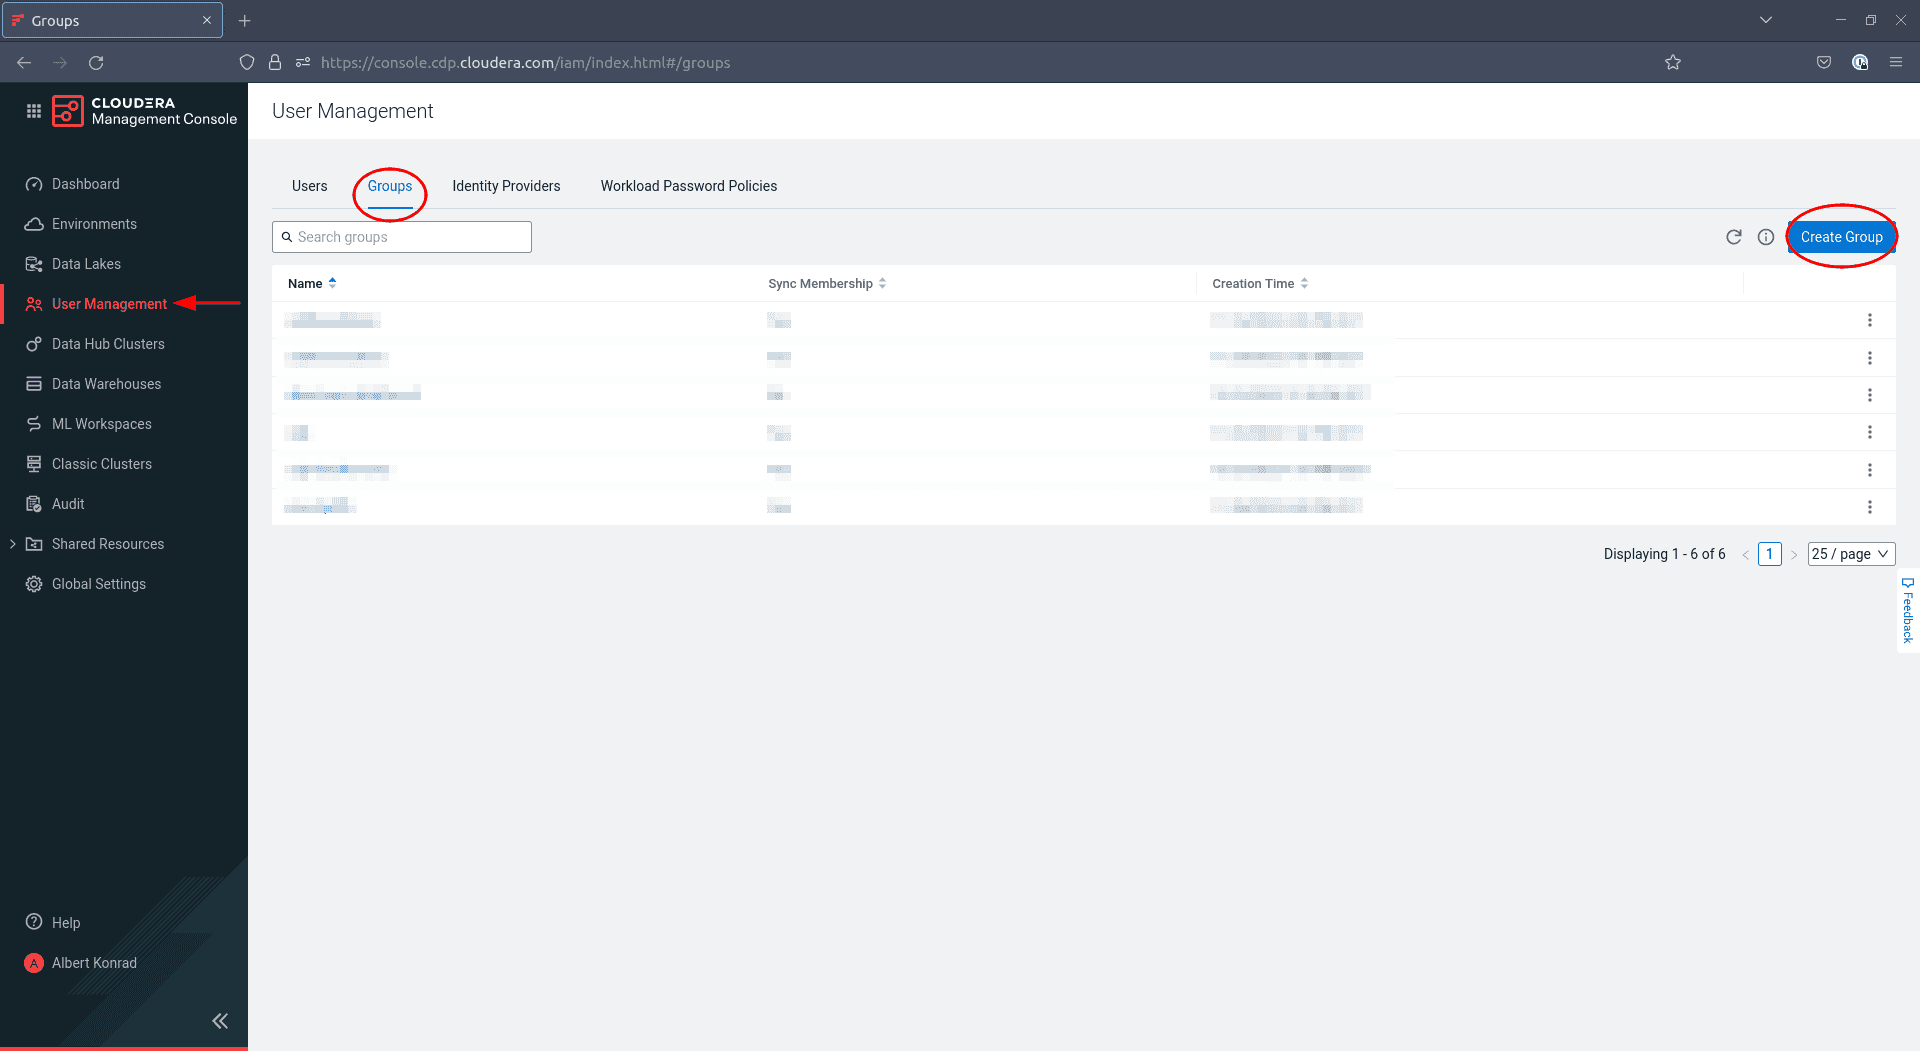
The last feature we enable for our data warehouse is Data Visualization. In order to do so, we first create a group for admin users:
-
Navigate to Management Console > User Management and click Create Group:

-
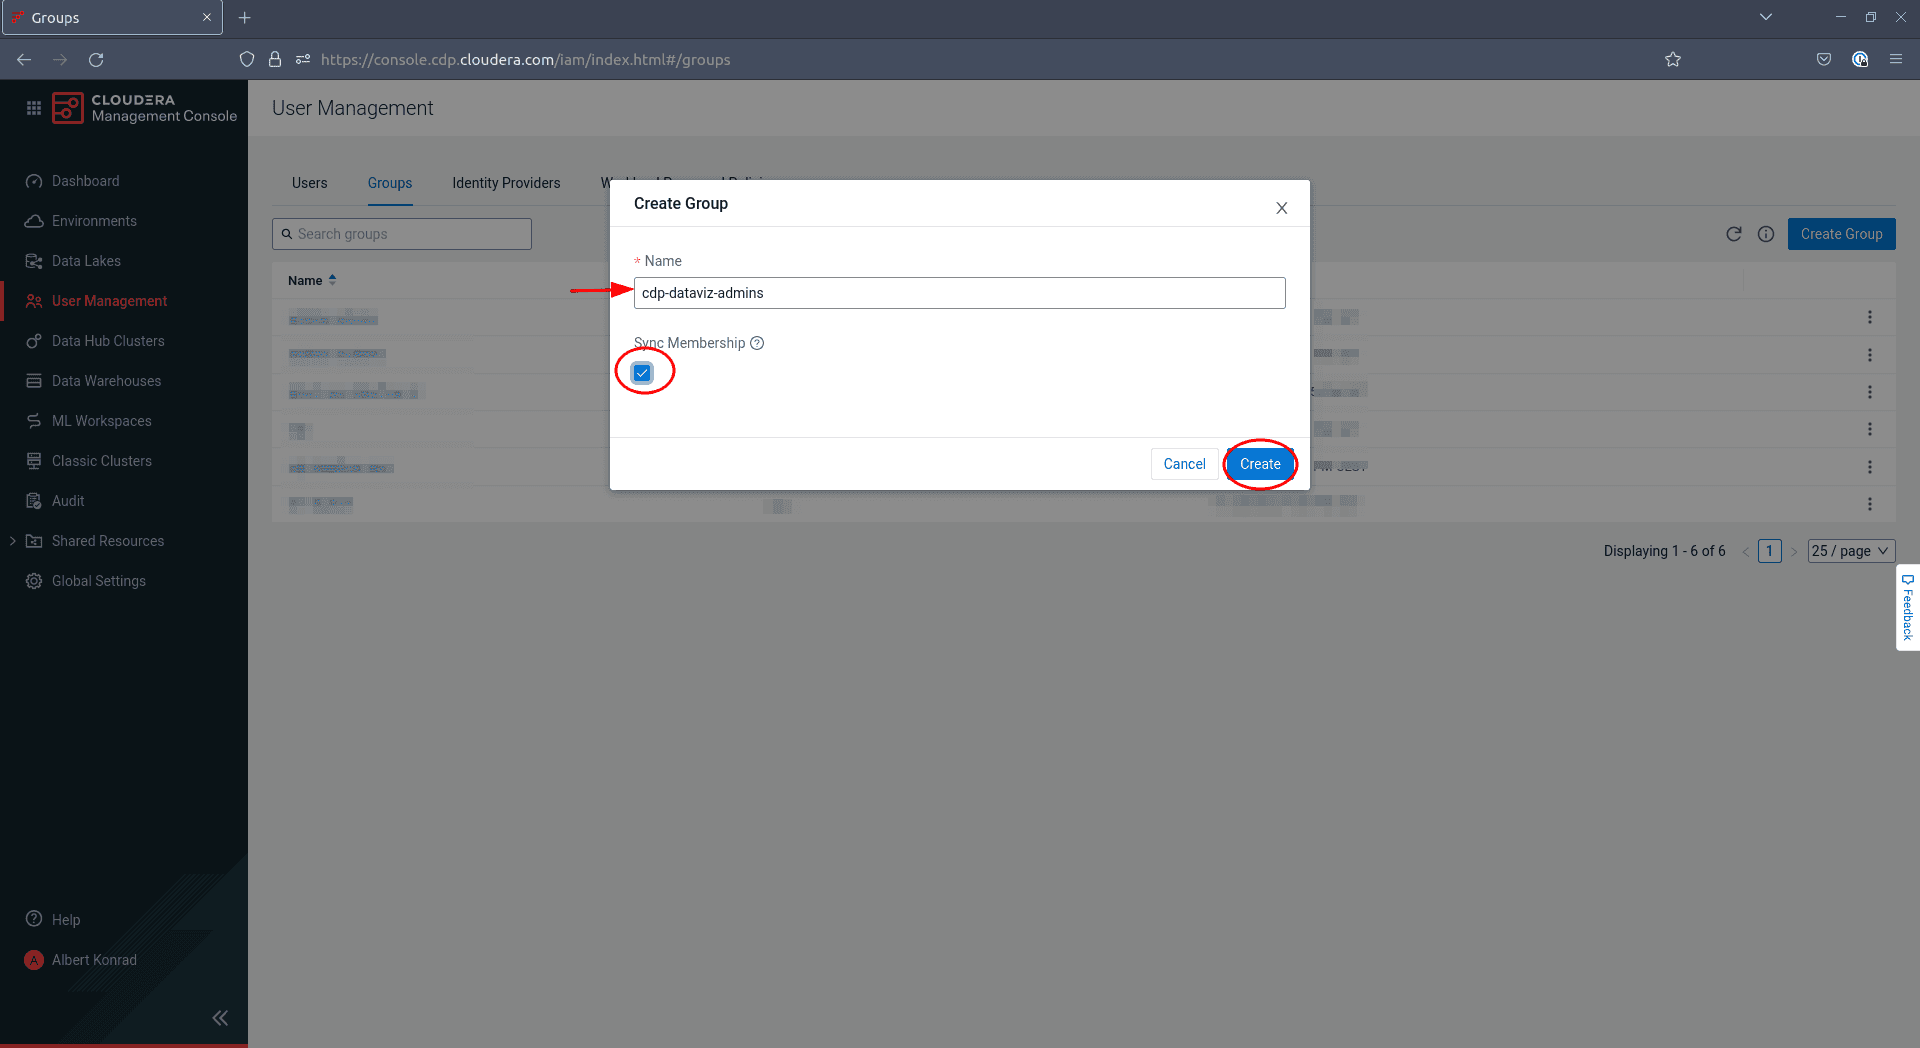
In the dialog box that opens, enter a name for your group and tick the box
Sync Membership:

-
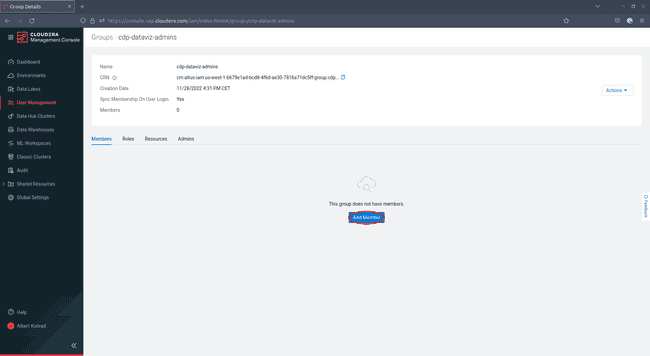
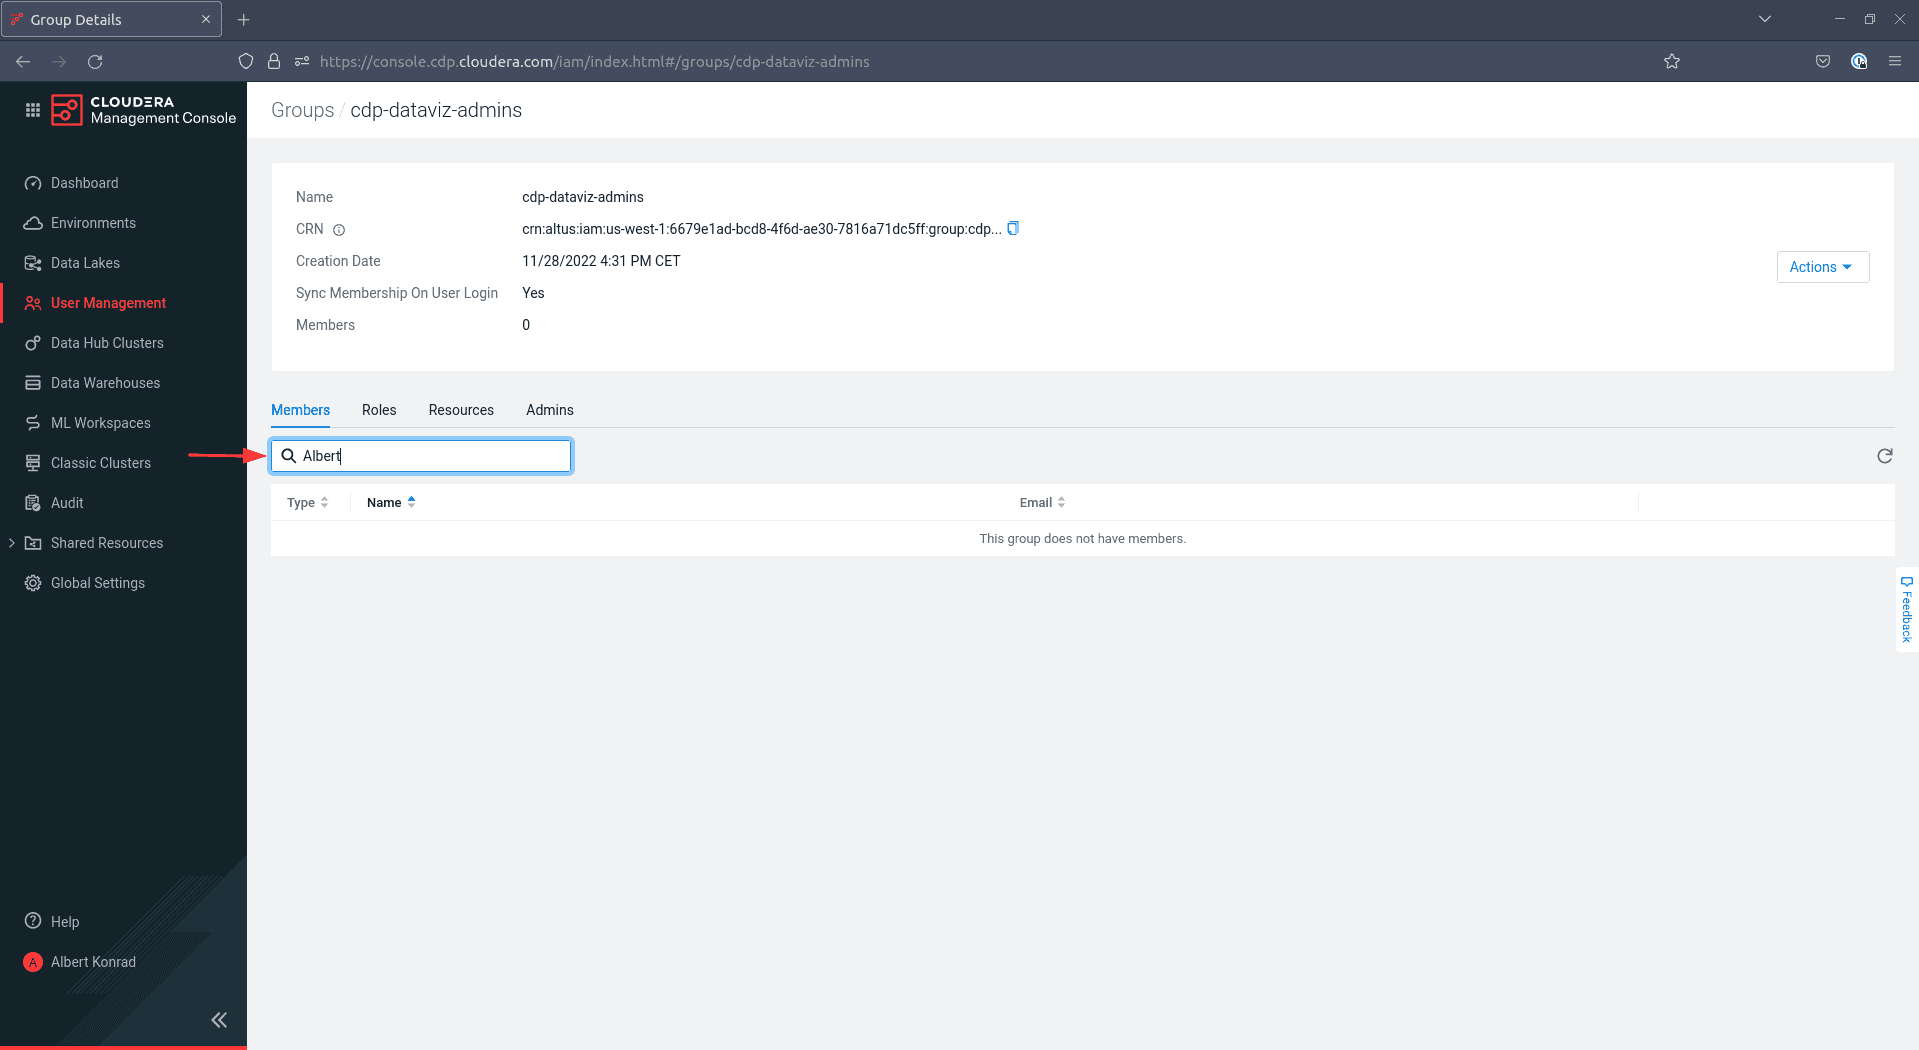
In the next screen, click Add Member:
-
In the following screen, enter the names of existing users you want to add into the text field on the left side. You want to add at least yourself to this group:

-
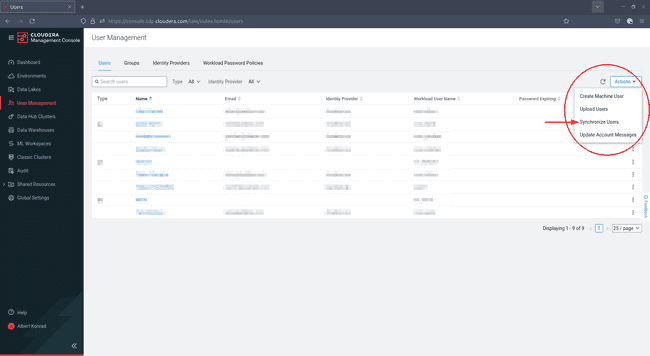
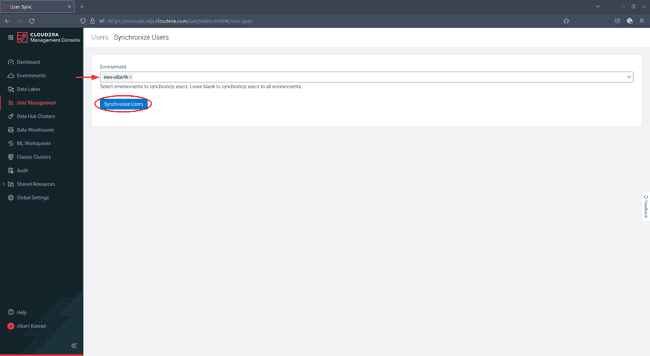
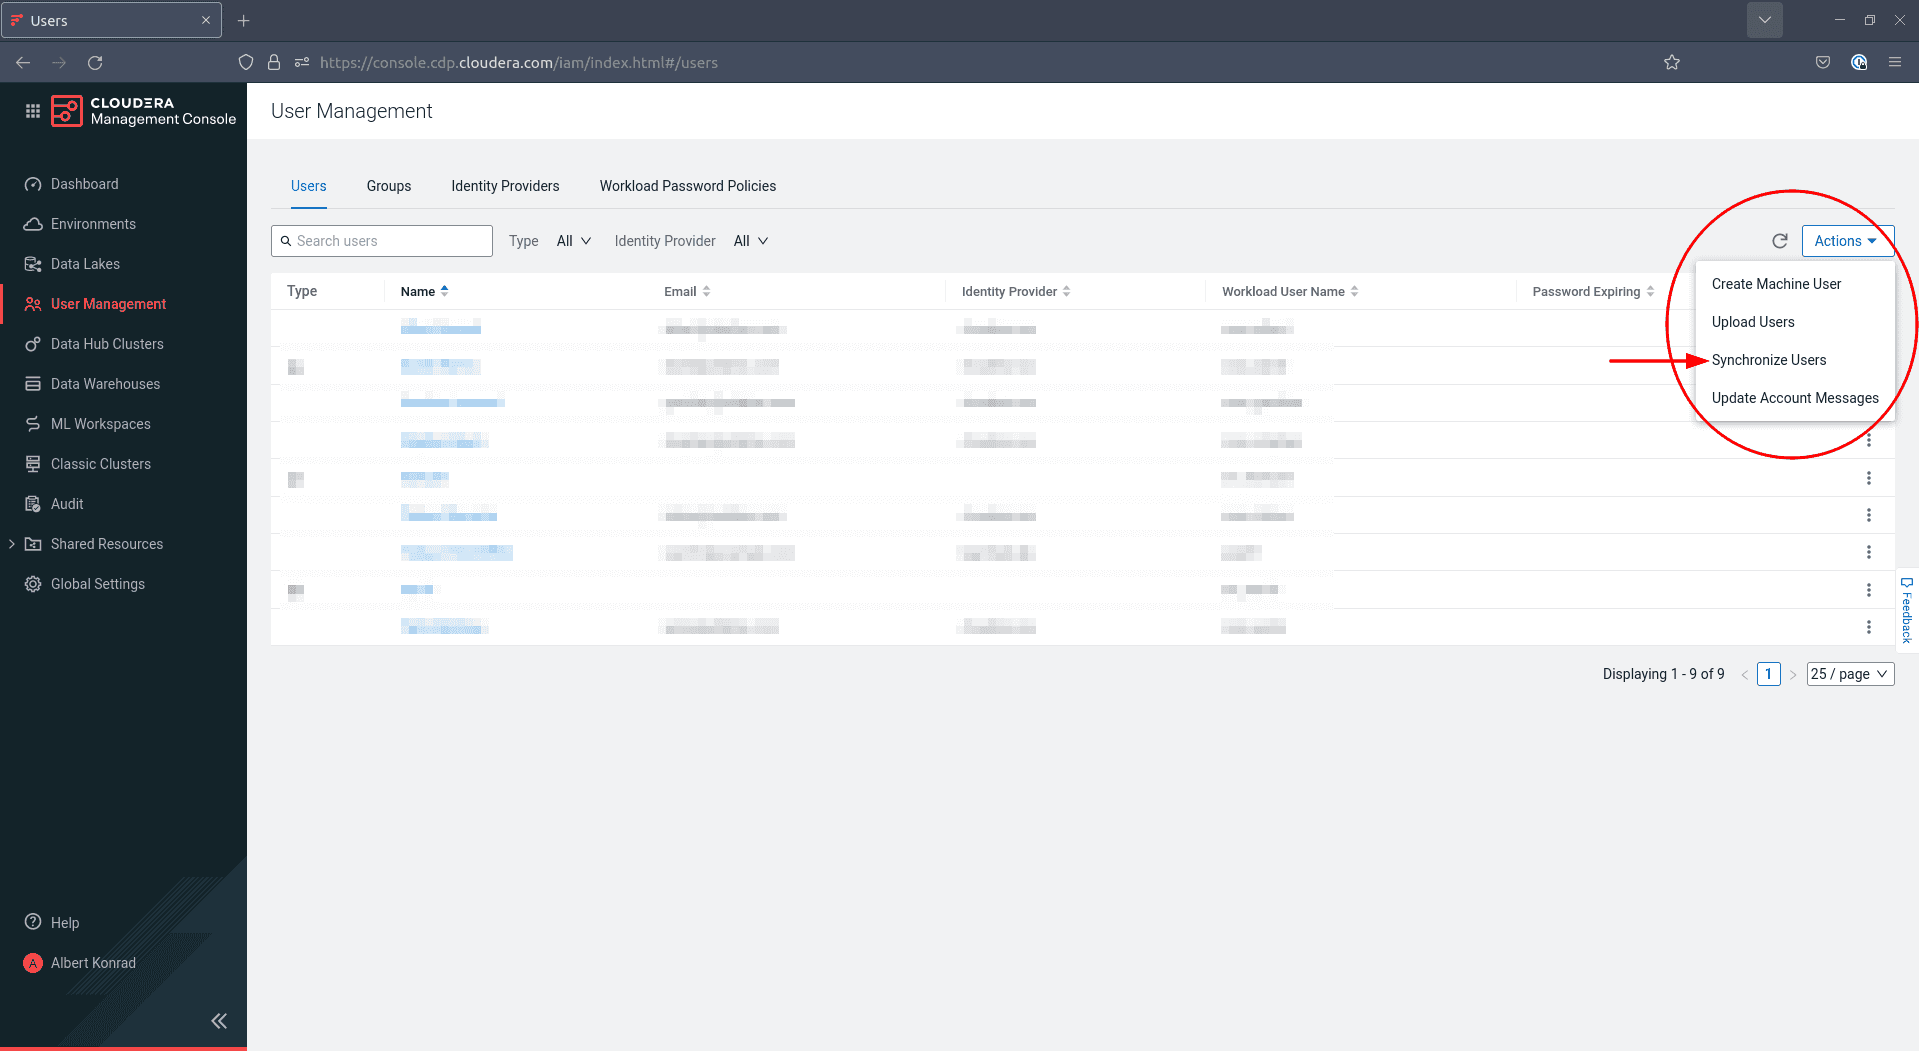
To finish the creation of your admin group, navigate back to User Management and click Actions on the right, then select Synchronize Users:
-
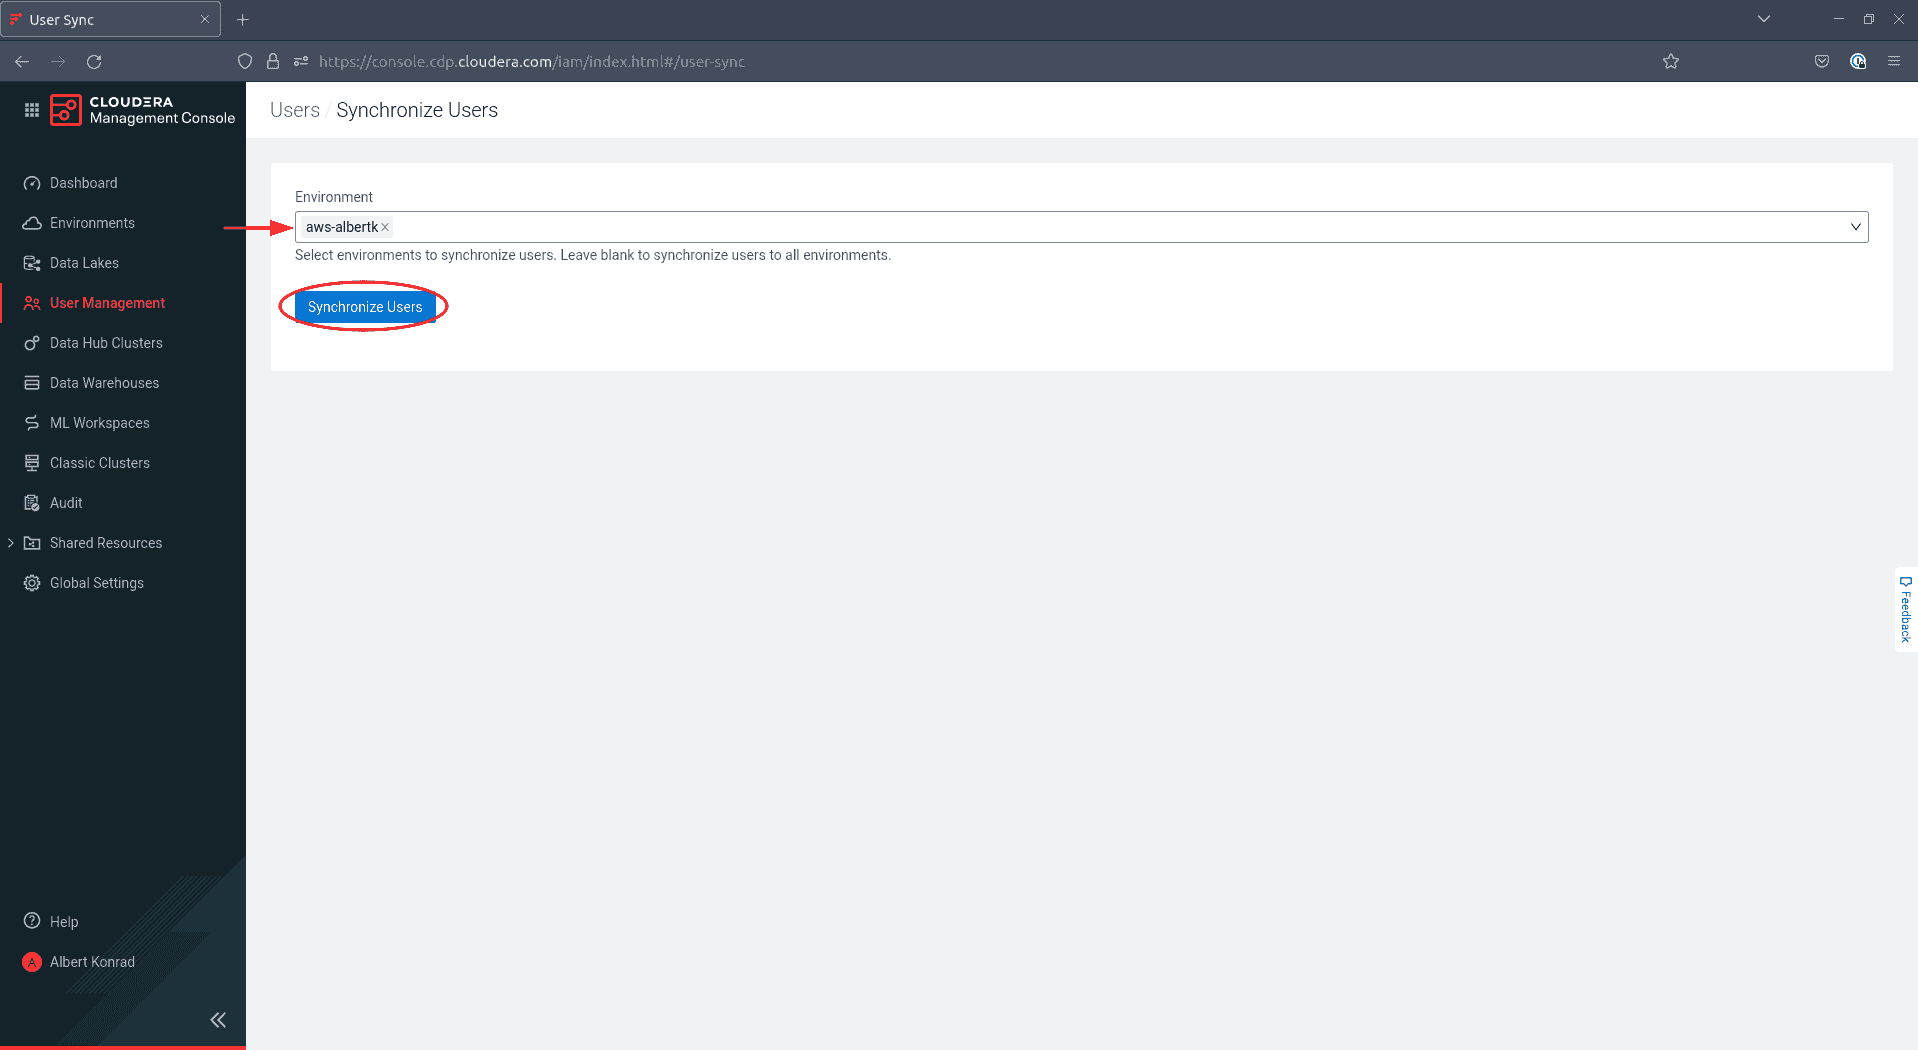
In the next screen, select your environment and click Synchronize Users:
-
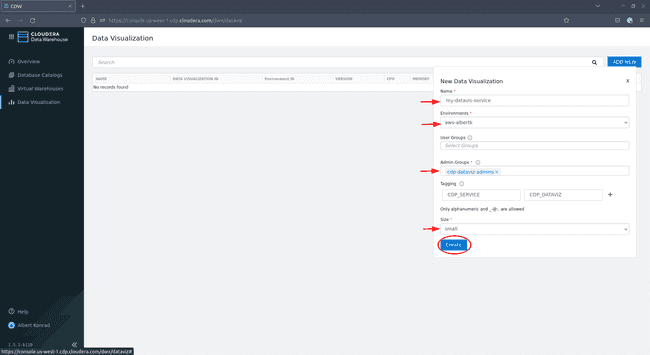
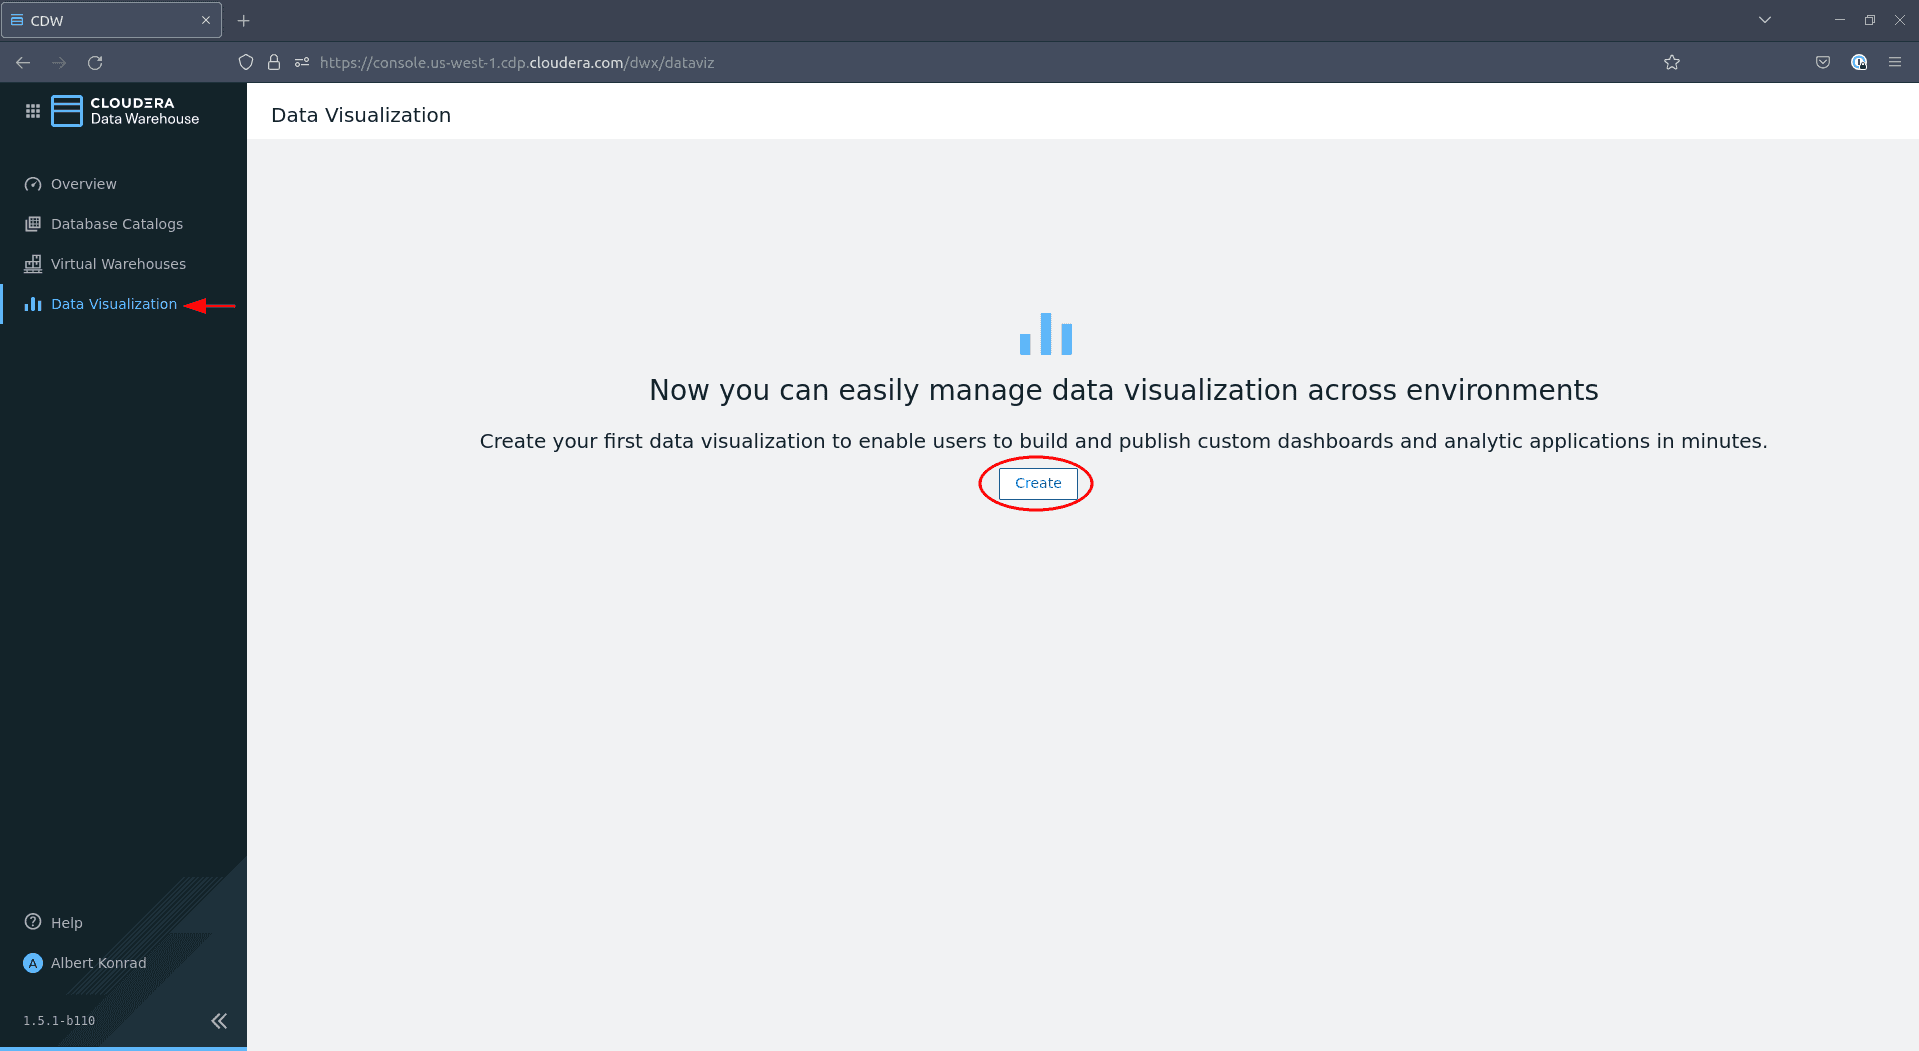
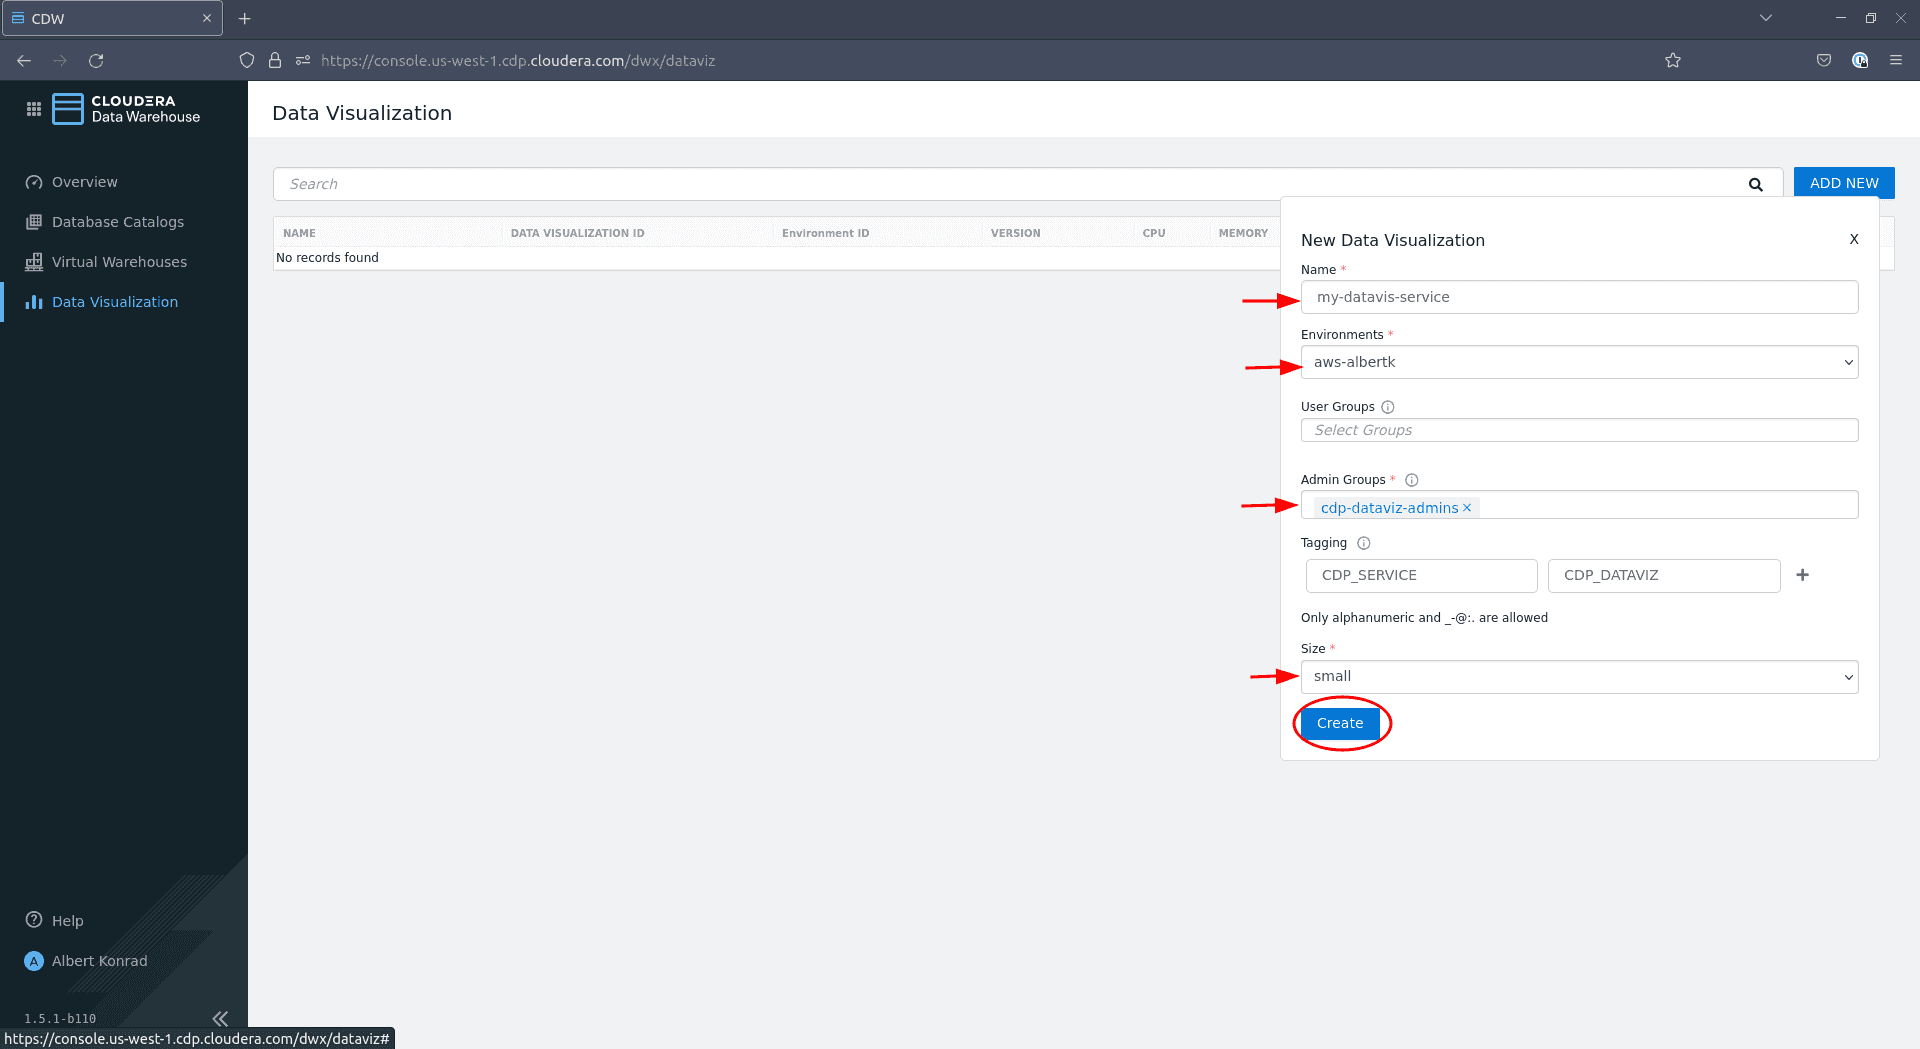
When the admin group is created and synced, navigate to Data Warehouse > Data Visualization and click Create:

-
In the configuration dialog, provide a name for your Data Visualization service and ensure the correct environment is selected. Leave User Groups blank for now. Under Admin Groups select the admin group we just created. Optionally add tags and select a size (
smallis sufficient for the purpose of this demo), then click Create:

And that is it! You have now fully enabled the Data Warehouse service on your environment with all features required to deploy our end-to-end architecture. Note that we still need to add some users to our Data Visualization service, which we are going to cover in another article.
Add Services from your Terminal
You can enable all services – with one limitation that we describe below – from your terminal using the CDP CLI. This approach is preferable for experienced users who want to be able to quickly create an environment.
Before you start deploying services, make sure the following variables are declared in your shell session:
export CDP_ENV_NAME=aws-${USER}
export CDP_ENV_CRN=$(cdp environments describe-environment
  --environment-name ${CDP_ENV_NAME:-aws-${USER}}
  | jq -r '.environment.crn')
AWS_TAG_GENERAL_KEY=ENVIRONMENT_PROVIDER
AWS_TAG_GENERAL_VALUE=CLOUDERA
AWS_TAG_SERVICE_KEY=CDP_SERVICE
AWS_TAG_SERVICE_DATAFLOW=CDP_DATAFLOW
AWS_TAG_SERVICE_DATAENGINEERING=CDP_DATAENGINEERING
AWS_TAG_SERVICE_DATAWAREHOUSE=CDP_DATAWAREHOUSE
AWS_TAG_SERVICE_VIRTUALWAREHOUSE=CDP_VIRTUALWAREHOUSE
Enabling DataFlow
To enable DataFlow via the terminal, use the commands below.
cdp df enable-service
  --environment-crn ${CDP_ENV_CRN}
  --min-k8s-node-count ${CDP_DF_NODE_COUNT_MIN:-3}
  --max-k8s-node-count ${CDP_DF_NODE_COUNT_MIN:-20}
  --use-public-load-balancer
  --no-private-cluster
  --tags "{"${AWS_TAG_GENERAL_KEY}":"${AWS_TAG_GENERAL_VALUE}","${AWS_TAG_SERVICE_KEY}":"${AWS_TAG_SERVICE_DATAFLOW}"}"
To monitor the status of your DataFlow service:
cdp df list-services
  --search-term ${CDP_ENV_NAME}
  | jq -r '.services[].status.detailedState'
Enabling Data Engineering
Fully enabling the Data Engineering service from your terminal requires two steps:
- Enable the Data Engineering service
- Enable a virtual cluster
In our specific use case we have to enable the Data Engineering virtual cluster from the CDP console. This is because at the time of writing, the CDP CLI provides no option to launch a virtual cluster with support for Apache Iceberg tables.
To enable Data Engineering from the terminal use the following command:
cdp de enable-service
  --name ${CDP_DE_NAME:-aws-${USER}-dataengineering}
  --env ${CDP_ENV_NAME:-aws-${USER}}
  --instance-type ${CDP_DE_INSTANCE_TYPE:-m5.2xlarge}
  --minimum-instances ${CDP_DE_INSTANCES_MIN:-1}
  --maximum-instances ${CDP_DE_INSTANCES_MAX:-50}
  --minimum-spot-instances ${CDP_DE_SPOT_INSTANCES_MIN:-1}
  --maximum-spot-instances ${CDP_DE_SPOT_INSTANCES_MAX:-25}
  --enable-public-endpoint
  --tags "{"${AWS_TAG_GENERAL_KEY}":"${AWS_TAG_GENERAL_VALUE}","${AWS_TAG_SERVICE_KEY}":"${AWS_TAG_SERVICE_DATAENGINEERING}"}"
To monitor the status of your Data Engineering service:
export CDP_DE_CLUSTER_ID=$(cdp de list-services
  | jq -r --arg SERVICE_NAME "${CDP_DE_NAME:-aws-${USER}-dataengineering}"
  '.services[] | select(.name==$SERVICE_NAME).clusterId')


cdp de describe-service
  --cluster-id ${CDP_DE_CLUSTER_ID}
  | jq -r '.service.status'
The service becomes available after 60 to 90 minutes. Once ready, you must enable a virtual cluster with support for Apache Iceberg Analytical tables. This is done via the Cloudera console as described in the Add Services via Console section.
Enabling Data Warehouse
In order to launch the Data Warehouse service from your terminal, you have to provide the public and private subnets of your CDP environment:
-
First, gather your VPC ID in order to find your subnets:
AWS_VPC_ID=$(cdp environments describe-environment --environment-name $CDP_ENV_NAME | jq '.environment.network.aws.vpcId') -
Second, gather your public and private subnets with the following command:
AWS_PRIVATE_SUBNETS=$(aws ec2 describe-subnets --filters Name=vpc-id,Values=${AWS_VPC_ID} | jq -r '.Subnets[] | select(.MapPublicIpOnLaunch==false).SubnetId') AWS_PUBLIC_SUBNETS=$(aws ec2 describe-subnets --filters Name=vpc-id,Values=${AWS_VPC_ID} | jq -r '.Subnets[] | select(.MapPublicIpOnLaunch==true).SubnetId') -
The subnet groups have to be provided in a specific format, which requires them to be joined with a comma as separator. A small bash functions helps to generate this format:
function join_by { local IFS="$1"; shift; echo "$*"; } -
Call this function to concatenate both arrays into strings of the form
subnet1,subnet2,subnet3:export AWS_PRIVATE_SUBNETS=$(join_by "," ${AWS_PRIVATE_SUBNETS}) export AWS_PUBLIC_SUBNETS=$(join_by "," ${AWS_PUBLIC_SUBNETS})
Now that we have our subnets, we are ready to create the Data Warehouse cluster:
cdp dw create-cluster
  --environment-crn $CDP_ENV_CRN
  --no-use-overlay-network
  --database-backup-retention-period 7
  --no-use-private-load-balancer
  --aws-options privateSubnetIds=$AWS_PRIVATE_SUBNETS,publicSubnetIds=$AWS_PUBLIC_SUBNETS
To monitor the status of the Data Warehouse, use the following commands:
export CDP_DW_CLUSTER_ID=$(cdp dw list-clusters --environment-crn $CDP_ENV_CRN | jq -r '.clusters[].id')


cdp dw describe-cluster
  --cluster-id ${CDP_DW_CLUSTER_ID}
  | jq -r '.cluster.status'
Once your Data Warehouse is available, launch a virtual warehouse as follows:
export CDP_DW_CLUSTER_ID=$(cdp dw list-clusters --environment-crn $CDP_ENV_CRN | jq -r '.clusters[].id')
export CDP_DW_CLUSTER_DBC=$(cdp dw list-dbcs --cluster-id $CDP_DW_CLUSTER_ID | jq -r '.dbcs[].id')
export CDP_VWH_NAME=aws-${USER}-virtual-warehouse
cdp dw create-vw
  --cluster-id ${CDP_DW_CLUSTER_ID}
  --dbc-id ${CDP_DW_CLUSTER_DBC}
  --vw-type impala
  --name ${CDP_VWH_NAME}
  --template xsmall
  --tags key=${AWS_TAG_GENERAL_KEY},value=${AWS_TAG_GENERAL_VALUE} key=${AWS_TAG_SERVICE_KEY},value=${AWS_TAG_SERVICE_VIRTUALWAREHOUSE}
To monitor the status of the virtual warehouse:
export CDP_VWH_ID=$(cdp dw list-vws
  --cluster-id ${CDP_DW_CLUSTER_ID}
  | jq -r --arg VW_NAME "${CDP_VWH_NAME}"
  '.vws[] | select(.name==$VW_NAME).id')


cdp dw describe-vw
  --cluster-id ${CDP_DW_CLUSTER_ID}
  --vw-id ${CDP_VWH_ID}
  | jq -r '.vw.status'
The final feature to enable is Data Visualization. First step is to prepare an Admin User Group:
export CDP_DW_DATAVIZ_ADMIN_GROUP_NAME=cdp-dw-dataviz-admins
export CDP_DW_DATAVIZ_SERVICE_NAME=cdp-${USER}-dataviz


cdp iam create-group
  --group-name ${CDP_DW_DATAVIZ_ADMIN_GROUP_NAME}
  --sync-membership-on-user-login
You need to log into the Data Visualization service with admin privileges at a later stage. Therefore, you should add yourself to the admin group:
export CDP_MY_USER_ID=$(cdp iam get-user
                        | jq -r '.user.userId')


cdp iam add-user-to-group
  --user-id ${CDP_MY_USER_ID}
  --group-name ${CDP_DW_DATAVIZ_ADMIN_GROUP_NAME}
Once the admin group is created, launching the Data Visualization service is quick. Note that we are going to add a user group in the future, but this will be covered in an upcoming article:
cdp dw create-data-visualization
  --cluster-id ${CDP_DW_CLUSTER_ID}
  --name ${CDP_DW_DATAVIZ_SERVICE_NAME}
  --config adminGroups=${CDP_DW_DATAVIZ_ADMIN_GROUP_NAME}
To monitor the status of your Data Visualization service:
export CDP_DW_DATAVIZ_SERVICE_ID=$(cdp dw list-data-visualizations
  --cluster-id ${CDP_DW_CLUSTER_ID}
  | jq -r --arg VIZ_NAME "${CDP_DW_DATAVIZ_SERVICE_NAME}"
  '.dataVisualizations[] | select(.name==$VIZ_NAME).id')


cdp dw describe-data-visualization
  --cluster-id ${CDP_DW_CLUSTER_ID}
  --data-visualization-id ${CDP_DW_DATAVIZ_SERVICE_ID}
  | jq -r '.dataVisualization.status'
And with that, we’re done! You have now fully enabled the Data Warehouse service with all features required by our end-to-end architecture.
AWS Resource Overview
While Cloudera provides extensive documentation for CDP Public Cloud, understanding what resources are deployed on AWS when a specific service is enabled is not a trivial task. Based on our observation, the following resources are created when you launch the DataFlow, Data Engineering and/or Data Warehouse services.
Hourly and other costs are for the EU Ireland region, as observed in June 2023. AWS resource pricing varies by region and can change over time. Consult AWS Pricing to see the current pricing for your region.
| CDP Component | AWS Resource Created | Resource Count | Resource Cost (Hour) | Resource Cost (Other) |
|---|---|---|---|---|
| DataFlow | EC2 Instance: c5.4xlarge | 3* | $0.768 | Data Transfer Cost |
| DataFlow | EC2 Instance: m5.large | 2 | $0.107 | Data Transfer Cost |
| DataFlow | EBS: GP2 65gb | 3* | n/a | $0.11 per GB Month (see EBS pricing) |
| DataFlow | EBS: GP2 40gb | 2 | n/a | $0.11 per GB Month (see EBS pricing) |
| DataFlow | RDS Postgre DB Instance: db.r5.large | 1 | $0.28 | Additional RDS charges |
| DataFlow | RDS: DB Subnet Group | 1 | No charge | No charge |
| DataFlow | RDS: DB Snapshot | 1 | n/a | Additional RDS charges |
| DataFlow | RDS: DB Parameter Group | 1 | n/a | n/a |
| DataFlow | EKS Cluster | 1 | $0.10 | Amazon EKS pricing |
| DataFlow | VPC Classic Load Balancer | 1 | $0.028 | $0.008 per GB of data processed (see Load Balancer Pricing) |
| DataFlow | KMS: Customer-Managed Key | 1 | n/a | $1.00 per month and usage costs: AWS KMS Pricing |
| DataFlow | CloudFormation: Stack | 6 | No charge | Handling cost |
| Data Engineering | EC2 Instance: m5.xlarge | 2 | $0.214 | Data Transfer Cost |
| Data Engineering | EC2 Instance: m5.2xlarge | 3* | $0.428 | Data Transfer Cost |
| Data Engineering | EC2 Security Group | 4 | No charge | No charge |
| Data Engineering | EBS: GP2 40gb | 2 | n/a | $0.11 per GB Month (see EBS pricing) |
| Data Engineering | EBS: GP2 60gb | 1 | n/a | $0.11 per GB Month (see EBS pricing) |
| Data Engineering | EBS: GP2 100gb | 1 | n/a | $0.11 per GB Month (see EBS pricing) |
| Data Engineering | EFS: Standard | 1 | n/a | $0.09 per GB Month (see EFS pricing) |
| Data Engineering | EKS Cluster | 1 | $0.10 | Amazon EKS pricing |
| Data Engineering | RDS MySQL DB Instance: db.m5.large | 1 | $0.189 | Additional RDS charges |
| Data Engineering | RDS: DB Subnet Group | 1 | No charge | No charge |
| Data Engineering | VPC Classic Load Balancer | 2 | $0.028 | $0.008 per GB of data processed (see Load Balancer Pricing) |
| Data Engineering | CloudFormation: Stack | 8 | No charge | Handling cost |
| Data Warehouse | EC2 Instance: m5.2xlarge | 4 | $0.428 | Data Transfer Cost |
| Data Warehouse | EC2 Instance: r5d.4xlarge | 1 | $1.28 | Data Transfer Cost |
| Data Warehouse | EC2 Security Group | 5 | No charge | No charge |
| Data Warehouse | S3 Bucket | 2 | n/a | AWS S3 Pricing |
| Data Warehouse | EBS: GP2 40gb | 4 | n/a | $0.11 per GB Month (see EBS pricing) |
| Data Warehouse | EBS: GP2 5gb | 3 | n/a | $0.11 per GB Month (see EBS pricing) |
| Data Warehouse | EFS: Standard | 1 | n/a | $0.09 per GB Month (see EFS pricing) |
| Data Warehouse | RDS Postgre DB Instance: db.r5.large | 1 | $0.28 | Additional RDS charges |
| Data Warehouse | RDS: DB Subnet Group | 1 | No charge | No charge |
| Data Warehouse | RDS: DB Snapshot | 1 | n/a | Additional RDS charges |
| Data Warehouse | EKS: Cluster | 1 | $0.10 | Amazon EKS pricing |
| Data Warehouse | VPC Classic Load Balancer | 1 | $0.028 | $0.008 per GB of data processed (see Load Balancer Pricing) |
| Data Warehouse | CloudFormation: Stack | 1 | No charge | Handling cost |
| Data Warehouse | Certificate via Certificate Manager | 1 | No charge | No charge |
| Data Warehouse | KMS: Customer-Managed Key | 1 | n/a | $1.00 per month and usage costs: AWS KMS Pricing |
| Virtual Warehouse | EC2 Instance: r5d.4xlarge | 3* | $1.28 | Data Transfer Cost |
| Virtual Warehouse | EBS: GP2 40gb | 3* | n/a | $0.11 per GB Month (see EBS pricing) |
*Note: Some resources scale based on load and based on the minimum and maximum node count you set when you enable the service.
With our configuration – and not accounting for usage-based cost such as Data Transfer or Load Balancer processing fees, or pro-rated costs such as the price of provisioned EBS storage volumes – we are looking at the following approximate hourly base cost per enabled service:
- DataFlow: ~$2.36 per hour
- Data Engineering: ~$1.20 per hour
- Data Warehouse: ~$3.40 per hour
- Virtual Warehouse: ~$3.84 per hour
As always, we have to emphasize that you should always remove cloud resources that are no longer used to avoid unwanted costs.
Next Steps
Now that your CDP Public Cloud Environment is fully deployed with a suite of powerful services enabled, you are almost ready to use it. Before you do, you need to onboard users to your platform and configure their access rights. We cover this process over the next two chapters, starting with User Management on CDP Public Cloud with Keycloak.
Source link