To make website content accessible and understandable across an international audience, it is good practice to translate our articles into other languages. This process is called localization.
Localization introduces a variety of benefits, some of which include:
- Increased trust: A majority of the non-English audience is less likely to buy something from a website if the site’s content is only in English. To put it simply, buyers won’t spend their money if the website doesn’t cater to their region
- Better understanding: In some cases where non-English speakers don’t understand content properly, localization mitigates this issue, which results in increased engagement and viewership
In this article, you will learn how to localize your blog content using Contentful’s locale feature. We will then use the Remix framework to display our content to the user. You can find the source code for this article on my GitHub.
Jump ahead:
Setting up Contentful
In this section, we will add translations to our content in Contentful. As a first step, you have to first create a free account with Contentful.
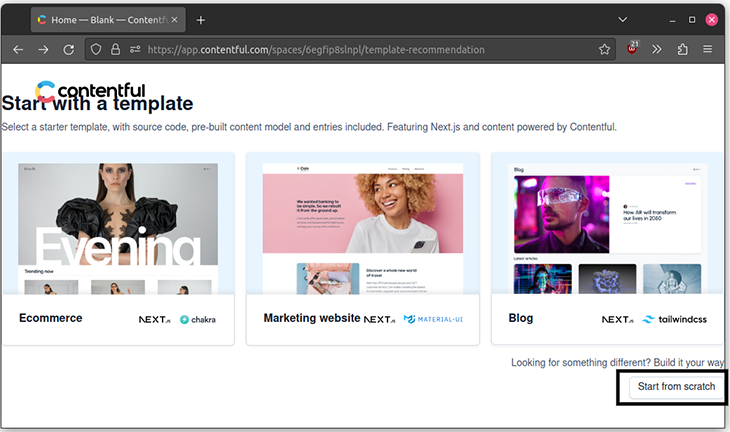
After this, select Start from Scratch to set up a new space for your project. Spaces are simply an area to host your content, images, and other media:
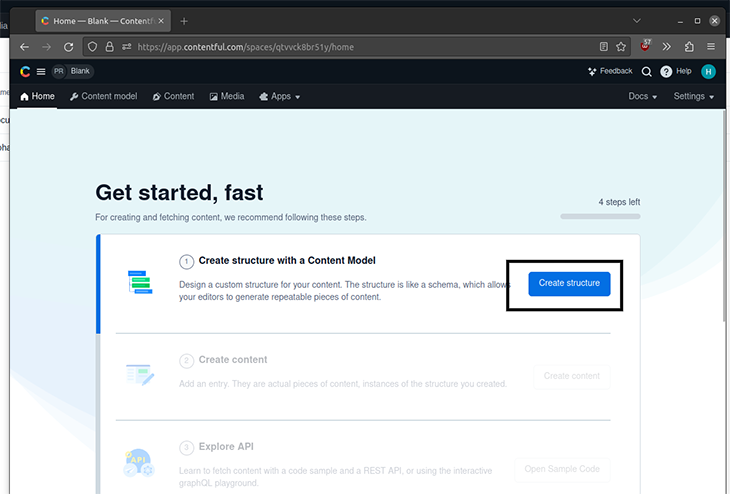
Next, click Create structure with a Content Model:
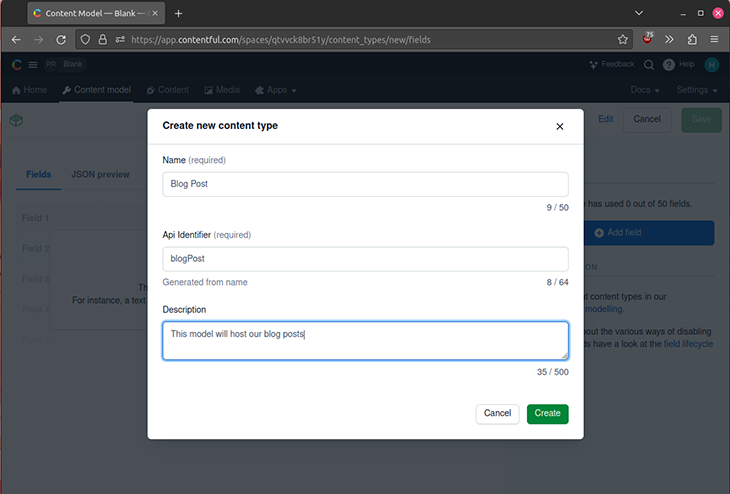
We will create a blog post model to represent blog posts. To do so, assign your content type’s name to Blog Post:
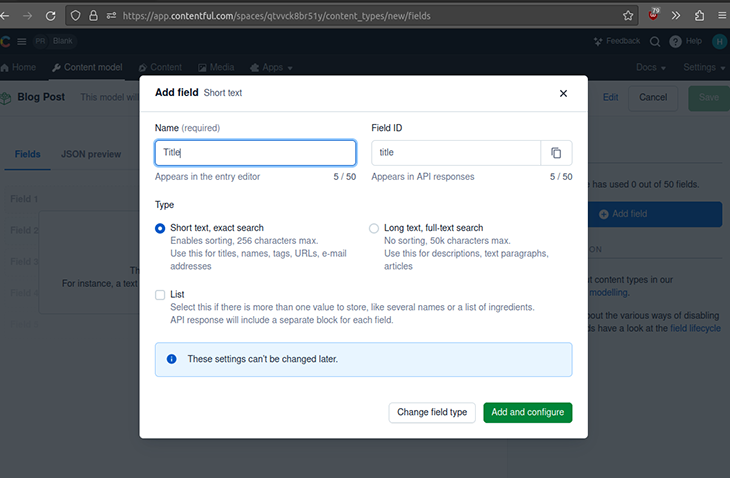
It will then ask you to set up fields. Here, we will add two fields:
- Title: As the name suggests, this will represent the title of our blog post
- Rich text: This will be the content of the blog post
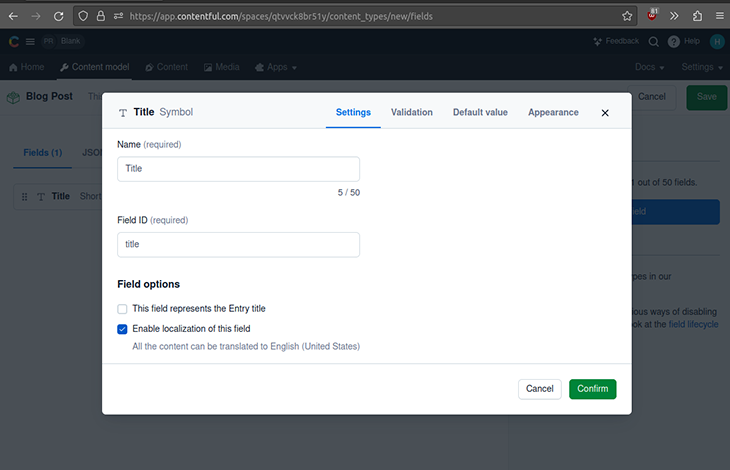
Let’s add a title with the following values:
The next screen will allow you to configure this field. Here, make sure to check the Enable localization of the field checkbox:
When that’s done, perform the same steps for the Content field, like so:
After this step, just click Save.
<
h3 id=”adding-locales”>Adding locales
To add locales, go to Settings > Locales to add a locale of your choice. As an example, we’ll use German:
Now that we have added a locale, we need to tell Contentful to display our locales whenever we add content. To do so, go to Entry editor settings and under Sidebar, click Translations:
Adding a blog post
Let’s now add some content to the Blog Post model! Go to the Content section and make sure that your locale is selected:

In this screen, you can then add your content:
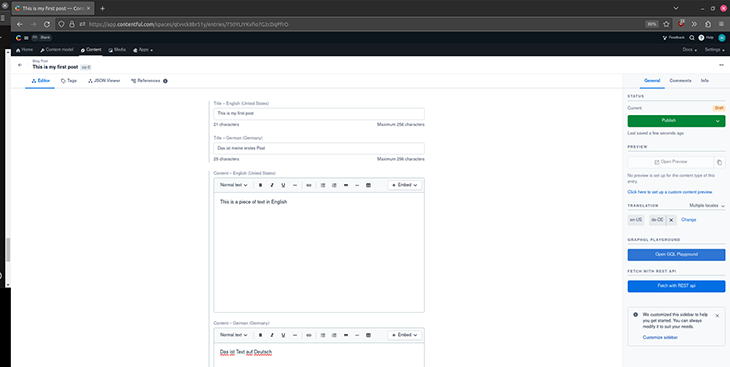
When you’re done adding content to your blog post, click Publish.
Using the Delivery API
Now that we finally have a post on our blog, we can test out the Contentful Delivery API. To do so, click Open GQL playground. This will let us execute GraphQL queries so that we can render this data later on in our frontend:
If we set the locale parameter to de-DE, the API will give us the results in German:
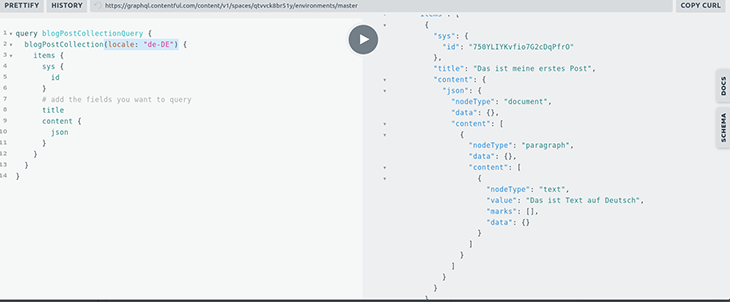
As you can see, Contentful made the localization process of our blog very easy!
Creating our Remix frontend
In this chapter of the article, you will learn how to consume Contentful’s Delivery API and render our blog posts via Remix.
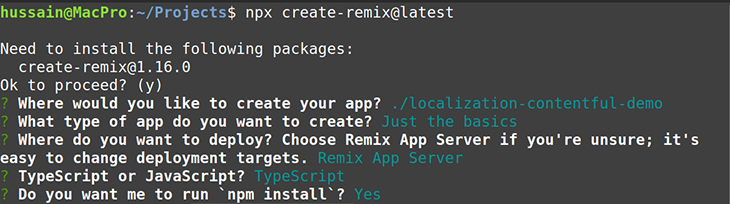
To set up a blank Remix project, run the following Bash command:
npx [email protected]
Here, make sure to select the default settings:
For this project, we need the following modules:
@apollo/client: Used to execute GraphQL queries on the Contentful APIgraphql: Peer dependency for Apollo Client@contentful/rich-text-html-renderer: Displays our rich content to the DOM
Now install the following npm packages:
npm install @apollo/client graphql @contentful/rich-text-html-renderer
Creating the project structure
Let’s create some files and folders for our project. This will enhance code readability and organization.
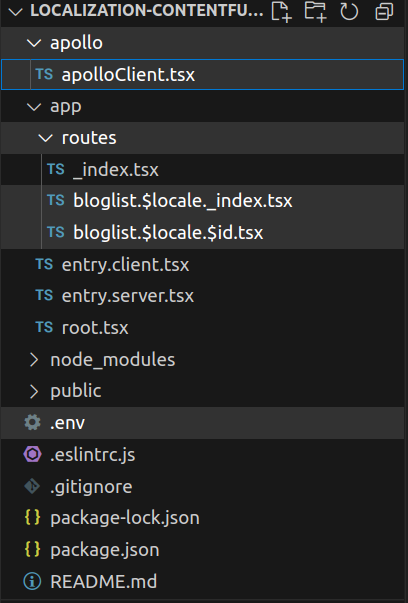
In your project, create the following files:
routes/bloglist.$locale._index.tsx: This component will render when the user navigates to thebloglist/{locale}pageroutes/bloglist.$locale.$id.tsx: Remix will display this page when the client goes to thebloglist/{locale}/{id}file.env: This file will be responsible for storing our environment variables and secretsapollo/apolloClient.tsx: This is our Apollo client to run GraphQL queries with the Delivery API
In the end, your file structure should look like so:
Let’s first retrieve our access token and content URL. These values will be our environment variables:
Now that we have our values, copy over these keys into your .env file:
AUTHORIZATION_TOKEN=<AUTHORIZATION_TOKEN>
CONTENT_URL=<CONTENT_URL>
Now, let’s write some code! Go to routes/bloglist.$locale.tsx file and start by writing the following code:
//When the user goes to the bloglist/{locale}, render this component:
function BlogList() {
  return (
    <div>
      {/* Show a simple h1 element:*/}
      <h1>Here are all of the blog entries:</h1>
    </div>
  );
}
export default BlogList;
Now head over to the bloglist.$locale.$id.tsx component and paste this block of code:
//When the user goes to the bloglist/{locale}/{id}, show this component:
function BlogDetails() {
  return (
    <div>
      <p>This is placeholder text for title and content</p>
    </div>
  );
}
export default BlogDetails;
Let’s test our program! To run the Remix server, type this Bash command:
npm run dev
This will be the result:
Great! As you can see, our code works. Remix has made route handling simple for us.
Creating our Apollo Client instance
Let’s now create our Apollo GraphQL client to let us fetch blog entries. To create your Apollo Client, write the following code in the apollo/apolloClient.tsx module:
import { ApolloClient, InMemoryCache, createHttpLink } from "@apollo/client";
import { setContext } from "@apollo/client/link/context";

//tell Apollo the value of our content url
const httpLink = createHttpLink({
  uri: process.env.CONTENT_URL,
});

//Contentful requires an authorization token before querying.
//Here, we are passing our token to the API:
const authLink = setContext((_, { headers }) => {
  return {
    headers: {
      ...headers,
      authorization: `Bearer ${process.env.AUTHORIZATION_TOKEN}`,
    },
  };
});
//now connect our API and the content URL:
export const apolloClient = new ApolloClient({
  link: authLink.concat(httpLink),
  ssrMode: true,
  cache: new InMemoryCache(),
});
Fetching our list of blog entries
Now that we have created our Apollo Client instance, let’s fetch our blog content.
Type this code snippet in routes/bloglist.$locale._index.tsx:
import { NavLink, V2_MetaFunction, useLoaderData } from "@remix-run/react";
import { gql } from "@apollo/client";
import { apolloClient } from "apollo/apolloClient";
import { LoaderFunction, json } from "@remix-run/node";

//the metadata of the site:
export const meta: V2_MetaFunction = () => {
  return [{ title: "Blog list" }];
};

//now fetch our data from the API:
export const loader: LoaderFunction = async ({ request, params }) => {
  try {
    const { data } = await apolloClient.query({
      //defining our graphQL query here:
      query: gql`
        query blogPostCollectionQuery($language: String!) {
          blogPostCollection(locale: $language) {
            items {
              sys {
                id
              }
              title
            }
          }
        }
      `,
      //our locale parameter will be the variable in this query.
      //this will tell our API to get the English or the German locale
      variables: { language: params.locale },
    });
    return json(data); //return this data to the user
  } catch (e) {
    console.log(e);
    return json({ error: "An error occurred" });
  }
};
In the above code snippet, we defined a loader function that tells Remix to fetch our list of blog items and return the data.
To render this list, append this block in the routes/bloglist.$locale._index.tsx file:
//define our interfaces
interface BlogPost {
  sys: Sys;
  title: string;
}
interface Sys {
  id: string;
}

function BlogList() {
//destructure our data and get only the 'items' property:
  const {
    blogPostCollection: { items },
  } = useLoaderData();

  return (
    <div>
      {/*Render our list to the user*/}
      <h1>Here is a list of blog entries:</h1>
      {items.map((item: BlogPost) => {
        return (
          <div key={item.sys.id}>
            {/*When clicked, go to bloglist/{locale}/{id
}*/}
            <NavLink to={`${item.sys.id}`}>
              <p>{item.title} </p>
            </NavLink>
          </div>
        );
      })}
    </div>
  );
}

export default BlogList;
Here is the result of the code:
Notice that Contentful returns the relevant translated text when the user goes to the corresponding locale directory.
Displaying blog items
In this section, we will write some code that will let the user read our blog content when they select a title. To display blog items, go to routes/bloglist.$locale.$id.tsx and write the following block of code:
import { V2_MetaFunction, useLoaderData } from "@remix-run/react";
import { gql } from "@apollo/client";
import { apolloClient } from "apollo/apolloClient";
import { LoaderFunction, json } from "@remix-run/node";
import { documentToHtmlString } from "@contentful/rich-text-html-renderer";

export const meta: V2_MetaFunction = ({ data }) => {
  return [{ title: data.blogPost.title }];
};

export const loader: LoaderFunction = async ({ request, params }) => {
  try {
    const { data } = await apolloClient.query({
      query: gql`
        query blogPostEntryQuery($postID: String!, $language: String!) {
          blogPost(id: $postID, locale: $language) {
            title
            content {
              json
            }
          }
        }
      `,
      //this query will have two params: the locale and the ID of the blog entry
      variables: { postID: params.id, language: params.locale },
    });
    return json(data);
  } catch (e) {
    console.log(e);
    return json({ error: "An error occurred" });
  }
};
In this code, we told Remix to fetch the blog’s title and content. It’s now time to display these values to the user:
//file name: routes/bloglist.$locale.$id.tsx
function BlogDetails() {
  //destructure the title and the content of the article:
  const {
    blogPost: { title, content },
  } = useLoaderData();
  //this will function will convert the content's data into plain HTML
  const contentText = documentToHtmlString(content.json);
  return (
    <div>
      <h1>{title}</h1>
      {/*render this HTML to the DOM */}
      {/*In production, remember to use libaries like DOMPurify. */}
      {/* This will prevent XSS issues */}
      <div dangerouslySetInnerHTML={{ __html: contentText }} />
    </div>
  );
}
export default BlogDetails;
This will be the outcome of the code:
And we’re done!
Conclusion
In this article, we discussed how to localize content using the Contentful API. In addition, you also learned how to use the Remix framework’s routes feature to run GraphQL APIs and fetch data from the Contentful Delivery API. Here is the source code of this article.
As you can see, localization was incredibly easy to implement, thanks to Contentful’s localization feature.
Thank you so much for reading!
- Visit https://logrocket.com/signup/ to get an app ID
- Install LogRocket via npm or script tag.
LogRocket.init()must be called client-side, not server-side - (Optional) Install plugins for deeper integrations with your stack:
- Redux middleware
- NgRx middleware
- Vuex plugin
$ npm i --save logrocket import LogRocket from 'logrocket';
LogRocket.init('app/id');
Add to your HTML:<script src="https://cdn.lr-ingest.com/LogRocket.min.js"></script>
<script>window.LogRocket && window.LogRocket.init('app/id');</script>
Source link