Donations Make us online
UXPin Merge provides developers, UX designers, and product teams with an intuitive user interface to prototype and test using ReactJS components. The drag-and-drop workflow is the perfect environment for rapid React prototyping–even for non-designers or those without design tool skills.
Payment giant PayPal and startup TeamPassword both have non-designers building and testing prototypes in UXPin. PayPal’s product teams complete 90% of design projects, while TeamPassword’s two-person development team does all the company’s prototyping and user testing.
This article demonstrates how engineers can use UXPin Merge to design, prototype, and test products before development, allowing them to iterate faster and reduce UI inconsistencies.
Streamline your React rapid prototyping workflow with UXPin Merge. Visit our Merge page for more details and how to request access.
What is Rapid Prototyping?
Rapid prototyping is a prototyping process where designers conduct lots of experiments fast to find the best solution. Team members ignore “nice-to-have” features and focus solely on optimizing UIs for user experience.
Designers use a design system or open-source component library to prototype new products. Using an existing library means design teams don’t have to design from scratch. Instead, they go from paper sketches to rapid high-fidelity prototyping and testing.
React rapid prototyping
React rapid prototyping uses a similar methodology where engineers use component libraries to build a minimum viable product (MVP). Using a React library enables engineers to develop user interfaces with minimal front-end programming from scratch, allowing for faster testing and iteration.
The Challenges of Prototyping in Code
The biggest challenge with prototyping in code is that it’s slow compared to the drag-and-drop design tool workflow (in which you create prototypes with pre-made component.) Even small changes require some code and styling adjustments to achieve the desired result.

Prototyping in code also means engineers must focus on multiple tasks, including writing code, referencing documentation, and UI design. As the prototype grows in complexity, so does the focus and time required to make changes and iterate–the opposite of rapid prototyping.
How TeamPassword Overcame React Rapid Prototyping Challenges
Password manager startup, TeamPassword, struggled with speed-to-market and UI inconsistencies. The small team had no designers, leaving engineers to design, prototype, and test releases using code.
TeamPassword switched to MUI’s open-source React library, which they customized to meet brand and product requirements and hosted in a private repository.
Prototyping and testing using UXPin Merge.
TeamPassword also needed a better method to prototype and test new products. The small startup didn’t have the resources to hire a UX designer, so they looked for a “developer-friendly” design tool. After exploring several options, TeamPassword’s devs discovered UXPin Merge.

Merge allowed TeamPassword to sync their MUI design system repository to UXPin’s design editor, giving engineers a drag-and-drop prototyping environment.
When TeamPassword has completed the prototyping phase, they simply import their design system into the project, add the components, and copy JSX component props from UXPin to develop the final product.
This Merge product development workflow eliminated TeamPassword’s UI consistencies while allowing developers to prototype, test, and iterate significantly faster. Merge’s Version Control enables the team to ship design system changes which automatically sync to UXPin–creating a single source of truth between design and development.
Using UXPin Merge for React Rapid Prototyping
Unlike image-based design tools that generate vector graphics, UXPin renders HTML, CSS, and Javascript, making it possible to import fully interactive React components.
The TeamPassword case study demonstrates how developers can prototype faster using React components without learning the complexities of a design tool. Here’s how you can too.
Choose a design system
If you don’t have a design system, use an open-source library. Some of our favorites include MUI, React-Bootstrap, Ant Design, and Semantic UI. These design systems are themeable and offer vast component libraries, including desktop and mobile UI elements.
Follow UXPin’s documentation for setting up your repository correctly. You can also request access to Merge; our technical support team will help you through the process.
“We had a training session with Jack which was really valuable. We learned how to set up the tool and use the editor. The team also showed us how to adjust components.” – Matthew Chigira, Fullstack Developer at TeamPassword.
Customize your design system
Follow the component library’s documentation to theme your design system, or leave it as is to start prototyping immediately. Save your design system to a private repository so you can sync it to UXPin.
When you make changes to the repo, like adding custom components and templates, Merge will automatically sync these back to UXPin. Version Control allows you to choose when to update projects, and you can always switch to earlier versions of your design system.
Choose an Integration
Bring components to UXPin with one of three integrations:
Once the initial setup is complete for both integrations, Merge will automatically update any repository changes in UXPin and notify all team members of the new version.
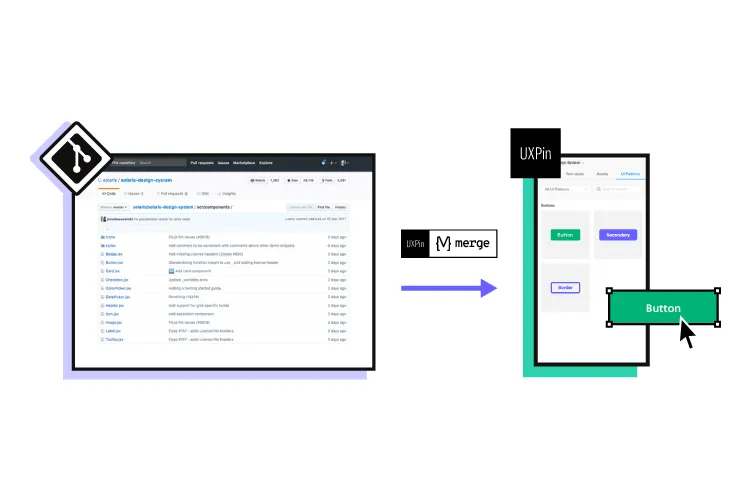
The Git Integration requires some setup to sync correctly with UXPin. UXPin provides a Merge boilerplate that you can download. Running npm install in the root directory will install the dependencies required to run the code from the boilerplate repository (things like React, Webpack, Babel, etc.)
With the Git Integration, you get all the Merge features, including Version Control, Patterns, and Merge component Manager.
Storybook offers an intuitive dashboard for developing design system components in isolation. Devs can document and test components before distributing them to a GitHub repository. Storybook also has collaboration, QA, and approval features, so teams can manage every aspect of the design system and follow governance procedures.
Configuring the Properties Panel
Each component’s React props will appear in UXPin’s Properties Panel, allowing you to make changes defined by the design system, including color, size, state, typography, etc.
Note: only the Git Integration will display React props. If you’re using Storybook, you’ll have to use Args to configure the UXPin Properties Panel.
Get to work
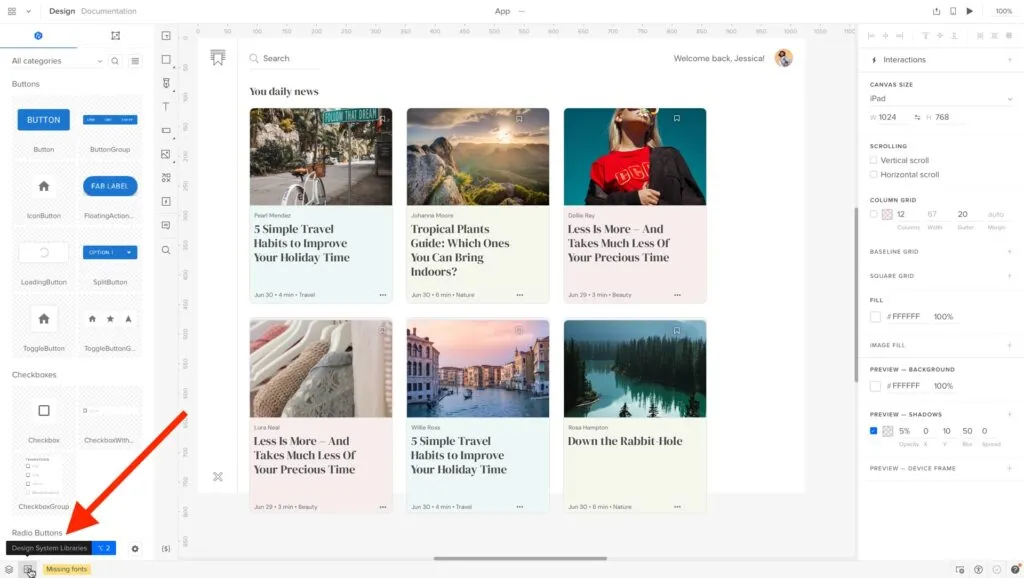
With your components imported to UXPin, it’s time to start prototyping. Drag UI elements from your design system library onto the canvas to build UIs.

With UXPin Patterns, you can create new patterns and templates and save these to your personal Patterns library. Because these UI components already exist in your repository, it’s a matter of combining them during development to replicate the prototype.
You can test prototypes in the browser for websites and web apps or use UXPin Mirror for mobile app testing (available for Android & iOS).
Test and iterate on your prototype in UXPin until you’re satisfied it’s ready for development.
Create-react-app
The final step is converting your UXPin Merge prototype to a React application. YouTuber CoderOne has an excellent tutorial about going from UXPin prototype to development.
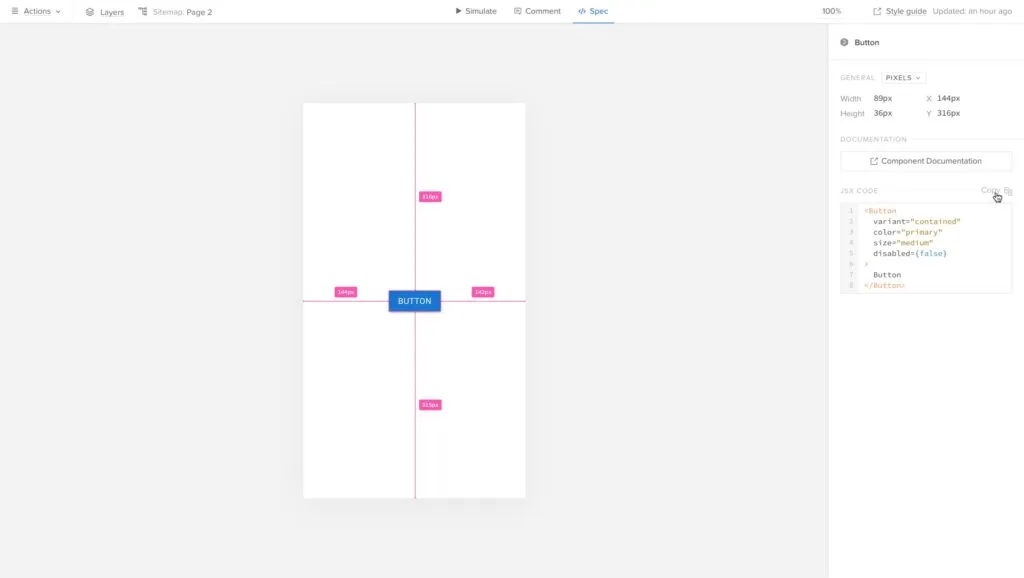
The best way to copy your prototype is in UXPin’s Preview and Share mode. Here you can view the product’s site map, adaptive versions, specifications, and each component’s props. UXPin will even provide a link to the component’s documentation.
Under Spec Mode, UXPin will display each component and its relative props in JSX. Devs can copy/paste this production-ready code to replicate the prototype in their React project.

Switch to UXPin Merge and enjoy the convenience of a prototyping tool with the power of code. Prototype, test, and iterate faster while creating better user experiences. For more details, visit our Merge page.
Source link


Leave a Reply