Early detection of bugs in the software development life cycle (SDLC) can save time and cost. In component testing, the approach involves testing individual components or modules in isolation to verify their functionality and ensure they meet requirements. This type of testing can identify issues early in the development process, reducing the cost and complexity of fixing bugs later on.
Playwright can be used for component testing. It provides a way to automate the testing of individual components of a web application in a real browser environment.
This blog explained:
- How you can Set up the React component.
- How you can test React component with the help of Playwright.
What Is Component Testing?
Component testing is a type of software testing that focuses on testing individual components of a larger system in isolation from the other components. The goal of component testing is to validate that each component behaves as expected and meets the specified requirements and functionality before the components are integrated into the larger system. This approach helps identify and fix issues early in the development process, leading to a more stable and reliable final product.
Playwright for Component Testing?
Playwright is a popular end-to-end testing framework for web applications that allows you to test web components in a real browser environment. It supports the automation of browsers like Chrome, Firefox, and Safari and provides APIs for interacting with pages, elements, and debugging.
Playwright supports component testing, which means that you can write tests to specifically target and verify the behavior of individual UI components within your web application. This makes it a useful tool for ensuring the stability and functionality of your application over time as it evolves.
End-to-End Testing vs. Component Testing
End-to-End (E2E) testing and Component testing are two different types of software testing that focus on different aspects of the application.
End-to-end Testing
End-to-End testing involves testing the entire application from start to finish, simulating real-world usage scenarios to verify that the application works as expected from the user’s perspective. The goal of E2E testing is to identify any integration issues between different components of the application and ensure that the application meets the requirements.
Component Testing
Component testing, on the other hand, focuses on testing individual components or units of the application in isolation. The goal of component testing is to verify that each component works as expected and meets the requirements before integrating it into the larger application.
Below are a few comparisons between End to End Testing vs. Component Testing
Advantages of Component Testing
There are various advantages of Component testing few of which are explained below
- Improved modularity: Component testing ensures that each component of a system works as expected in isolation, leading to improved modularity and easier maintenance.
- Early detection of defects: Component testing enables early detection and correction of defects, reducing the overall cost of fixing bugs.
- Improved reliability: By thoroughly testing each component, the overall reliability of the system is increased.
- Faster development: Component testing enables developers to test individual parts of a system quickly, leading to faster development and reduced overall development time.
- Enhanced collaboration: Component testing allows different teams or developers to work on separate components of a system, enhancing collaboration and reducing the likelihood of conflicts.
- Isolation: By testing individual components in isolation, developers can identify and fix issues more easily, rather than having to investigate and debug complex interactions between multiple components.
- Faster development: Component testing enables developers to test individual parts of a system quickly, leading to faster development and reduced overall development time.
- Faster debugging: Component testing allows developers to quickly identify the source of an issue rather than having to search through the entire system to find it.
- Better test coverage: By testing individual components, developers can ensure that every part of the system is thoroughly tested, which can help to improve overall test coverage.
Pre-request
For Demo purposes, we are using the Counter react component and another component you will see later in the DEMO.
Set Up React App and Install Playwright
This section describes how to set up React Component, Install Playwright and integrate it with React before you can create component tests.
Step 1
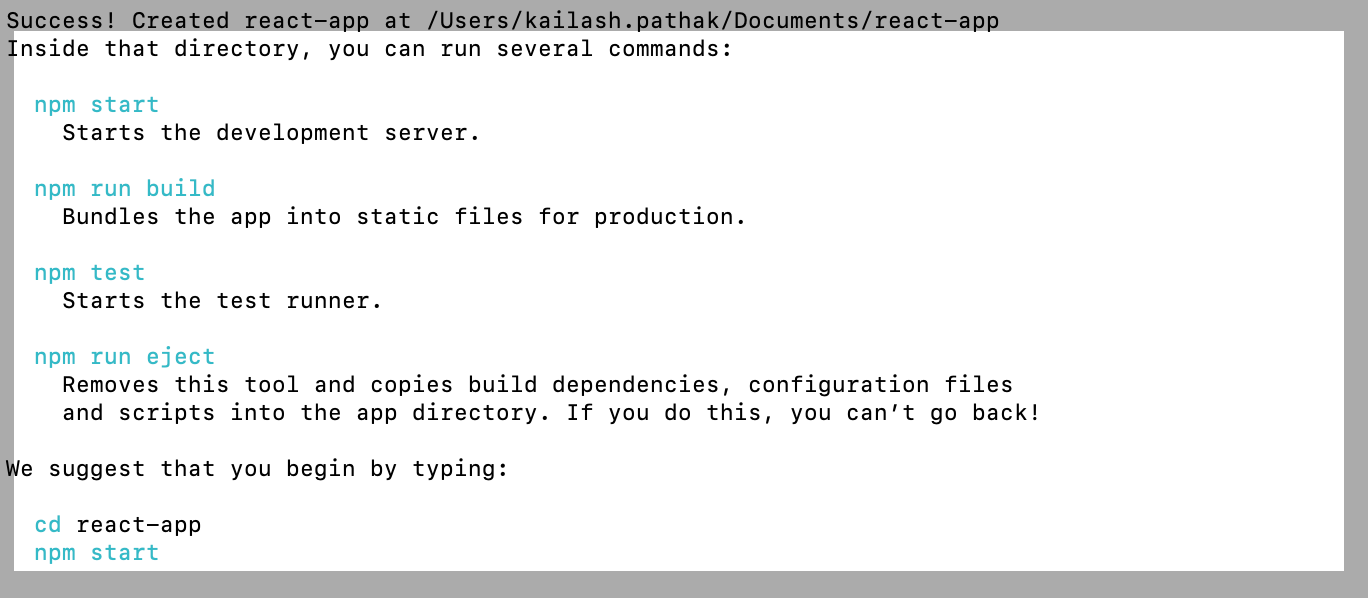
Run the below command in the terminal.
npx create-react-app react-appAfter running the above command, look like the attached below.
Step 2
Go into the root directory and run the below command to launch React app.
After running the command, the ‘npm start’ react app with the port is launched.
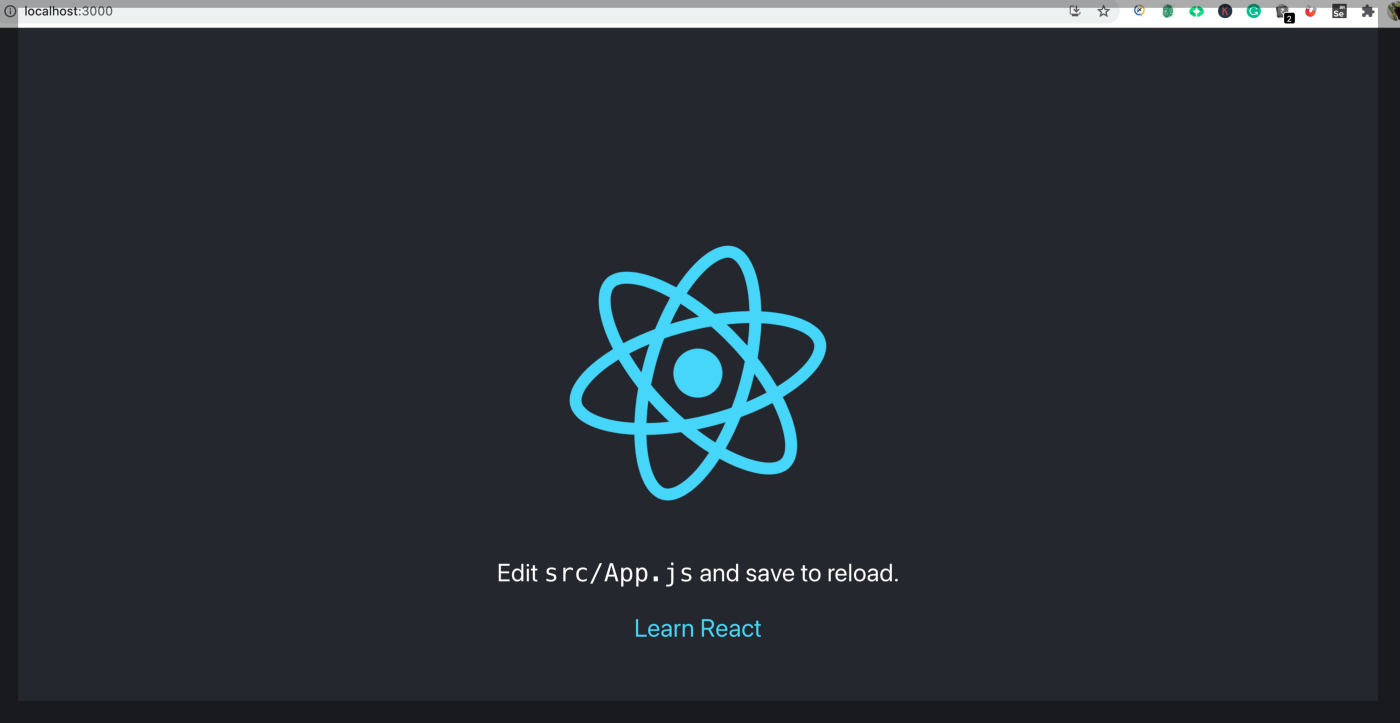
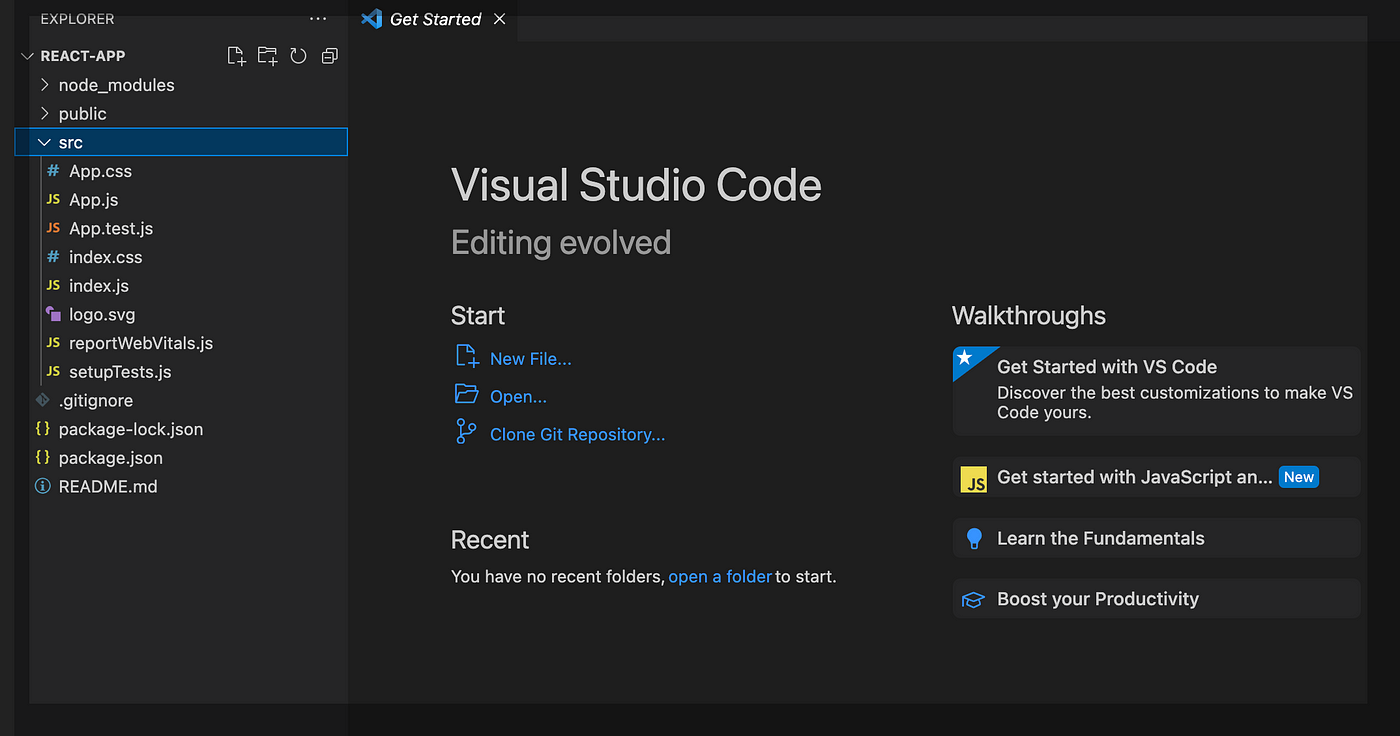
As you can see in your Visual Studio Code, the project has been created successfully. Let’s see how it looks, like the one attached below.
Step 3
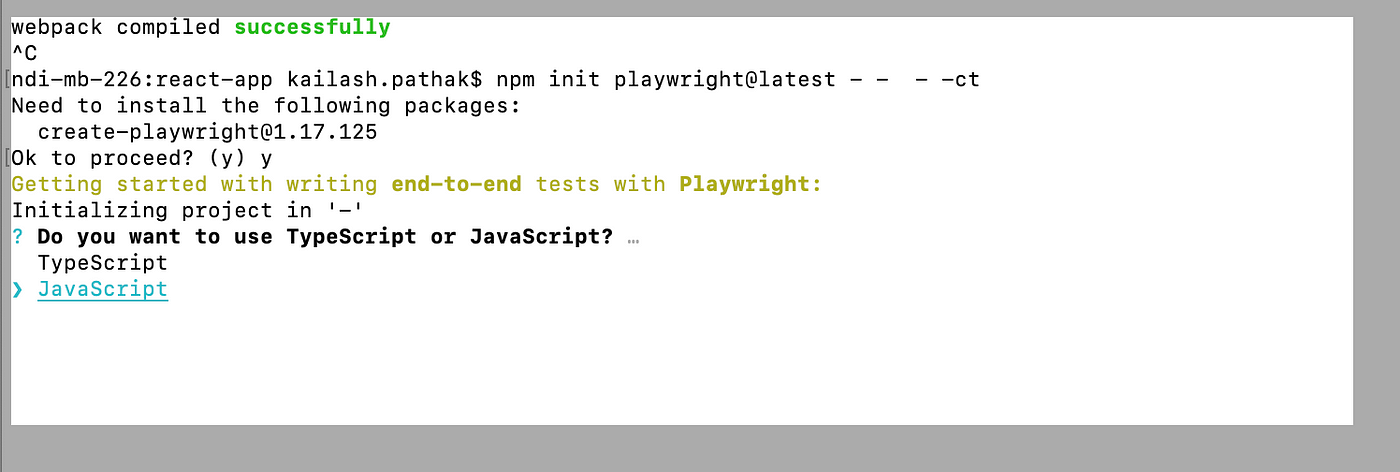
You can see that application is started; let’s see how we can get started with the test project for Playwright component testing.
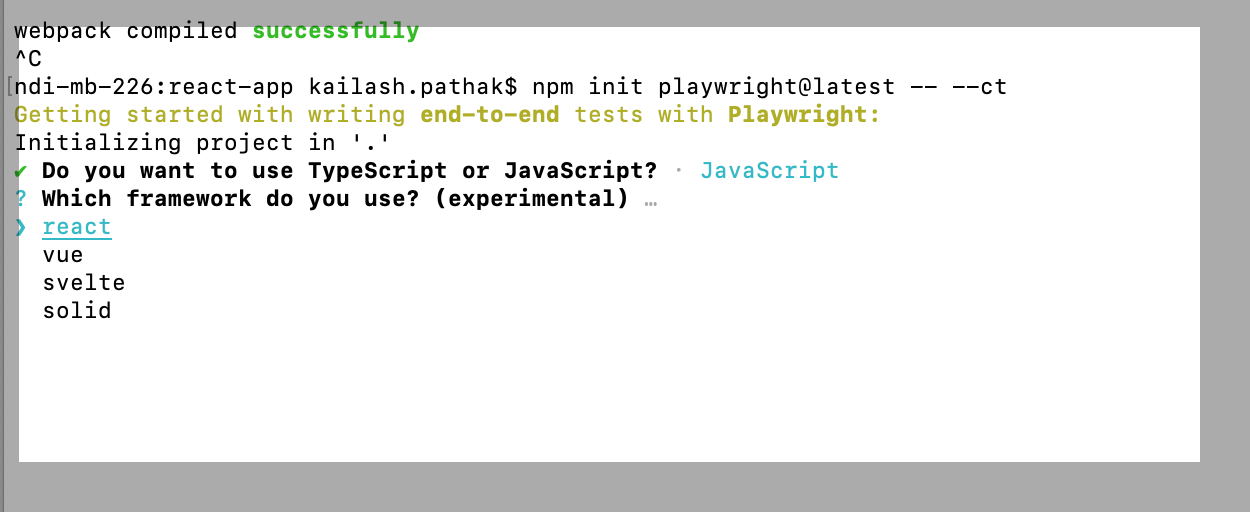
Run the below command to <>.
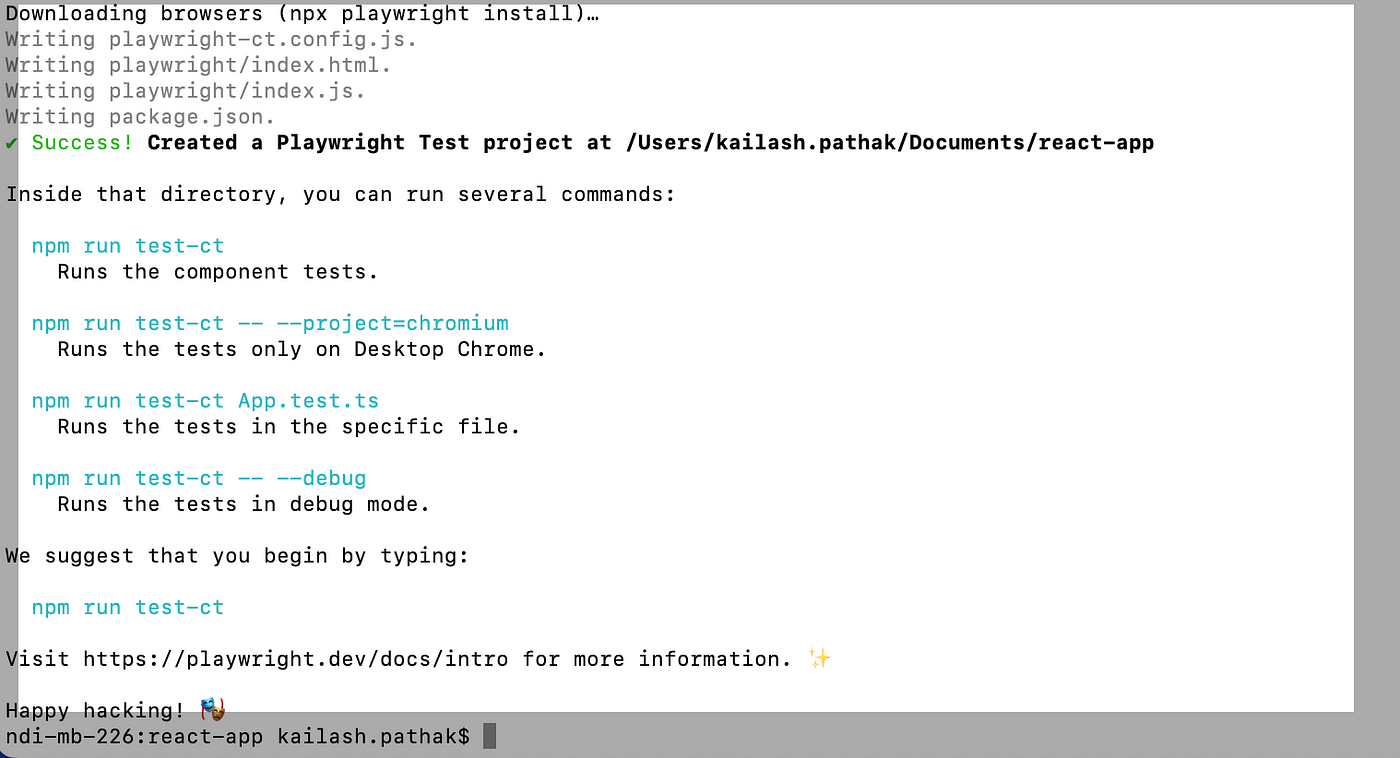
npm init playwright@latest -- --ctOnce the above command is done below options are displayed to install. Select JavaScript.
Once React framework is installed successfully, you can see the below screenshot.
Step 4
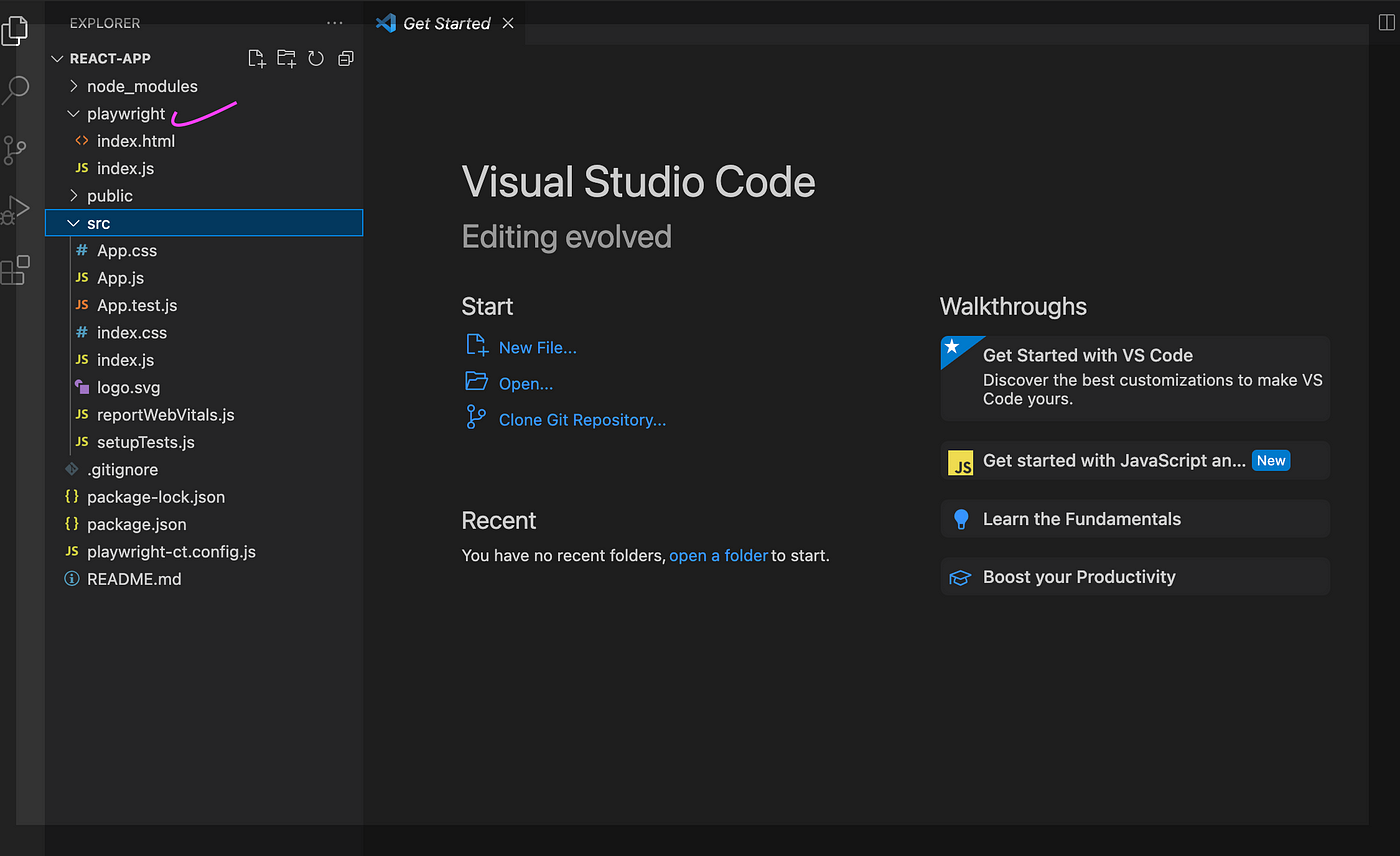
Open the VS code, and you can see Playwright is installed.
Testing React Component Using Playwright
Example 1
Let’s Write First Component Test and Test With Playwright
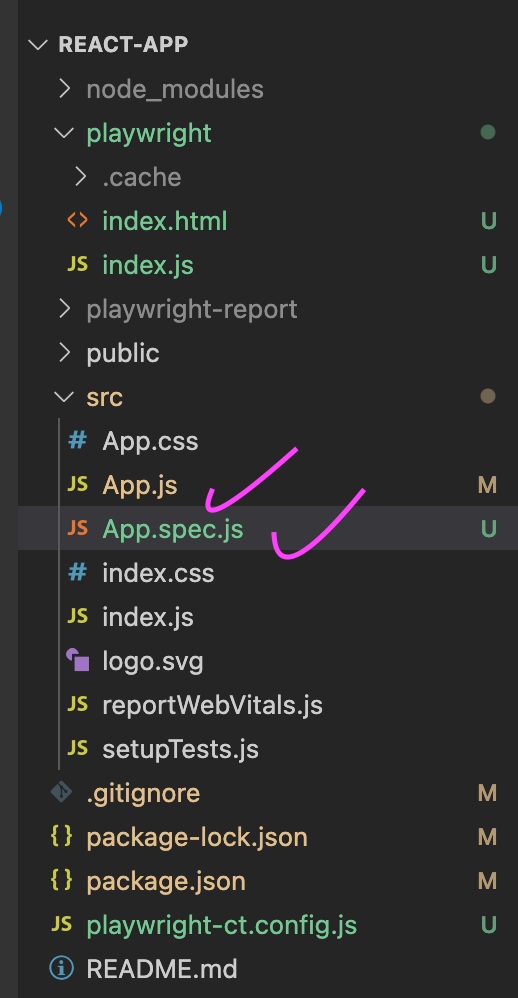
Let’s update the name of the existing file src/App.test.js -> App.spec.js and Create an App.js file.
Write the below code under App.js.
import logo from './logo.svg';
import './App.css';

function App() {
  return (
    <div className="App">
      <header className="App-header">
        <img src={logo} className="App-logo" alt="logo" />
        <p>
          Edit <code>src/App.js</code> and save to reload.
        </p>
        <a
          className="App-link"
          href="https://reactjs.org"
          target="_blank"
          rel="noopener noreferrer"
        >
          Learn React
        </a>
      </header>
    </div>

  );
}

export default App;
Write the below component test cases under App.spec.js.
import { test, expect } from '@playwright/experimental-ct-react';
import App from './App';
test.use({ viewport: { width: 500, height: 500 } });
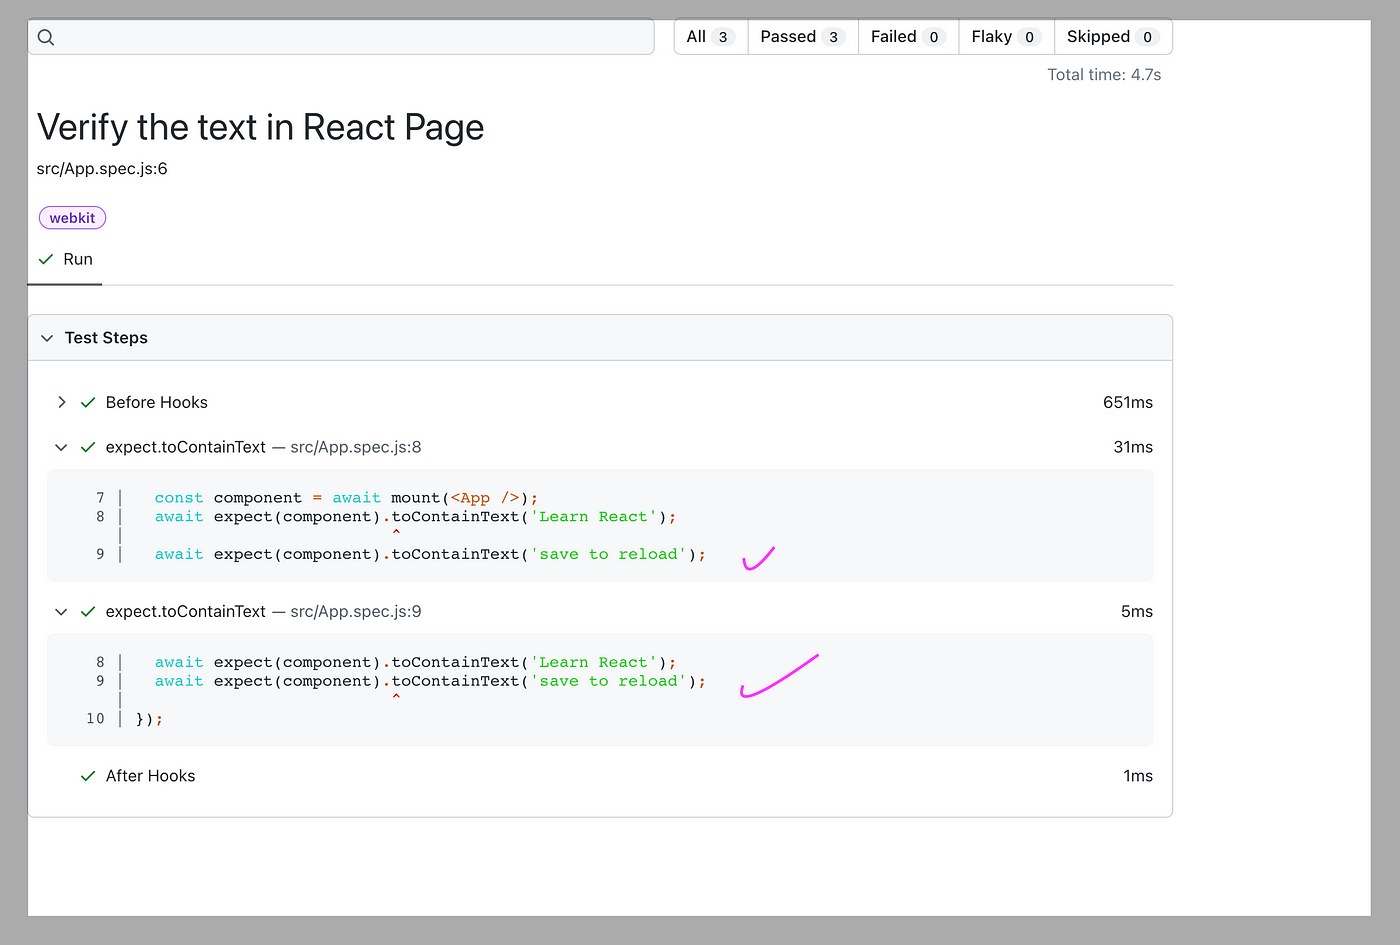
test('Verify the text in React Page ', async ({ mount }) => {
const component = await mount(<App />);
await expect(component).toContainText('Learn React');
await expect(component).toContainText('save to reload');
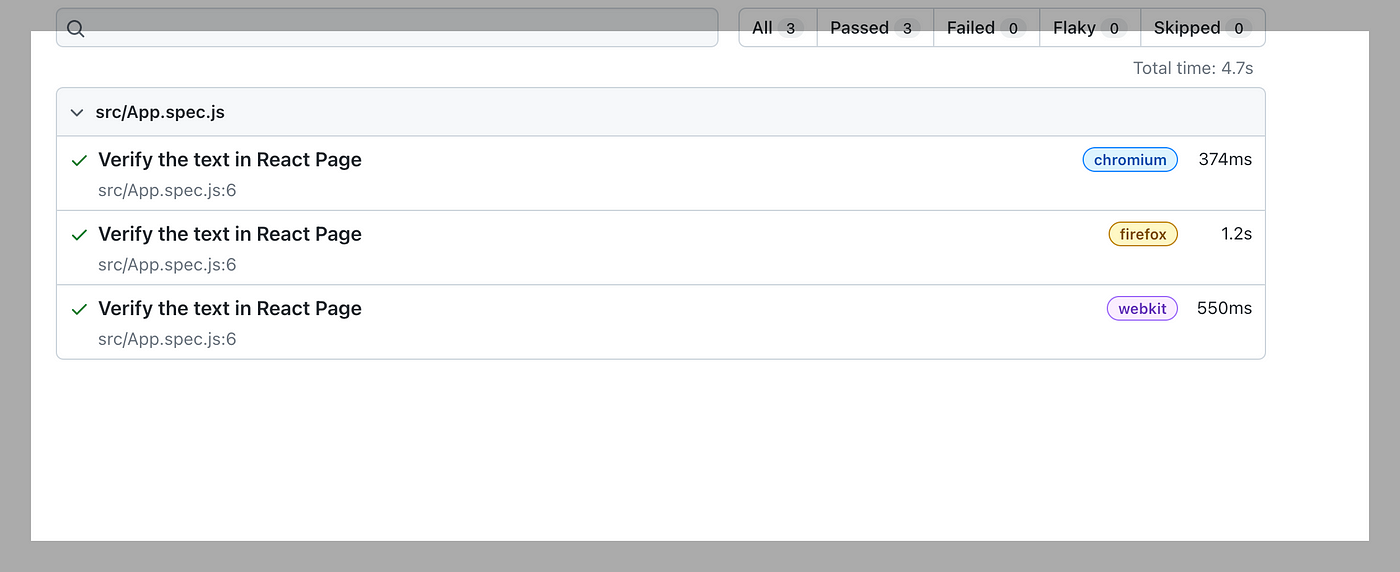
});Let’s run the test case using the below command.
After running the above command, let’s run the command given below.
npx playwright show-reportOutput
After running the above command below report display where you can see two texts, ‘Learn React’ And ‘save to reload.’
Example 2
Now Let’s take another example to test Counter Component using Playwright.
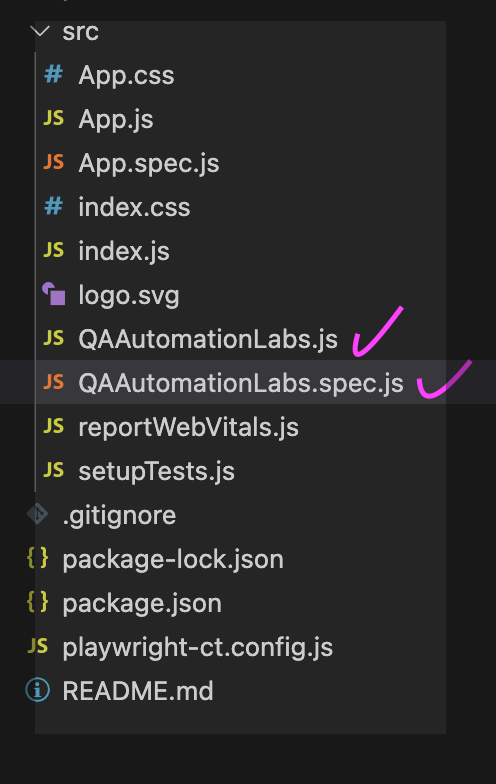
Let’s give the name of the js file as ‘QAAutomationLabs.js’ and the spec name ‘QAAutomationLabs.spec.js.’
Scenario Covered:
- Scenario for when we do the increment by clicking on the (+) icon.
- Scenario for when we do the decrement by clicking on the (-) icon.
Create a New Component under the src folder.
The QAAutomationLabs.js file is attached below.
import { useState } from 'react'
export default function Counter({ initial = 0 }) {
    const [count, setCount] = useState(initial)

    return (
        <div style={{
            padding: 30
        }}>
            <button style={{ color: "black", backgroundColor: "green", margin: 10 }} aria-label="decrement" onClick={() => setCount(count - 1)}>
                -
            </button>
            <span data-cy="counter">{count}</span>
            <button style={{ color: "black", backgroundColor: "green", margin: 10 }} aria-label="increment" onClick={() => setCount(count + 1)}>
                +
            </button>
        </div>
    )
}
QAAutomationLabs.spec.js is attached below.
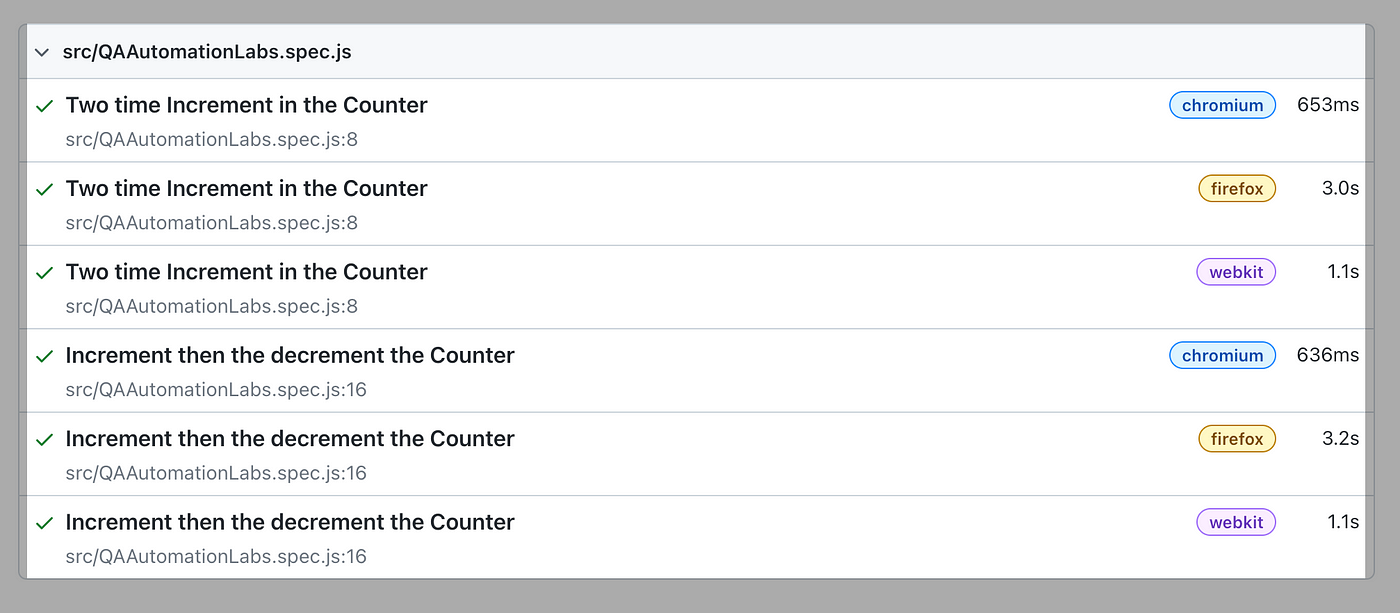
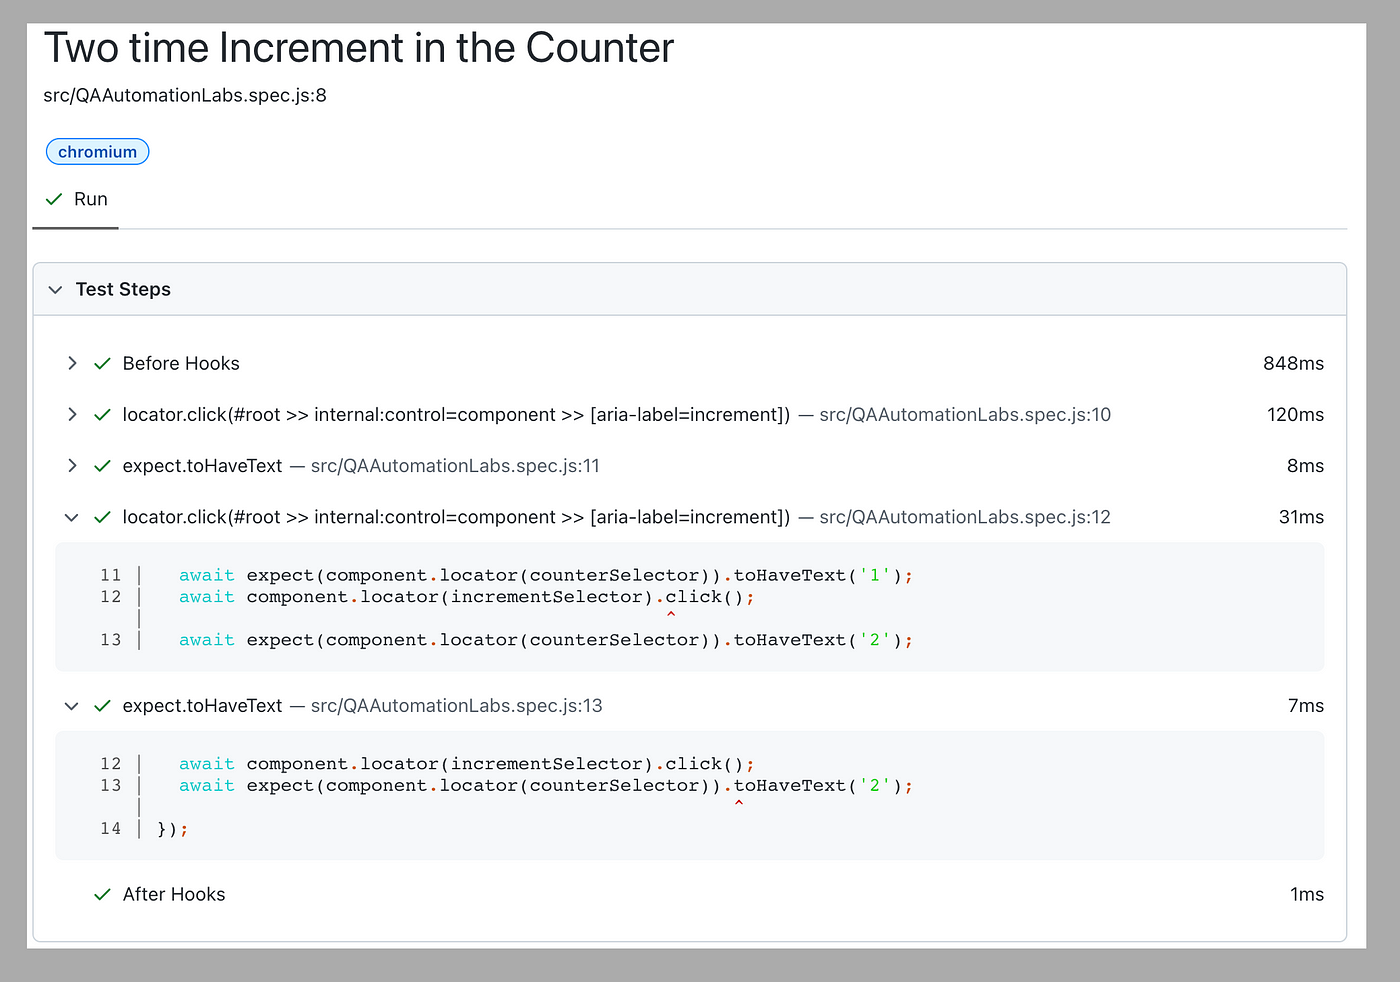
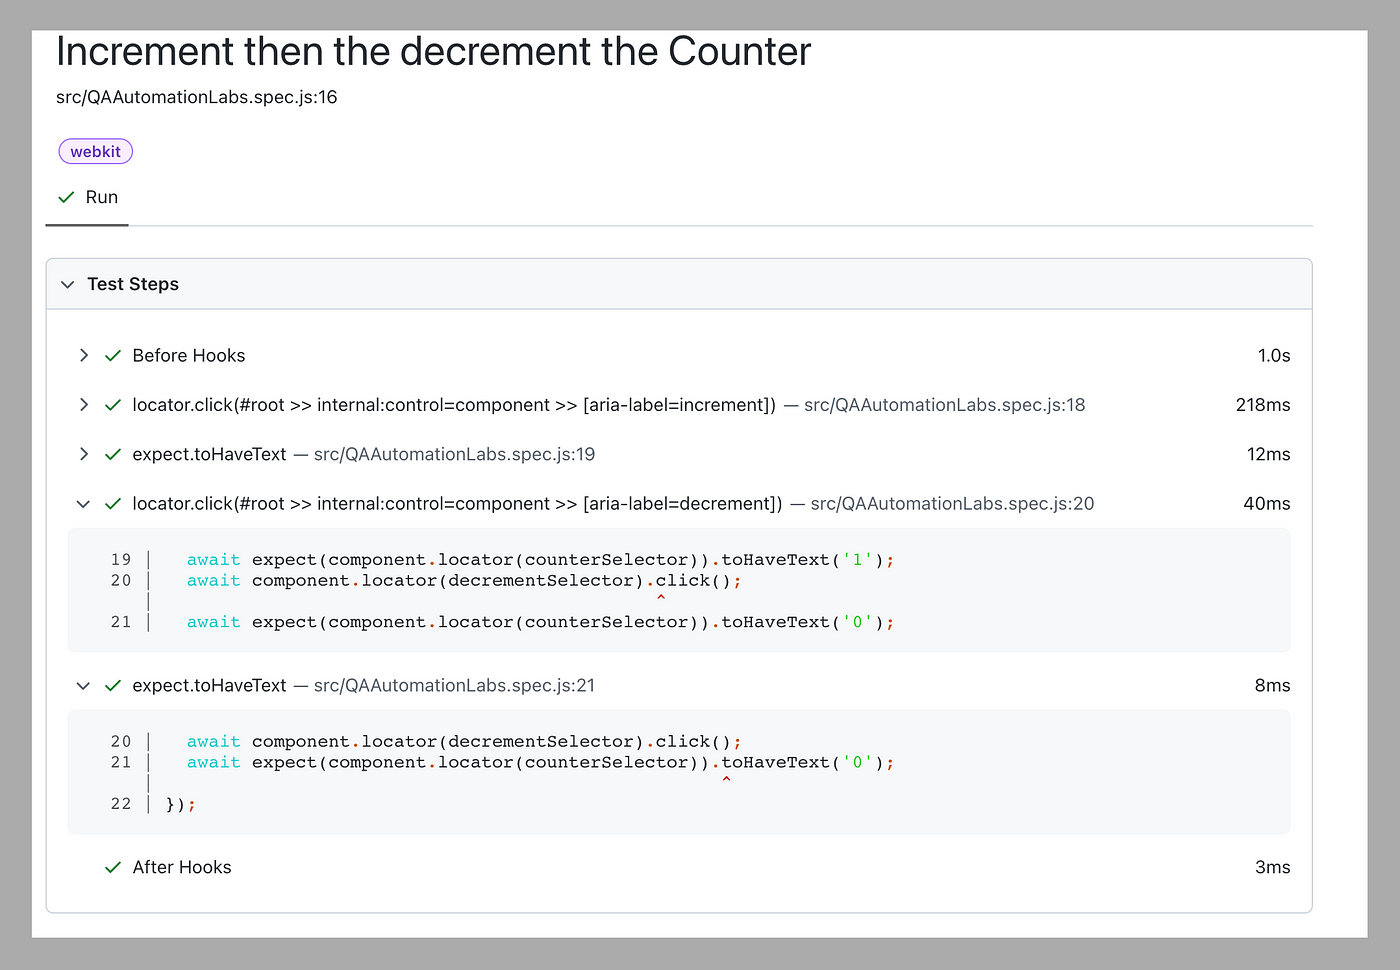
In the below test case, we are covering two scenarios. First ‘Two time Increment in the Counter.’ The second scenario, ‘Increment then the decrement the Counter.’
const component = await mount(
await component.locator(incrementSelector).click();
await expect(component.locator(counterSelector)).toHaveText(‘1’);
await component.locator(incrementSelector).click();
await expect(component.locator(counterSelector)).toHaveText(‘2’);
});
test(‘Increment then the decrement the Counter ‘, async ({ mount }) => {
const component = await mount(
await component.locator(incrementSelector).click();
await expect(component.locator(counterSelector)).toHaveText(‘1’);
await component.locator(decrementSelector).click();
await expect(component.locator(counterSelector)).toHaveText(‘0’);
});” data-lang=”text/javascript”>
import { test, expect } from '@playwright/experimental-ct-react';
import App from './QAAutomationLabs';
const counterSelector="[data-cy="counter"]";
  const incrementSelector = "[aria-label=increment]";
  const decrementSelector = "[aria-label=decrement]";
test.use({ viewport: { width: 500, height: 500 } });

test('Two time Increment in the Counter ', async ({ mount }) => {
  const component = await mount(<App />);
  await component.locator(incrementSelector).click();
  await expect(component.locator(counterSelector)).toHaveText('1');
  await component.locator(incrementSelector).click();
  await expect(component.locator(counterSelector)).toHaveText('2');
});

test('Increment then the decrement the Counter ', async ({ mount }) => {
  const component = await mount(<App />);
  await component.locator(incrementSelector).click();
  await expect(component.locator(counterSelector)).toHaveText('1');
  await component.locator(decrementSelector).click();
  await expect(component.locator(counterSelector)).toHaveText('0');
});
Let’s run the test case using the below command.
After running the above command, let’s run the command given below.
npx playwright show-reportOutput
After running the above command, the below report displays.
Wrap-up
Component testing, along with Playwright, is beneficial for several reasons it allows for early detection of bugs, improves code quality, increases confidence in code changes, facilitates refactoring, simplifies integration testing, and is cost-effective.
Additionally, by writing tests for individual components, developers are forced to think about the design and functionality of their code, which can lead to better code quality and maintainability.
Source link