
When discussing server-side rendering (SSR), frameworks like Next.js, Remix, SvelteKit, and Nuxt.js often come to mind as they offer inbuilt SSR functionality. However, it is important to recognize that client-side rendering frameworks, such as React and Vue.js, also require SSR in order to create optimized and SEO-friendly applications.
Integrating SSR into an existing application can be a difficult task, which may explain why this is not a more widely discussed topic. In this article, we’ll look at the pros and cons of server-side rendering and explore the process of incorporating it into a preexisting Vue 3 application using Vite, Vue’s default bundler.
Jump ahead:
Prerequisites
To follow along with the examples in this article, it is recommended you have the following:
- A foundational understanding of Vue 3
- Working knowledge of Express.js
- Node.js installed on your machine
What is SSR?
Server-side rendering, or SSR, refers to the process of generating and delivering fully rendered pages on the server rather than in the client’s browser. This approach is used for client-side JavaScript applications, allowing for faster loading times and better search engine optimization.
The rise of SSR can be attributed to the increasing popularity of single-page applications (SPAs). SPAs are a web development architecture that provides an alternative to traditional, multi-page applications. They enable the creation of client-side applications that can dynamically update parts of the user interface without requiring a full page reload, thanks to the use of asynchronous javascript. SSR is a solution that aims to enhance the performance and SEO of these types of applications.
Today, many single-page applications are constructed using popular UI frameworks like React, Vue.js, and Angular. These SPAs are composed of a single HTML page that retrieves data from the server asynchronously. This allows for real-time updates to be visible to the user without needing a full page refresh.
SPA architecture is an ambitious attempt to create web applications similar to native mobile and desktop applications. However, because the browser has to generate all aspects of the app, including the user interface, data, and functionality, at once during the initial load, SPAs tend to be slower. This is because an SPA’s HTML page includes an empty root element that is populated by the browser after it downloads and processes the JavaScript bundle containing all other elements on the page. This approach is known as client-side rendering (CSR).
Here’s an example of what the SPA’s HTML page looks like:
<!DOCTYPE html>
<html lang="en">
  <head>
    <meta charset="UTF-8">
    <link rel="icon" href="https://blog.logrocket.com/favicon.ico">
    <meta name="viewport" content="width=device-width, initial-scale=1.0">
    <title>Vite App</title>
  </head>
  <body>
    <div id="app"></div>
    <script type="module" src="/src/main.js"></script>
  </body>
</html>
Because the browser must download and execute the entire application before any content is displayed, initial page load times are often slow. This results in a poor user experience as users may see a blank screen or loading spinner for an extended period. Additionally, slow page loading can negatively impact the website’s SEO performance.
In contrast, SSR generates the static HTML markup on the server, allowing the browser to receive a fully rendered page during the initial load. This is achieved using a backend runtime such as Node.js to execute JavaScript code and construct the user interface.
Here’s an example showing how an HTML file can receive content from a server-side rendered page:
<!DOCTYPE html>
<html lang="en">
  <head>
    <meta charset="UTF-8" />
    <meta name="viewport" content="width=device-width, initial-scale=1.0" />
    <title>Vite App</title>
The HTML content within the app element is generated on the server and then sent to the client on initial load.
As previously mentioned, the Vue framework enables the creation of client-side applications, which by default, renders components that generate and manipulate the DOM in the browser. It is also possible to render the same components on the server, transmit them directly to the browser, and subsequently hydrate the static markup into a fully interactive app on the client side.
We’ll explore how to accomplish this later in this article.
Why add SSR to your Vue 3 app?
There are several reasons why you might choose to incorporate server-side rendering into an existing Vue.js 3 application:
- Improved performance: SSR can significantly improve the initial load time of an application by generating the static HTML markup on the server, thereby allowing the browser to receive a fully rendered page during the initial load
- Enhanced SEO: Search engines have a hard time indexing JavaScript-heavy applications. With SSR, the initial render of the page is done on the server, and search engines can easily read the HTML
- Improved accessibility: SSR can make web apps more accessible for users with slow internet connections or those using assistive technologies
- Better user experience: Server-side rendering can ensure that users who have JavaScript disabled or blocked in their browser still see the same content and layout as users with JavaScript enabled
- Backend integration: SSR allows for easy integration with backend systems and services
Considerations and tradeoffs
If you’re creating a new Vue.js 3 application and server-side rendering is of high importance, you can use a modern JavaScript meta-framework such as Nuxt.js, which provides inbuilt server-side rendering. Another option is to use the official SSR setup provided by the Vue core team.
However, if you have an existing Vue application and migrating to Nuxt.js is not an option, it’s worth noting that adding SSR to your app may come with additional complexity and development effort. It is important to evaluate the tradeoffs of adding SSR before embarking on that path. Here are some considerations:
- Maintenance: An SSR application may require more maintenance than a traditional client-side rendered application
- Performance: Server-side rendering can improve the initial load time, but it can also introduce additional latency and complexity to the application. SSR may also increase the codebase’s complexity and require additional server resources
- Browser compatibility: Some older browsers may not support certain features or technologies used in an SSR implementation, which may require additional testing and compatibility workarounds
- Security: SSR may introduce additional security concerns. It requires the application to run on the server, which can be vulnerable to different types of cyber attacks
- State management: SSR requires a different approach to state management compared to a traditional SPA; implementation can be challenging and require additional effort
Getting started
For this tutorial, I will assume that you already have an existing Vue.js application set up. Therefore, we will start by installing the necessary dependencies required for the tutorial.
If you do not have a project set up and wish to follow along with the examples in this article, you can bootstrap a Vue 3 project using the following command:
npm init [email protected]
The Vue CLI installs most of the necessary dependencies (e.g., vue-router, Pinia, and vue-jsx) for a Vue project by default, so you’ll only need to install Express to begin.
To do this, open your machine’s terminal, cd to your project folder, and run the following command:
npm i express
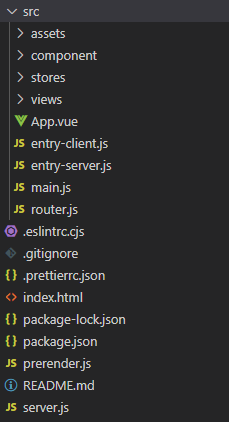
Folder structure
To integrate SSR into our application, we’ll need to perform the following steps:
- Adjust the build script within
package.jsonto produce a client and SSR build and generate preload directives - Create a server using
express - Develop an entry point for both the server and the client
This will require making changes to the file structure and adding new files to the project. A typical SSR application has the following directory structure:
- index.html
- server.js
- src/
 - main.js
 - entry-client.js
 - entry-server.js
As you may have observed, this is the standard folder structure of a Vue project template, with the exception of a few additional files such as server.js , entry-client.js , and entry-server.js.
These files will be used to establish the SSR functionality in the application. The server.js file will act as the primary server for the app. The entry-server.js file will contain the render function responsible for generating content from the server. While the entry-client.js file will be responsible for rendering the app using the SSR API and will also handle the hydration process of the application.
Add these files to your project directory if they are not already present. The placement of the files isn’t essential but it’s advisable to place the server.js file in the root directory, and the entry files, entry-server.js and entry-client.js, within the src directory:
Setting up the client files
Before setting up the server-side files, we’ll need to establish the client-side files such as the router.js , main.js, and index.html files.
main.js
The main.js file usually contains a function for utilizing the application, and its content typically appears similar to the sample code shown below:
import { createApp } from "vue";
import { createPinia } from "pinia";
import App from "./App.vue";
import router from "./router";
import "./assets/main.css";
const app = createApp(App);
app.use(createPinia());
app.use(router);
app.mount("#app");
However, in the context of this application, we will be using the createSSRApp and createRouter functions to create an SSR version of the application and establish a router instance.
Open the main.js file and replace the above code with the following:
//main.js
import { createPinia } from "pinia";
import { createSSRApp } from "vue";
import App from "./App.vue";
import { createRouter } from "./router";

export function createApp() {
 const app = createSSRApp(App);
 const pinia = createPinia();
 app.use(pinia);
 const router = createRouter();
 app.use(router);
 return { app, router };
}
router.js
To configure the router for our server-side rendered Vue application, we simply need to utilize the createMemoryHistory() function for the history on the server side, and createWebHistory() on the client side. We’ll also need to create routes for the pages within our app and register them using the createRouter function:
//router.js

import {
  createMemoryHistory,
  createRouter as _createRouter,
  createWebHistory,
} from "vue-router";

const routes = [
  {
    path: "https://blog.logrocket.com/",
    component: () => import("../pages/Home.vue"),
  },
  {
    path: "/welcome",
    component: () => import("../pages/Welcome.vue"),
  },
];

export const createRouter = () =>
  _createRouter({
    history: import.meta.env.SSR
      ? createMemoryHistory("https://blog.logrocket.com/")
      : createWebHistory("https://blog.logrocket.com/"),
    routes,
  });
Here, we’re creating routes for the home and welcome pages files within a pages folder.
More great articles from LogRocket:
index.html
All that needs to be done within the index.html file is to replace the default entry target, main.js, with the client entry file:
//index.html

<!DOCTYPE html>
<html lang="en">
  <head>
    <meta charset="UTF-8" />
    <meta name="viewport" content="width=device-width, initial-scale=1.0" />
    <title>Vite App</title>
    <!--preload-links-->
  </head>
  <body>
    <div id="app"><!--app-html--></div>
    <script type="module" src="https://blog.logrocket.com/src/entry-client.js"></script>
  </body>
</html>
N.B., the entry-client.js is yet to be created, we’ll learn how to do that a little later in this article
Configuring the package.json file
We’ll need to make the necessary adjustments in the package.json file to enable the SSR functionality we plan to implement in the project. Specifically, we’ll customize the scripts in the package.json file to include options for building a server-side rendered version as well as a client-side rendered version for production and generating preload directives.
To do this, open the package.json file and replace the existing scripts with the following:
//package.json

"scripts": {
    "dev": "node server",
    "build": "npm run build:client && npm run build:server",
    "build:noExternal": "npm run build:client && npm run build:server:noExternal",
    "build:client": "vite build --ssrManifest --outDir dist/client",
    "build:server": "vite build --ssr src/entry-server.js --outDir dist/server",
    "build:server:noExternal": "vite build --config vite.config.noexternal.js --ssr src/entry-server.js --outDir dist/server",
    "generate": "vite build --ssrManifest --outDir dist/static && npm run build:server && node prerender",
    "serve": "NODE_ENV=production node server",
    "debug": "node --inspect-brk server"
  },
You may also want to add a "type": "module" property to the package.json file to prevent Node from throwing a “Cannot use import statement outside a module” error:
"type": "module",
Setting up the server with Express.js
The Node.js server will handle the rendering of the app by converting it into a string, injecting the string into the index.html file, and replacing the placeholder within the app div with the rendered content. We will go into more detail on this process in the following sections.
For now, open the server.js file and import the following packages:
import fs from "node:fs";
import path from "node:path";
import { fileURLToPath } from "node:url";
import express from "express";
In this step, we’re utilizing express to create the server, the path to handle file paths, the fileUrlToPath to convert file URLs to file paths, and the fs package to read the index.html file.
Next, add the following code below the previous imports:
const isTest = process.env.VITEST;

export async function createServer(
  root = process.cwd(),
  isProd = process.env.NODE_ENV === "production",
  hmrPort
) {
  const __dirname = path.dirname(fileURLToPath(import.meta.url));
  const resolve = (p) => path.resolve(__dirname, p);

  const indexProd = isProd
    ? fs.readFileSync(resolve("dist/client/index.html"), "utf-8")
    : "";

  const manifest = isProd
    ? JSON.parse(
        fs.readFileSync(resolve("dist/client/ssr-manifest.json"), "utf-8")
      )
    : {};

  const app = express();

  /**
   * @type {import('vite').ViteDevServer}
   */
  let vite;
  if (!isProd) {
    vite = await (
      await import("vite")
    ).createServer({
      base: "https://blog.logrocket.com/",
      root,
      logLevel: isTest ? "error" : "info",
      server: {
        middlewareMode: true,
        watch: {
          usePolling: true,
          interval: 100,
        },
        hmr: {
          port: hmrPort,
        },
      },
      appType: "custom",
    });
    app.use(vite.middlewares);
  } else {
    app.use((await import("compression")).default());
    app.use(
      "https://blog.logrocket.com/",
      (await import("serve-static")).default(resolve("dist/client"), {
        index: false,
      })
    );
  }

  app.use("*", async (req, res) => {
    try {
      const url = req.originalUrl;

      let template, render;
      if (!isProd) {
        template = fs.readFileSync(resolve("index.html"), "utf-8");
        template = await vite.transformIndexHtml(url, template);
        render = (await vite.ssrLoadModule("/src/entry-server.js")).render;
      } else {
        template = indexProd;
        render = (await import("./dist/server/entry-server.js")).render;
      }

      const [appHtml, preloadLinks] = await render(url, manifest);

      const html = template
        .replace(`<!--preload-links-->`, preloadLinks)
        .replace(`<!--app-html-->`, appHtml);

      res.status(200).set({ "Content-Type": "text/html" }).end(html);
    } catch (e) {
      vite && vite.ssrFixStacktrace(e);
      console.log(e.stack);
      res.status(500).end(e.stack);
    }
  });

  return { app, vite };
}

if (!isTest) {
  createServer().then(({ app }) =>
    app.listen(6173, () => {
      console.log("http://localhost:6173");
    })
  );
}
Here, we’re configuring the Vite server by reading the index.html file, utilizing the render function from the entry-server.js file, passing in the initial URL, in this case, the homepage, and finally, replacing the <!--app-html--> placeholder with the rendered content.
The createServer function is responsible for the entirety of the server’s logic. The initial portions of the function are used to separate Vite from the production environment and utilize it in middleware mode, giving us complete control over the main server:
let vite;
  if (!isProd) {
    vite = await (
      await import("vite")
    ).createServer({
      base: "https://blog.logrocket.com/",
      root,
      logLevel: isTest ? "error" : "info",
      server: {
        middlewareMode: true,
        watch: {
          usePolling: true,
          interval: 100,
        },
        hmr: {
          port: hmrPort,
        },
      },
      appType: "custom",
    });
    // use vite's connect instance as middleware
    app.use(vite.middlewares);
  } else {
    app.use((await import("compression")).default());
    app.use(
      "https://blog.logrocket.com/",
      (await import("serve-static")).default(resolve("dist/client"), {
        index: false,
      })
    );
  }
Here, the if statement checks if the app is not in production mode before executing the code block within it. This block of code creates a ViteDevServer instance in middleware mode and configures the app type as custom, disables Vite’s inbuilt serving logic, and allows the server to take over handling the requests.
Another significant portion of the server is the implementation of the * handler, which is responsible for serving server-rendered HTML. This is achieved by reading the index.html file, calling the render function from the entry-server.js file, passing in the current URL, and then replacing the <!--app-html--> placeholder with the rendered content. This ensures that the server can serve the app as a fully-rendered HTML string rather than just the client-side JavaScript bundle:
app.use("*", async (req, res) => {
    try {
      const url = req.originalUrl;

      let template, render;
      if (!isProd) {
        template = fs.readFileSync(resolve("index.html"), "utf-8");
        template = await vite.transformIndexHtml(url, template);
        render = (await vite.ssrLoadModule("/src/entry-server.js")).render;
      } else {
        template = indexProd;
        render = (await import("./dist/server/entry-server.js")).render;
      }

      const [appHtml, preloadLinks] = await render(url, manifest);

      const html = template
        .replace(`<!--preload-links-->`, preloadLinks)
        .replace(`<!--app-html-->`, appHtml);

      res.status(200).set({ "Content-Type": "text/html" }).end(html);
    } catch (e) {
      vite && vite.ssrFixStacktrace(e);
      console.log(e.stack);
      res.status(500).end(e.stack);
    }
  });

  return { app, vite };
}
What the else block does is simple. It assigns the production index.html file to the template variable and imports the entry-server.js file in the production environment, assigning it to the render variable. This will be used to render the server-side version of the app and inject it into the index.html file in place of the placeholder.
Note that the dist/client/ path referenced in the code leads to the asset links in the client build. Therefore, files not within the conditional blocks are served from dist/client/.
Beyond the conditional block, we’re passing the root path (url) and manifest to the render function and destructuring the appHtml and preloadLinks from it:
const [appHtml, preloadLinks] = await render(url, manifest);
The manifest.json file, generated using the --ssrManifest flag we added to the build:client script in the package.json file earlier, will be used by the render function to identify the available client-side assets.
Finally, the rendered HTML and preload links are injected into the placeholders within the index.html file:
 const html = template
 .replace(`<!--preload-links-->`, preloadLinks)
 .replace(`<!--app-html-->`, appHtml);

 res.status(200).set({ "Content-Type": "text/html" }).end(html);
Now that the server is set up; we can proceed to create and populate the entry-client.js and entry-server.js files before building and serving our app.
Configuring the entry files
The entry-client.js, and entry-server.js files are used to set up the SSR functionality in our application. The entry-server.js file contains the logic for creating an instance of the Vue app for SSR using the createSSRApp API and rendering the app to a string using the renderToString API. The resulting string is then sent to the browser to be hydrated and rendered on the client side. The entry-client.js file is responsible for initializing the application’s hydration process and creating the app’s client-side instance using the SSR API.
entry-server.js
In the entry-server.js file, we need to create a render function that initializes a Vue instance, configures necessary middleware, such as the router and store, and takes in a URL path as an argument. The function should then export this instance for use by the server to render the app to a string for server-side rendering.
To begin, navigate to the entry-server.js file within the src folder and add the following code:
//server.js

import { basename } from "node:path";
import { renderToString } from "vue/server-renderer";
import { createApp } from "./main";

export async function render(url, manifest) {
  const { app, router } = createApp();

  await router.push(url);
  await router.isReady();

  const ctx = {};
  const html = await renderToString(app, ctx);

  const preloadLinks = renderPreloadLinks(ctx.modules, manifest);
  return [html, preloadLinks];
}

function renderPreloadLinks(modules, manifest) {
  let links = "";
  const seen = new Set();
  modules.forEach((id) => {
    const files = manifest[id];
    if (files) {
      files.forEach((file) => {
        if (!seen.has(file)) {
          seen.add(file);
          const filename = basename(file);
          if (manifest[filename]) {
            for (const depFile of manifest[filename]) {
              links += renderPreloadLink(depFile);
              seen.add(depFile);
            }
          }
          links += renderPreloadLink(file);
        }
      });
    }
  });
  return links;
}

function renderPreloadLink(file) {
  if (file.endsWith(".js")) {
    return `<link rel="modulepreload" crossorigin href="https://blog.logrocket.com/adding-ssr-existing-vue-3-app/${file}">`;
  } else if (file.endsWith(".css")) {
    return `<link rel="stylesheet" href="https://blog.logrocket.com/adding-ssr-existing-vue-3-app/${file}">`;
  } else if (file.endsWith(".woff")) {
    return ` <link rel="preload" href="https://blog.logrocket.com/adding-ssr-existing-vue-3-app/${file}" as="font" type="font/woff" crossorigin>`;
  } else if (file.endsWith(".woff2")) {
    return ` <link rel="preload" href="https://blog.logrocket.com/adding-ssr-existing-vue-3-app/${file}" as="font" type="font/woff2" crossorigin>`;
  } else if (file.endsWith(".gif")) {
    return ` <link rel="preload" href="https://blog.logrocket.com/adding-ssr-existing-vue-3-app/${file}" as="image" type="image/gif">`;
  } else if (file.endsWith(".jpg") || file.endsWith(".jpeg")) {
    return ` <link rel="preload" href="https://blog.logrocket.com/adding-ssr-existing-vue-3-app/${file}" as="image" type="image/jpeg">`;
  } else if (file.endsWith(".png")) {
    return ` <link rel="preload" href="https://blog.logrocket.com/adding-ssr-existing-vue-3-app/${file}" as="image" type="image/png">`;
  } else {
    return "";
  }
}
Here we use the render function to create a context object that automatically associates the component module IDs used in the context of Vue SSR and renders the requested page. The function also employs the renderToString() method to return a promise that resolves the rendered HTML of the application.
The renderPreloadLinks and renderPreloadLink functions are used for rendering resources such as CSS, fonts, and JavaScript files on the client side. The former function takes in the module and manifest parameters as arguments within the render function and is exported along with the app’s static markup to be utilized within the server.js file:
function renderPreloadLinks(modules, manifest) {
  let links = "";
  const seen = new Set();
  modules.forEach((id) => {
    const files = manifest[id];
    if (files) {
      files.forEach((file) => {
        if (!seen.has(file)) {
          seen.add(file);
          const filename = basename(file);
          if (manifest[filename]) {
            for (const depFile of manifest[filename]) {
              links += renderPreloadLink(depFile);
              seen.add(depFile);
            }
          }
          links += renderPreloadLink(file);
        }
      });
    }
  });
  return links;
}
It’s important to note that the manifest file is generated from the client build and contains mappings of module IDs to their corresponding chunk and asset files. We must run the build command and generate a client build for the server and entry files to access the file.
To do this, open your terminal in the current working directory and run the following command:
npm run build
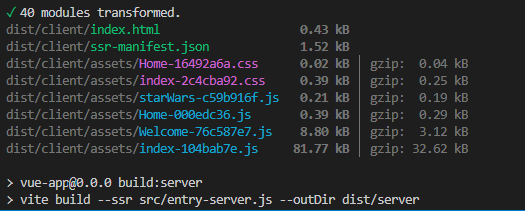
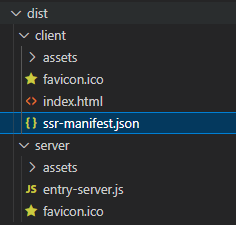
This will construct your app and generate a dist folder containing a manifest.json file in the root directory:
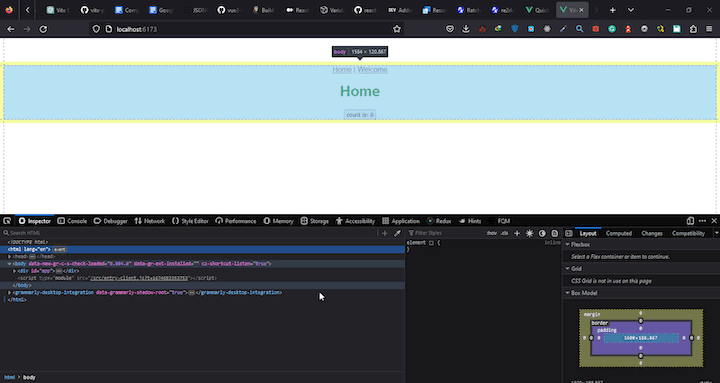
At this stage, we can start the app by running the npm run serve command in the terminal, allowing us to view our app’s content:

In this example, we have incorporated navigation that routes to the home and welcome pages we previously created, as well as a button that increments a count state when clicked:
//App.vue

<template>
  <div>
    <router-link to="https://blog.logrocket.com/">Home</router-link> |
    <router-link to="/welcome">Welcome</router-link>
    <router-view />
  </div>
</template>
If you attempt to interact with the app, you’ll notice that it is not functional and the app being served is static:

This is because the entry-client.js file still needs to be set up and the app needs to be hydrated.
entry-client.js
Hydration, In this context, is a process of taking an already-rendered HTML page and turning it into a fully interactive application on the client side. This is accomplished by injecting JavaScript codes and other assets into the page. This “hydrates” the static HTML elements by binding them to the corresponding Vue.js components and re-activating event listeners and other dynamic functionality.
The entry-client.js file is responsible for this process; it exports a function that creates a new Vue instance, configures the router and other client-specific options, and attaches the app to the DOM.
The entry-client.js file is the only entry file required on the client side, so we do not need the main.j``s file, which was the previous entry file. However, since SSR functionality is being added to an existing project, the main.js file may contain other functions; therefore, we are composing the createApp() function within it.
Within the entry-client.js file, we need to import the createApp function from the main.js file, destructure the app and router methods, and verify if the router is ready before attaching the app to ensure the hydration matches:
import { createApp } from "./main";

const { app, router } = createApp();

router.isReady().then(() => {
  app.mount("#app");

  console.log("hydrated");
});
With that, we have successfully integrated server-side rendering into an existing Vue 3 application. Now, if you save your progress and go back to the browser, the app should properly load its assets:

To confirm that the content is being rendered from the server, you can check the browser’s developer tools by navigating to the Network tab. Once there, you should see the content on the page when you click on the URL and navigate to the response tab, as shown below:
Conclusion
In this article, we discussed the concept of server-side rendering, its advantages and disadvantages, and demonstrated how to incorporate SSR into a preexisting Vue 3 project. The process we used involved creating a primary server for the application and adding new entry files for both the server side and the client side.
Experience your Vue apps exactly how a user does
Debugging Vue.js applications can be difficult, especially when there are dozens, if not hundreds of mutations during a user session. If you’re interested in monitoring and tracking Vue mutations for all of your users in production, try LogRocket.  https://logrocket.com/signup/
LogRocket is like a DVR for web and mobile apps, recording literally everything that happens in your Vue apps including network requests, JavaScript errors, performance problems, and much more. Instead of guessing why problems happen, you can aggregate and report on what state your application was in when an issue occurred.
The LogRocket Vuex plugin logs Vuex mutations to the LogRocket console, giving you context around what led to an error, and what state the application was in when an issue occurred.
Modernize how you debug your Vue apps – Start monitoring for free.
Source link
