
“When Vue’s user count reached a certain volume, it became a community. Suddenly all these people counted on me: contributors, users, educators, students… It became bigger than I ever thought it could be.” – Evan You.
This is a confession of a developer towards releasing a JS framework in 2014 that today is used by over 1.5 million users. A framework has become significant in website development if we consider how new it is. With developers picking up Vue slowly, the question of Vue.js testing becomes all the more interesting to decode among the organization.
The framework is in a place where it is not extremely popular, so each question can be found on community channels and is not so new that it is still in the experimenting stage. When we see large-scale applications built with Vue, we know the relevance of Vue.js testing will only increase with time.
All these facts make this guide an important piece of the puzzle that will ultimately guide you toward releasing a Vue.js-based web application to the world.
What Is Vue.js?
Vue.js is a framework for building complex or simple user interfaces. It was released in 2014 and is used by almost 1% of websites today. It is lightweight and built on top of main web components like HTML, CSS, and JavaScript.
It works with a component-based model-view framework paradigm, which allows the modules to be built as loosely coupled and connected components. This helps break down complex modules into small components that other parts of the application can also reuse.
A small example of Vue.js expressing its component-based functionality can be as follows:
import { createApp } from 'vue'
createApp({
  data() {
    return {
      counter: 0
    }
  }
}).mount('#app')
HTML Code:
<div id="app">
  <button @click="count++">
    Count is: {{ count }}
  </button>
</div>
Here, we see an important concept of declarative rendering in HTML through the code {{count}}. By declarative rendering, we point out the template rendering part where we can directly render the data using declarative syntax or template syntax, which is double braces as it is in Jinja 2 templating engine also. This is an important property of Vue that comes in handy in quick development and minimizing the code.
The second property is reactivity, reacting to the change in the JavaScript code automatically. The changes are then reflected in the DOM without writing any extra code. However, this is a brief high-level overview of reactivity that needs to be discussed in detail. Since this guide revolves around testing Vue components, let’s keep that discussion for another day.
Vue.js Component-Based System Overview
The fundamental idea of a component-based system is to divide bigger things into smaller units and focus on each in isolation. This helps break down a larger problem and focus on details that could be missed if the complete system was taken at once. This can also be seen when we develop simple HTML pages that get divided into a component-based tree:
In Vue, we perform something similar by saving each component into its file with its logic as a .vue extension.
For a minimal example of understanding components in Vue.js, let’s create a small web page as follows:
<div>
    <h1> Hi This is Div 1.</h1>
</div>

<div>
    <h1> Hi This is Div 2.</h1>
</div>
In Vue’s app.js file, we will create a component to demonstrate reusability as follows:
Vue.component(<component_name>, object)While writing the code, replace it with the name of the component you want to put:
Vue.component(‘vcomp’)We will put down a simple template to replace the object:
Vue.component(‘vcomp’, {
template: “<h2> Hi this is a Vue Component </h2>”
});
Here, the template part takes the HTML template you want to display when this component is rendered on the screen.
With this small code, we have our component ready to be implemented in the HTML page we wrote at the start. Since this component is referred to by the name “vcomp,” let’s insert this inside the div block as follows:
<div>
    <h1> Hi This is Div 1.</h1>
    <vcomp><vcomp>
</div>

<div>
    <h1> Hi This is Div 2.</h1>
    <vcomp></vcomp>
</div>
What Vue will do here is replace the vcomp tags with the component template described in app.js. As a result, we get a small web page as follows:
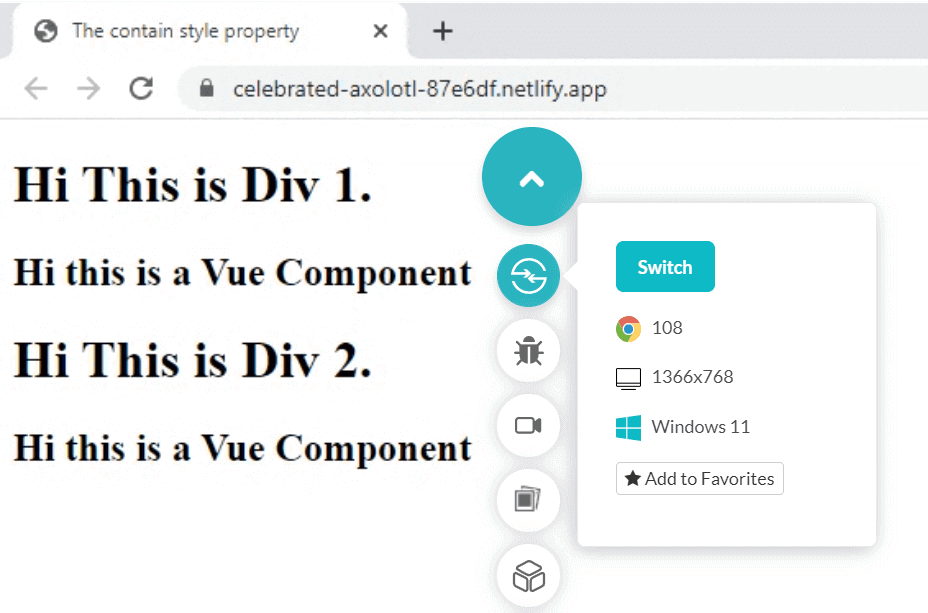
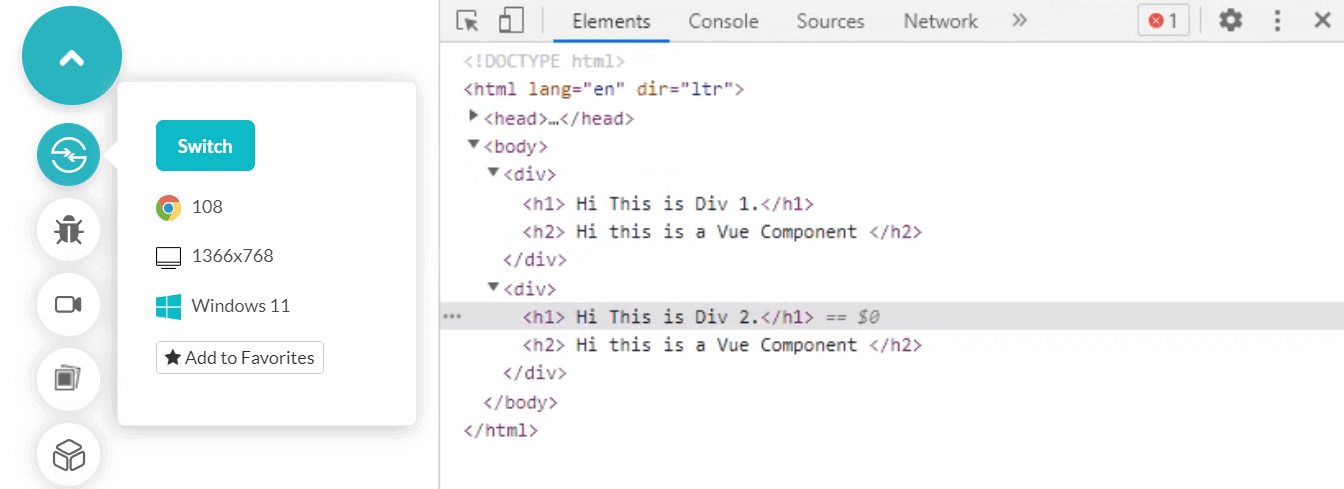
If we inspect this web page, we can check that the HTML code has been replaced by the template provided in Vue:
A simple problem is that the code has become reusable but is not customizable as per our choice. In web development, you may have many elements with the same code. A need that can be satisfied by our above example. However, we can have an even larger number of codes that are not the same but similar. For example, “Hi, I am Harish” and “Hi, I am Jack” are two similar elements with 75% similarity of “Hi, I am.” If we could find a way to put data into this template, we would have a good component with us.
This is accomplished by the data object attached to the Vue component. For now, we have our modified view as:
Vue.component(‘vcomp’, {
template: “<h2> Hi I am </h2>”
});
This denotes the part that will remain the same. A data object is written as:
Vue.component(‘vcomp’, {
template: “<h2> Hi I am </h2>,
data: function(){}”
});
In the function part, you can write the function to be executed when you want. For our example, you need to return the name to put this as:
Vue.component(‘vcomp’, {
template: “<h2> Hi I am {{name}}.</h2>,
data: function(){
return {
name: “Harish”
}
}”
});
Also, notice the additional {{name}} we put in the template where we want the name to be placed when returned.
The last thing we need is to decide when this function should be called and how it should be called. While there are many ways to achieve that, for demonstration, I will take the on:click event attached to a button on the click of which this function can be called.
The modified code then becomes as follows:
Vue.component(‘vcomp’, {
template: “<h2> Hi I am {{name}}. <button v-on:click = “changeName”></button></h2>”,
data: function(){
return {
name: “Harish”
}
},
methods: {
changeName: function(){
this.name = ‘Ashley’;
}
}
});
The two modified elements to note here are “methods” and “button.” Run this code, and you get a button on the click of which the name “Hi, I am” changes to “Hi, I am Ashley.”
Unit Testing: A General Overview
Unit testing is one of the pillars of testing software, the other being integration testing and end-to-end testing. Generally, software testing starts through unit testing, especially when TDD is facilitated as a development method.
Unit testing breaks the software into smaller units so it is easier to focus on smaller parts and their details, and debugging becomes a lot easier. This definition may look similar to what we discussed in the definition of the components above.
In reality, they both have similar roots, but the goal they serve is different. Since components are also smaller units in a Vue application, the work of a tester performing unit testing becomes a lot easier and targeted towards a specific area. Hence, unit testing in Vue components is a popular talk among Vue testers.
As a note, this should not be confused with “testing a component,” as unit testing works with Vue-based applications. Unit testing still means testing the functionalities or class for expected outputs but for a smaller part of the application.
When we start testing only components of a Vue application, such as how it mounts or renders, we call it component testing in Vue. However, that does not mean unit tests do not cover “just” components. In certain cases, it may, and in a few, it may not.
How To Get Started With Unit Testing in Vue.js
In this section of the Vue.js testing guide, we will take unit testing in Vue, which is different from unit testing in web applications. Here, we will only focus on how to perform unit testing on the parts of the applications written in Vue.
Taking into consideration how Vue-based features work, we aim to perform unit testing on two types of functions.
- Composables
- Components
Therefore, we can divide this section into two logical parts.
How To Perform Unit Testing in Vue Composables
The concept of composables came into Vue with its version 3 release and is built to eliminate all the Vue 2 weaknesses leading to complex components and mixins. Vue composable refers to those functions that use Vue’s composition API. This API is a solution to components that become too big and hard to maintain over time.
For instance, let’s say we have a component that can list down certain products through search. Sometime later, we need more functionality in this search by applying certain filters. A few days later, we may add another functionality to search. Doing all this, we may make a very big and complex component, which can become extremely hard to maintain.
Instead, we can use composition API, which are reusable functions called from these components and eliminate large options and data. In this example, we can create search(), sort(), filter(), advanceFilter(), etc., and call whenever required from the main component.
Composables can depend on either of the three APIs:
- Life cycle
- Inject
- Reactivity
Among these three, if reactivity is being used as follows:
import { createApp } from 'vue'
createApp({
  data() {
    return {
      counter: 0
    }
  }
}).mount('#app')
This can be tested by matching the expected and actual results directly, also called an assertion in testing. Whereas, if lifehooks and inject are being used, the tester needs these elements to “wrap inside host component,” explaining which can deviate us from the actual unit testing part.
How To Perform Unit Testing in Vue Components
Unit testing in Vue components aims at testing the functionalities offered by the components in the application. While they should target components, they should only confine themselves to the functionality and events relating to these components rather than getting into the correctness of code.
An important point to note in performing unit testing in Vue.js is that the private state of a component instance should not be asserted, as it can break with any implementation change. The main focus of unit tests should be verifying the output of a certain functionality or event, or interaction.
Unit Testing Tools for the Vue.js Component
While there are a lot of tools and plugins available for performing unit tests on Vue.js components, the official website of Vue recommends only two tools:
- Vitest
- Cypress
Vitest is a node-based tool while Cypress is a browser-based tool. A node-based tool may not perform as efficiently as a browser-based tool; therefore, in this case, Cypress can be preferred. However, there is a cost associated with it. Since Vitest is a headless tool and is node-based, it can execute tests much faster than Cypress.
As Vue states, “Cypress can be orders of magnitude slower than Vitest,” which can be a matter of concern. Therefore, the tester must work carefully when performing unit testing with Vue.js.
To add Vitest to your project, you can directly use an npm package manager to add this in a single command:
npm install -D vitest happy-dom @testing-library/vueAfter this, we need to update the Vite configuration to add the test option block:
import { defineConfig } from 'vite'

export default defineConfig({
  test: {
   }
})
After this is done, we can write our tests in a file whose name ends with *.test.js. This file can be placed in a test directory located in the project’s root folder. You can also place this file in test directories next to the source files.
Now that the test cases are written, just add the test script in package.json as follows:
{
  // ...
  "scripts": {
    "test": "vitest"
  }
}
Now run these tests with a simple npm command:
Mounting Libraries
Mounting libraries must mount the components so user events can be simulated and unit testing can be invoked with user-like actions. These libraries are provided by Vue and are recommended for use in unit testing for Vue components.
@testing-library/vue@vue/test-utils
Among these two, @vue/test-utils is a low-level library on top of which @testing-library/vue is built. So it is evident by this fact that @vue/test-utils dives deeper into the Vue APIs implementation details while @testing-library/vue stays away from it and focuses only on how the software is used by the end-user. For a tester, it completely depends on their choice of which one to prefer as per the situation. A mix and match of both can yield the best results, however.
How To Run a Unit Test in Vue.js
Unit tests in Vue.js can be run with the Vue Test Utils library, an official unit testing library of Vue.js. It can be used with test runners, such as Jest, Mocha, and Karma, or without a test runner with jsdom. Vue.js recommends using Jest for unit test cases; therefore, we will follow the same pattern here.
To install Vue test utils with jest, run the following two commands.
For installation of cli-plugin-unit-jest to run Jest tests:
To install Vue test utils:
$ npm install --save-dev @vue/test-utilsNow, we can do a simple, small test on the initial code with which we started this guide on Vue.js testing:
  template: `
    <div>
      <button @click="count++">Add up</button>
      <p>Clicks: {{ counter }}</p>
    </div>
  `,
  data() {
    return { counter: 0 }
  }
}
Now, we first need to target this button and take a wrapper in return to proceed further. This is achieved through the following code:
const button = wrapper.find('button')Now, find the p tag inside this button:
const countertext = wrapper.find('p')Then, we need to provide some asynchronous behavior to wait for the click to happen, which can lead us to trigger our code:
  expect(text.text()).toContain('Clicks: 0')
  await button.trigger('click')
  expect(text.text()).toContain('Clicks: 1')
Here, as we mentioned, asynchronous behavior is used, which is a deep topic of great length in Vue. Someone who wishes to learn more about it can refer to the official page on asynchronous behavior in the Vue.js docs. Running the above test exposes the functionality of the button and the module that contains it.
While performing Vue.js testing, many organizations face a tough challenge in building their web and mobile apps for multiple platforms like Windows, macOS, Android, and iOS. Developers and QA teams face the major challenge of creating an in-house test infrastructure to cover all browsers, devices, and operating systems, which is a tedious and expensive approach. You will still need to manage operating system updates continuously, which is quite impractical to achieve.
However, cloud-based testing platforms make this easy.
Mount vs ShallowMount in Vue
While performing unit testing in Vue through vue test utils, you will often come across mount() and shallowMount() in examples or reading other’s unit test codes. These two methods will be used by a tester to create unit tests in Vue.
- The
mount()function in Vue takes the Vue component as an argument and returns a wrapper for that component. With this instance wrapper, the tester can interact with the component as it will catch the DOM and render it for you. - The
shallowMount()function also works similarly and helps interact with the component passed. The only difference between them is thatshallowMount()does not render the child components. Whereasmount()will render both passed components and all its children.
Due to this, they both are preferred in different scenarios and use cases. The most important one is that when you need to test any component in isolation and need to test the effect of changes on children, shallowMount is to be used. Otherwise, if children are involved, then you should go for mount(). This will keep your unit test cases in isolation and provide clarity about what they are aimed at.
Conclusion
Vue is a framework that is seeing substantial growth in the user interface market in website development. With its component-based mechanism, which is similar to React, Vue tries to break down heavy modules into smaller components that not only help in development but also in testing.
This guide on Vue.js testing discussed the testing part of a website that contains Vue-based elements focusing specifically on unit tests. Vue has rich API collections that help in the unit testing of components, a demonstration of which was discussed in this guide.
For web developers and testers, I hope this guide is a good reference for your next unit testing project. For any feedback and suggestions, let us know in the comment section or through email. Thank you for giving this post your valuable time.
Source link