The single-page application (SPA) architecture has been one of the biggest trends in web development for a while now. As developers, JavaScript frameworks such as Angular, React, Svelte, and Vue.js allow you to generate a SPA using a command line interface (CLI). Some cases where you might need a SPA include:
- When you’re building an ecommerce application like Jumia or a movie streaming service like Netflix
- More commonly, when you’re building an admin dashboard
Admin dashboards are complex because they handle network requests, charts, real-time communication, data tables, UI components, and more. Due to their complexity, developer teams tend to purchase pre-built templates and customize them.
But if you’re a frontend developer working primarily with Vue.js, vue-element-admin is one of the best free and open source Vue admin templates available. In this article, we’ll learn how to use vue-element-admin and explore some of its features.
Jump ahead:
What is vue-element-admin?
vue-element-admin is the predecessor to vue-admin-template. It is a production-ready, frontend solution for admin interfaces that uses the element-ui toolkit. This template has many complex features that you can use for enterprise-level dashboards.
Let’s explore some of the core features of this project.
Authentication
An admin dashboard should have login functionality to verify a user. In vue-admin-template, the login action will send the user details (username and password) to the server, and the server will return a token, which will be stored in a cookie:
login({ commit }, userInfo) {
    const { username, password } = userInfo
    return new Promise((resolve, reject) => {
      login({ username: username.trim(), password: password }).then(response => {
        const { data } = response
        commit('SET_TOKEN', data.token)
        setToken(data.token)
        resolve()
      }).catch(error => {
        reject(error)
      })
    })
  },
Authorization
Another important feature of an admin dashboard is setting user roles and permissions. In this template, the user role is obtained from the token returned from the server. The user role determines which route they can access. This is calculated dynamically:
const hasToken = getToken()

  if (hasToken) {
    if (to.path === '/login') {
      next({ path: "https://blog.logrocket.com/" })
      NProgress.done()
    } else {
      const hasRoles = store.getters.roles && store.getters.roles.length > 0
      if (hasRoles) {
        next()
      } else {
        try {
          const { roles } = await store.dispatch('user/getInfo')
          const accessRoutes = await store.dispatch('permission/generateRoutes', roles)

          router.addRoutes(accessRoutes)

          next({ ...to, replace: true })
        } catch (error) {
          await store.dispatch('user/resetToken')
          Message.error(error || 'Has Error')
          next(`/login?redirect=${to.path}`)
          NProgress.done()
        }
      }
    }
  } else {
    /* has no token*/
    if (whiteList.indexOf(to.path) !== -1) {      next()
    } else {
      // other pages that do not have permission to access are redirected to the login page.
      next(`/login?redirect=${to.path}`)
      NProgress.done()
    }
  }
})
The code snippet above shows how page-level permissions are implemented in this template. Users with different permissions will see different sidebars and only be able to enter a limited number of pages. You might prefer to customize this if your routing table is dynamically generated in the backend.
UI components
As stated earlier, vue-element-admin uses the element-ui UI toolkit. Admin dashboards require a lot of reusable components, and this template provides more than 25 UI components, including DragSelect, ErrorDialog, MarkdownEditor, Pagination, Charts, and more.
Layout component
One of the first components or views you’ll implement when building a dashboard is the Layout component. vue-element-admin consists of:
- A sidebar
- A navbar
TagsView- Content
The layout of a page is defined in the router configuration:
{
    path: '/401',
    component: () => import('@/views/error-page/401'),
    hidden: true
  },
  {
    path: "https://blog.logrocket.com/",
    component: Layout,
    redirect: '/dashboard',
    children: [
      {
        path: 'dashboard',
        component: () => import('@/views/dashboard/index'),
        name: 'Dashboard',
        meta: { title: 'Dashboard', icon: 'dashboard', affix: true }
      }
    ]
  },
This configuration makes it easy to customize the sidebar to correspond with the user role.
Network requests
Admin dashboards consume a lot of API endpoints from the backend, so it’s important to have an organized flow. vue-element-admin handles this in a very clear and concise manner, so let’s break it down.
First, we have a request utility that wraps axios. request handles all POST, GET, and other request parameters; request headers; and error messages. API requests are modules in src/api; a typical request looks like this:
export function getInfo(token) {
  return request({
    url: '/vue-element-admin/user/info',
    method: 'get',
    params: { token }
  })
}
Then the network module is imported in vue-store actions, like this:
import { getInfo } from '@/api/user'

getInfo({ commit, state }) {
    return new Promise((resolve, reject) => {
      getInfo(state.token).then(response => {
        const { data } = response

        if (!data) {
          reject('Verification failed, please Login again.')
        }

        const { roles, name, avatar, introduction } = data

        // roles must be a non-empty array
        if (!roles || roles.length <= 0) {
          reject('getInfo: roles must be a non-null array!')
        }

        commit('SET_ROLES', roles)
        commit('SET_NAME', name)
        commit('SET_AVATAR', avatar)
        commit('SET_INTRODUCTION', introduction)
        resolve(data)
      }).catch(error => {
        reject(error)
      })
    })
  },
Charts
Dashboards have a lot of charts for different forms and data. This is another common requirement. This template recommends Apache ECharts, a powerful, easy-to-use, and flexible JavaScript visualization library.
Personally, I prefer this library to other chart libraries because of its extensive gallery, which comes in handy when you’re implementing charts for clients that aren’t sure of how they want to represent data. We won’t go in depth into ECharts in this article; you can check their documentation here.
Building with vue-admin-template
So far, we’ve explored features of vue-admin-template; let’s go ahead and demonstrate how to bootstrap an admin dashboard with the template quickly.
Prerequisites
Make sure you have installed the following:
This project also uses a mock server, implemented with mockjs. You can find the mock implementation in ~/mock.
After cloning the repository, run npm install to install the project dependencies. Navigate to src/router and modify index.js with this code snippet:
//src/router
/* eslint-disable */
import Vue from 'vue'
import Router from 'vue-router'
Vue.use(Router)

import Layout from '@/layout'
export const constantRoutes = [
  {
    path: '/redirect',
    component: Layout,
    hidden: true,
    children: [
      {
        path: '/redirect/:path(.*)',
        component: () => import('@/views/redirect/index')
      }
    ]
  },
  {
    path: '/login',
    component: () => import('@/views/login/index'),
    hidden: true
  },
  {
    path: '/auth-redirect',
    component: () => import('@/views/login/auth-redirect'),
    hidden: true
  },
  {
    path: '/404',
    component: () => import('@/views/error-page/404'),
    hidden: true
  },
  {
    path: '/401',
    component: () => import('@/views/error-page/401'),
    hidden: true
  },
  {
    path: "https://blog.logrocket.com/",
    component: Layout,
    redirect: '/dashboard',
    children: [
      {
        path: 'dashboard',
        component: () => import('@/views/dashboard/index'),
        name: 'Dashboard',
        meta: { title: 'Dashboard', icon: 'dashboard', affix: true }
      }
    ]
  },
  {
    path: '/posts',
    component: Layout,
    children: [
      {
        path: 'index',
        component: () => import('@/views/posts/index'),
        name: 'Posts',
        meta: { title: 'Posts', icon: 'post', affix: true }
      }
    ]
  },

  {
    path: '/profile',
    component: Layout,
    redirect: '/profile/index',
    hidden: true,
    children: [
      {
        path: 'index',
        component: () => import('@/views/profile/index'),
        name: 'Profile',
        meta: { title: 'Profile', icon: 'user', noCache: true }
      }
    ]
  }
]

/**
 * asyncRoutes
 * the routes that need to be dynamically loaded based on user roles
 */
export const asyncRoutes = [

  // 404 page must be placed at the end !!!
  { path: '*', redirect: '/404', hidden: true }
]

const createRouter = () => new Router({
  scrollBehavior: () => ({ y: 0 }),
  routes: constantRoutes
})
const router = createRouter()
// Detail see: https://github.com/vuejs/vue-router/issues/1234#issuecomment-357941465
export function resetRouter() {
  const newRouter = createRouter()
  router.matcher = newRouter.matcher // reset router
}

export default router
Installing Vue Router
This project uses Vue Router 3. Here, we have two types of routes: asyncRoutes and constantRoutes.
Constant routes are global; every user has access to these routes, while async routes are dynamically loaded based on the user’s role. A typical admin route will look like this:
{
    path: '/transactions',
    component: Layout,
    redirect: '/transactions/info',
    alwaysShow: true, // will always show the root menu
    name: 'Transactions',
    meta: {
      title: 'Transactions',
      icon: 'lock',
      roles: ['superadmin', 'admin']    },
    children: [
      {
        path: 'info',
        component: () => import('@/views/transactions/info/index'),
        name: 'TransactionInfo',
        meta: {
          title: 'Transactions Info',
          roles: ['superadmin']
        }
      },
}
Next, head to src/dashboard/views/index and modify the code with this:
//src/dashboard/views/index
<template>
  <div class="dashboard-editor-container">
    <panel-group @handleSetLineChartData="handleSetLineChartData" />

    <el-row style="background: #fff; padding: 16px 16px 0; margin-bottom: 32px">
      <line-chart :chart-data="lineChartData" />
    </el-row>

    <el-row :gutter="32">
      <el-col :xs="24" :sm="24" :lg="8">
        <div class="chart-wrapper">
          <raddar-chart />
        </div>
      </el-col>
      <el-col :xs="24" :sm="24" :lg="8">
        <div class="chart-wrapper">
          <pie-chart />
        </div>
      </el-col>
      <el-col :xs="24" :sm="24" :lg="8">
        <div class="chart-wrapper">
          <bar-chart />
        </div>
      </el-col>
    </el-row>

    <el-row>
      <el-col
        :xs="{ span: 24 }"
        :sm="{ span: 24 }"
        :md="{ span: 24 }"
        :lg="{ span: 24 }"
        :xl="{ span: 24 }"
        style="padding-right: 8px; margin-bottom: 30px"
      >
        <post-table />
      </el-col>
    </el-row>
  </div>
</template>

<script>
import PanelGroup from "./components/PanelGroup";
import LineChart from "./components/LineChart";
import RaddarChart from "./components/RaddarChart";
import PieChart from "./components/PieChart";
import BarChart from "./components/BarChart";
import PostTable from "./components/PostTable";
const lineChartData = {
  newVisitis: {
    expectedData: [100, 120, 161, 134, 105, 160, 165],
    actualData: [120, 82, 91, 154, 162, 140, 145],
  },
  messages: {
    expectedData: [200, 192, 120, 144, 160, 130, 140],
    actualData: [180, 160, 151, 106, 145, 150, 130],
  },
  purchases: {
    expectedData: [80, 100, 121, 104, 105, 90, 100],
    actualData: [120, 90, 100, 138, 142, 130, 130],
  },
  shoppings: {
    expectedData: [130, 140, 141, 142, 145, 150, 160],
    actualData: [120, 82, 91, 154, 162, 140, 130],
  },
};

export default {
  name: "DashboardAdmin",
  components: {
    PanelGroup,
    LineChart,
    RaddarChart,
    PieChart,
    BarChart,
    PostTable,
  },
  data() {
    return {
      lineChartData: lineChartData.newVisitis,
    };
  },
  methods: {
    handleSetLineChartData(type) {
      this.lineChartData = lineChartData[type];
    },
  },
};
</script>
Adding UI components
If you’ve worked with element-ui before, these UI components will look very familiar. Above, we introduced a new view component, PostTable. Let’s go ahead and flesh this out.
Create a new Vue file named PostTable.vue in src/views/dashboard/admin/components and add these lines of code:
//src/views/dashboard/admin/components/PostTable.vue
<template>
  <el-table
    v-loading="listLoading"
    :data="list"
    border
    fit
    highlight-current-row
    style="width: 100%"
  >
    <el-table-column align="center" label="ID" width="">
      <template slot-scope="{ row }">
        <span>{{ row.id }}</span>
      </template>
    </el-table-column>

    <el-table-column width="" align="center" label="Date">
      <template slot-scope="{ row }">
        <span>{{ row.timestamp | parseTime("{y}-{m}-{d} {h}:{i}") }}</span>
      </template>
    </el-table-column>

    <el-table-column width="" align="center" label="Author">
      <template slot-scope="{ row }">
        <span>{{ row.author }}</span>
      </template>
    </el-table-column>

    <el-table-column width="" label="Importance">
      <template slot-scope="{ row }">
        <svg-icon
          v-for="n in +row.importance"
          :key="n"
          icon-class="star"
          class="meta-item__icon"
        />
      </template>
    </el-table-column>

    <el-table-column class-name="status-col" label="Status" width="">
      <template slot-scope="{ row }">
        <el-tag :type="row.status | statusFilter">
          {{ row.status }}
        </el-tag>
      </template>
    </el-table-column>
  </el-table>
</template>

<script>
import { fetchList } from "@/api/article";

export default {
  name: "PostTable",
  filters: {
    statusFilter(status) {
      const statusMap = {
        published: "success",
        draft: "info",
        deleted: "danger",
      };
      return statusMap[status];
    },
  },
  data() {
    return {
      list: null,
      listLoading: true,
      listQuery: {
        page: 1,
        limit: 5,
      },
    };
  },
  created() {
    this.getList();
  },
  methods: {
    async getList() {
      this.listLoading = true;
      const { data } = await fetchList(this.listQuery);
      const items = data.items;
      this.list = items.map((v) => {
        return v;
      });
      this.listLoading = false;
    },
  },
};
</script>
Finally, in our route table, we defined the path @/views/posts/index; let’s create it. Create a post/index.vue in the views directory and add these lines of code:
//src/post/index.vue
<template>
  <div class="app-container">
    <el-table
      v-loading="listLoading"
      :data="list"
      border
      fit
      highlight-current-row
      style="width: 100%"
    >
      <el-table-column align="center" label="ID" width="80">
        <template slot-scope="{ row }">
          <span>{{ row.id }}</span>
        </template>
      </el-table-column>

      <el-table-column width="180px" align="center" label="Date">
        <template slot-scope="{ row }">
          <span>{{ row.timestamp | parseTime("{y}-{m}-{d} {h}:{i}") }}</span>
        </template>
      </el-table-column>

      <el-table-column width="120px" align="center" label="Author">
        <template slot-scope="{ row }">
          <span>{{ row.author }}</span>
        </template>
      </el-table-column>

      <el-table-column width="100px" label="Importance">
        <template slot-scope="{ row }">
          <svg-icon
            v-for="n in +row.importance"
            :key="n"
            icon-class="star"
            class="meta-item__icon"
          />
        </template>
      </el-table-column>

      <el-table-column class-name="status-col" label="Status" width="110">
        <template slot-scope="{ row }">
          <el-tag :type="row.status | statusFilter">
            {{ row.status }}
          </el-tag>
        </template>
      </el-table-column>

      <el-table-column min-width="300px" label="Title">
        <template slot-scope="{ row }">
          <template v-if="row.edit">
            <el-input v-model="row.title" class="edit-input" size="small" />
            <el-button
              class="cancel-btn"
              size="small"
              icon="el-icon-refresh"
              type="warning"
              @click="cancelEdit(row)"
            >
              cancel
            </el-button>
          </template>
          <span v-else>{{ row.title }}</span>
        </template>
      </el-table-column>

      <el-table-column align="center" label="Actions" width="120">
        <template slot-scope="{ row }">
          <el-button
            v-if="row.edit"
            type="success"
            size="small"
            icon="el-icon-circle-check-outline"
            @click="confirmEdit(row)"
          >
            Ok
          </el-button>
          <el-button
            v-else
            type="primary"
            size="small"
            icon="el-icon-edit"
            @click="row.edit = !row.edit"
          >
            Edit
          </el-button>
        </template>
      </el-table-column>
    </el-table>
  </div>
</template>

<script>
import { fetchList } from "@/api/article";

export default {
  name: "Posts",
  filters: {
    statusFilter(status) {
      const statusMap = {
        published: "success",
        draft: "info",
        deleted: "danger",
      };
      return statusMap[status];
    },
  },
  data() {
    return {
      list: null,
      listLoading: true,
      listQuery: {
        page: 1,
        limit: 10,
      },
    };
  },
  created() {
    this.getList();
  },
  methods: {
    async getList() {
      this.listLoading = true;
      const { data } = await fetchList(this.listQuery);
      const items = data.items;
      this.list = items.map((v) => {
        this.$set(v, "edit", false); // https://vuejs.org/v2/guide/reactivity.html
        v.originalTitle = v.title; //  will be used when user click the cancel botton
        return v;
      });
      this.listLoading = false;
    },
    cancelEdit(row) {
      row.title = row.originalTitle;
      row.edit = false;
      this.$message({
        message: "The title has been restored to the original value",
        type: "warning",
      });
    },
    confirmEdit(row) {
      row.edit = false;
      row.originalTitle = row.title;
      this.$message({
        message: "The title has been edited",
        type: "success",
      });
    },
  },
};
</script>
Awesome. Now, run your dev server with npm run dev:
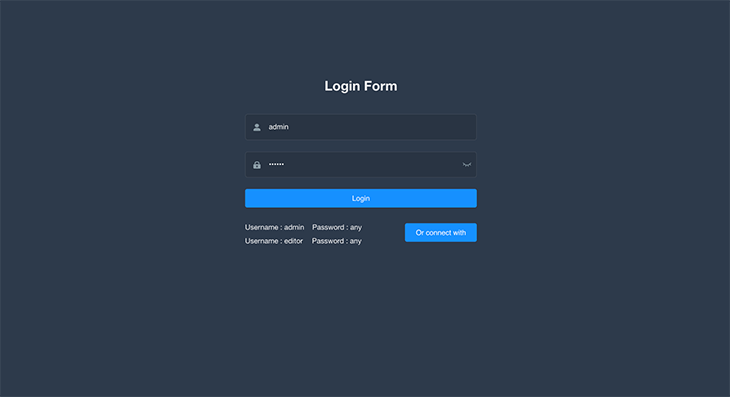
npm run devClick Login and you should see something like this:

This is the dashboard home. Click Posts, and you should see something like this:
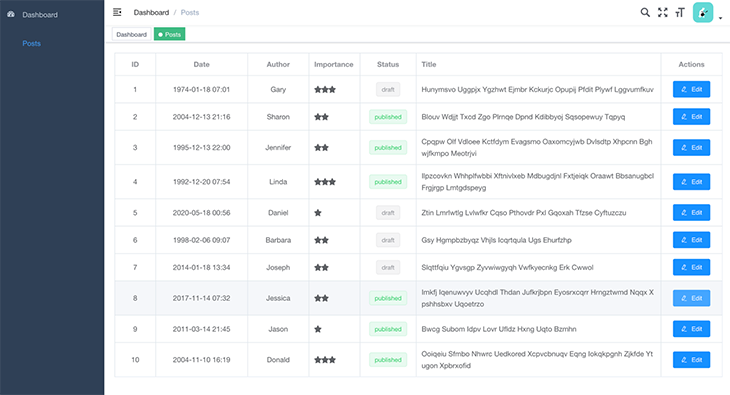
This looks like a blog publication dashboard, right? vue-element-admin also provides editors like TinyMCE and MarkdownEditor as components, so you can integrate them right into this dashboard.
Learn more about vue-element-admin from its documentation here.
Conclusion
Admin dashboards are one of the inevitable tasks you’ll be given to work on as a frontend developer. vue-element-admin provides a completely free and open source template for you to bootstrap a dashboard easily. The workflows, project directory, and routing configuration are standard enough for enterprise-level single-page applications.
In this article, we explored the core features of vue-element-admin and went ahead to build a blog publication admin dashboard.
Experience your Vue apps exactly how a user does
Debugging Vue.js applications can be difficult, especially when there are dozens, if not hundreds of mutations during a user session. If you’re interested in monitoring and tracking Vue mutations for all of your users in production, try LogRocket.  https://logrocket.com/signup/
LogRocket is like a DVR for web and mobile apps, recording literally everything that happens in your Vue apps including network requests, JavaScript errors, performance problems, and much more. Instead of guessing why problems happen, you can aggregate and report on what state your application was in when an issue occurred.
The LogRocket Vuex plugin logs Vuex mutations to the LogRocket console, giving you context around what led to an error, and what state the application was in when an issue occurred.
Modernize how you debug your Vue apps – Start monitoring for free.
Source link
