When it comes to infrastructure provisioning, including the AWS EKS cluster, Terraform is the first tool that comes to mind. Learning Terraform is much easier than setting up the infrastructure manually. That said, would you rather use the traditional approach to set up the infrastructure, or would you prefer to use Terraform? More specifically, would you rather create an EKS cluster using Terraform and have Terraform Kubernetes deployment in place, or use the manual method, leaving room for human errors?
As you may already know, Terraform is an open-source Infrastructure as Code (IaC) software platform that allows you to manage hundreds of cloud services using a uniform CLI approach and uses declarative configuration files to codify cloud APIs. In this article, we won’t go into all the details of Terraform. Instead, we will be focusing on Terraform Kubernetes deployment.
In summary, we will be looking at the steps to provision an EKS Cluster using Terraform. Also, we will go through how Terraform Kubernetes deployment helps save time and reduce human errors, which can occur when using a traditional or manual approach for application deployment.
Prerequisites for Terraform Kubernetes Deployment
Before we proceed and provision EKS cluster using Terraform, there are a few commands (or tools) you need to have in mind and on hand. First off, you must have an AWS Account, and Terraform must be installed on your host machine, seeing as we are going to create an EKS cluster using Terraform CLI on the AWS cloud.
Now, let’s take a look at the prerequisites for this setup and help you install them:
AWS Account
If you don’t have an AWS account, you can register for a “Free Tier Account” and use it for test purposes.
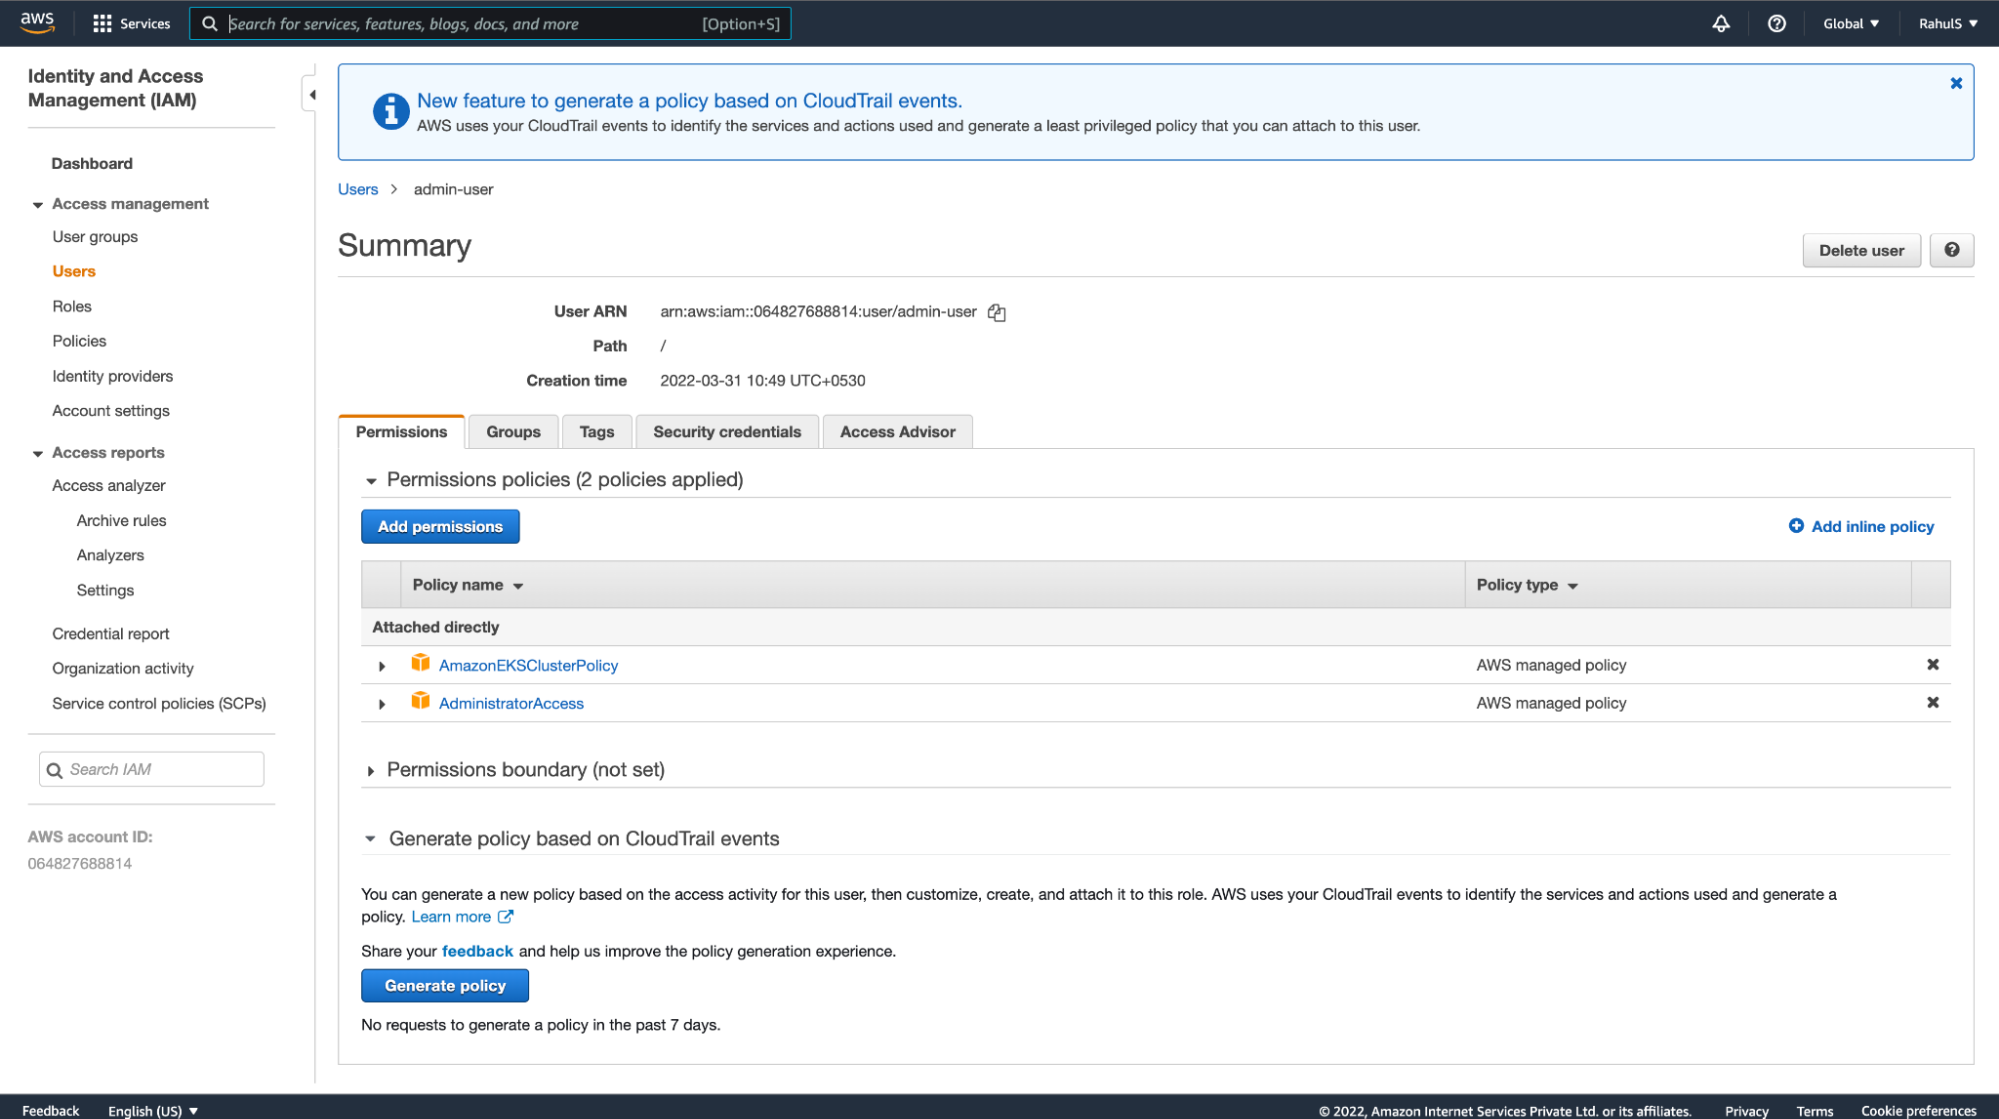
IAM Admin User
You must have an IAM user with AmazonEKSClusterPolicy and AdministratorAccess permissions as well as its secret and access keys. We will be using the IAM user credentials to provision an EKS cluster using Terraform. The keys you create for this user will be used to connect to the AWS account from the CLI (Command Line Interface). When working on production clusters, only provide the required access and avoid providing admin privileges.
EC2 Instance
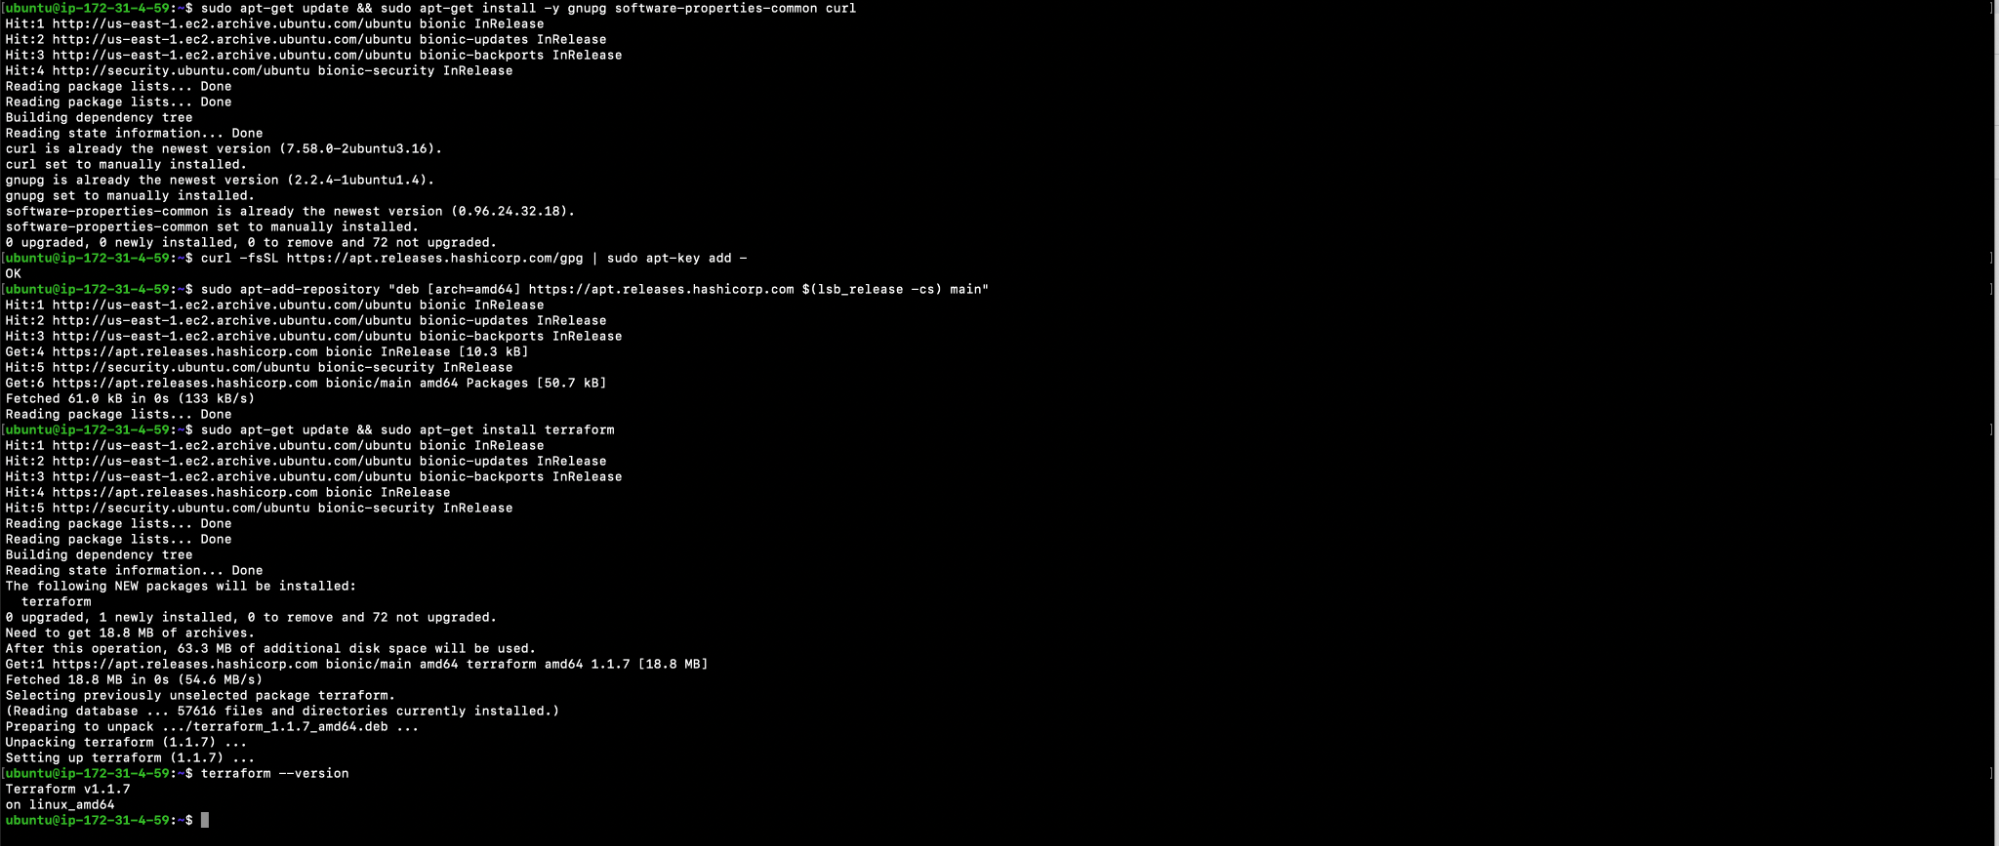
We will be using the Ubuntu 18.04 EC2 Instance as a host machine to execute our Terraform code. You may use another machine, however, you will need to verify which commands are compatible with your host machine to install the required packages. The first step is installing the required packages on your machine. You can also use your personal computer to install the required tools. This step is optional.
sudo apt-add-repository deb [arch=amd64] $(lsb_release -cs) main (here).
sudo “apt-get” update and sudo “apt-get” install Terraform.
Terraform—version:
AWS CLI
There is not much to do with aws-cli, however, we need to use it to check the details about the IAM user whose credentials will be used from the terminal. To install it, use the commands below:
We will be using the kubectl command against the Kubernetes cluster to view the resources in the EKS cluster we want to create. Install kubectl on Ubuntu 18.04 EC2 machine using the commands below:
Note: This is completely optional. We will be using this to convert the output of the Terraform graph command. The output of the Terraform graph command is in DOT format, which can easily be converted into an image by making use of the DOT provided by GraphViz. The Terraform graph command is used to generate a visual representation of a configuration or execution plan.
To install the DOT command, execute this command: sudo apt install graphvi
Export Your AWS Access and Secret Keys for the Current Session
If the session expires, you will need to export the keys again on the terminal. There are other ways to use your keys that allow aws-cli to interact with AWS:
Export AWS_DEFAULT_REGION=<YOUR_AWS_DEFAULT_REGION>. Here, replace <YOUR_AWS_ACCESS_KEY_ID> with your access key, <YOUR_AWS_SECRET_ACCESS_KEY> with your secret key, and <YOUR_AWS_DEFAULT_REGION> with the default region for your aws-cli.
Check the Details of the IAM User Whose Credentials Are Being Used
Basically, this will display the details of the user whose keys you used to configure the CLI in the above step:
aws sts get-caller-identity:
Architecture
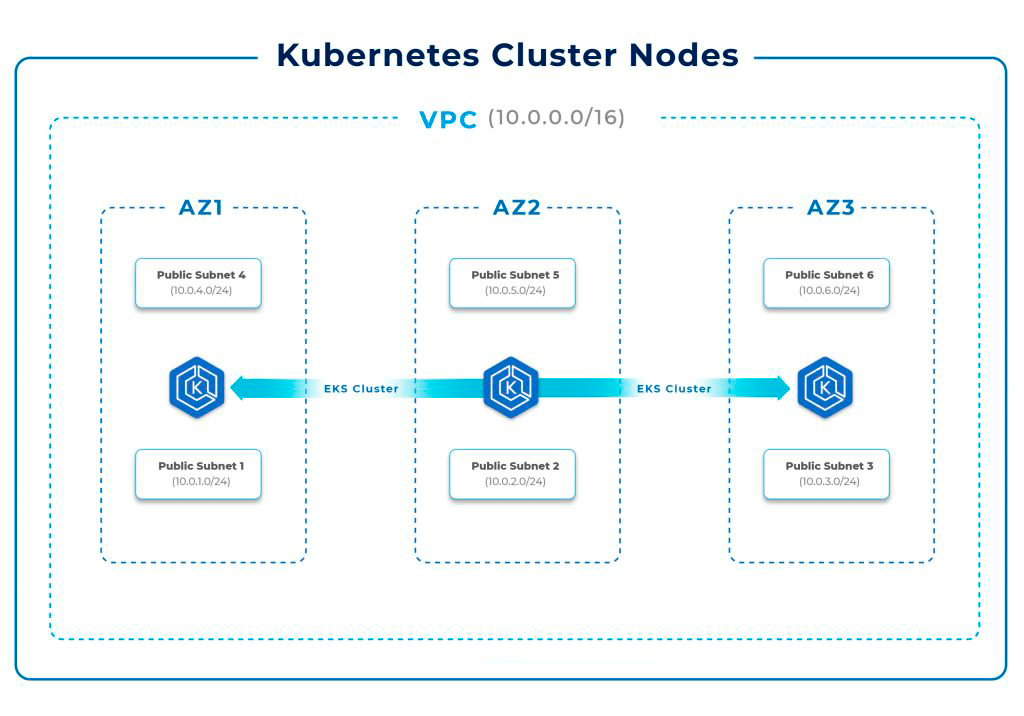
The architecture should appear as follows.
A VPC will be created with three public subnets and three private subnets. Traffic from private subnets will route through the NAT gateway and traffic from public subnets will route through the internet gateway.
Kubernetes cluster nodes will be created as part of auto-scaling groups and will reside in private subnets. Public subnets can be used to create bastion servers that can be used to connect to private nodes.
Three public subnets and three private subnets will be created in three different availability zones.
You can change the VPC CIDR in the Terraform configuration files if you wish. If you are just getting started, we recommend following the article without making any unfamiliar changes to the configuration in to avoid human errors.
Highlights
This article will help you provision an EKS cluster using Terraform and deploy a sample NodeJs application. When creating an EKS cluster, other AWS resources such as VPC, subnets, NAT gateway, internet gateway, and security groups will also be created on your AWS account. This article is divided into two parts:
The creation of an EKS cluster using Terraform.
Deployment of a sample Nodejs application in the EKS cluster using Terraform.
First off, we will create an EKS cluster. After which, we will deploy a sample Nodejs application on it using Terraform. In this article, we refer to Terraform Modules for creating VPC, and its components, along with the EKS cluster.
Here is a list of some of the Terraform elements we’ll use:
Module: A module is made up of a group of of .tf and/or .tf.jsonfiles contained in a directory. Modules are containers for a variety of resources that are used in conjunction. Terraform’s main method of packaging and reusing resource configurations is through modules.
EKS: We will be using a terraform-aws-modules/eks/aws module to create our EKS cluster and its components.
VPC: We will be using a terraform-aws-modules/vpc/aws module to create our VPC and its components.
Data: The Data source is accessed by a data resource, which is specified using a data block and allows Terraform to use the information defined outside of Terraform, defined within another Terraform configuration, or changed by functions.
Provider: Provider isa Terraform plugin that allows users to communicate with cloud providers, SaaS providers, and other APIs. Terraform configurations must specify the required providers in order for Terraform to install and use them.
Kubernetes: The Kubernetes provider is used to communicate with Kubernetes’ resources. Before the provider can be utilized, it must be configured with appropriate credentials. For this example, we will use host, token, and cluster_ca_certificate in the provider block.
AWS: The AWS provider is used to communicate with AWS’ resources. Before the provider can be utilized, it must be configured with the appropriate credentials. In this case, we will export AWS access and secret keys to the terminal.
Resource: The most crucial element of the Terraform language is resources. Each resource block describes one or more infrastructure items. A resource block specifies a particular kind of resource with a specific local name. The resource type and name serve to identify a resource and, therefore, must be distinct inside a module.
kubernetes_namespace: We will be using a kubernetes_namespace to create namespaces in our EKS cluster.
kubernetes_deployment: We will be using a kubernetes_deployment to create deployments in our EKS cluster.
kubernetes_service: We will be using a kubernetes_service to create services in our EKS cluster.
aws_security_group: We will be using aws_security_group to create multiple security groups for instances that will be created as part of our EKS cluster.
random_string: Random string is a resource that generates a random permutation of alphanumeric and special characters. We will be creating a random string that will be used as a suffix in our EKS cluster name.
Output: Output values provide information about your infrastructure to other Terraform setups and make said information available on the command line. In computer languages, output values are equivalent to return values. An output block must be used to declare each output value that a module exports.
Required_version: The required_version parameter accepts a version constraint string that determines which Terraform versions are compatible with your setup. Only the Terraform CLI version is affected by the required version parameter.
Variable: Terraform variables, including variables in any other programming language, allow you to tweak the characteristics of Terraform modules without modifying the module’s source code. This makes your modules composable and reusable by allowing you to exchange modules across multiple Terraform settings. Variables can include past values, which can be utilized when calling the module or running Terraform.
Locals: A local value gives an expression a name, allowing you to use it numerous times within a module without having to repeat it.
Before we go ahead and create EKS cluster using Terraform, let’s take a look at why Terraform is a good choice.
Why Provision and Deploy With Terraform?
It’s normal to wonder “why provision EKS cluster using Terraform?” or “why create EKS cluster using Terraform?” when we can simply achieve the same with the AWS Console, AWS CLI, or other tools. Here are a few of the reasons why:
Unified workflow: If you’re already using Terraform to deploy infrastructure to AWS, your EKS cluster can be integrated into that process. Also, Terraform can be used to deploy applications into your EKS cluster.
Full lifecycle management: Terraform not only creates resources, but also updates and deletes tracked resources without you having to inspect the API to find those resources.
Graph of relationships: Terraform recognizes resource-dependent relationships via a relationship graph. If, for example, an AWS Kubernetes cluster requires specified VPC and subnet configurations, Terraform will not attempt to create the cluster if the VPC and subnets fail to create it with the required configuration.
How To Create an EKS Cluster Using Terraform
In this part of the article, we shall provision an EKS cluster using Terraform. While doing this, other dependent resources like VPC, Subnets, NAT Gateway, Internet Gateway, and Security Groups will also be created, and we will also deploy an Nginx application with Terraform.
Note: You can find all of the relevant code on my Github repository. Before you create an EKS cluster with Terraform using the following steps, you need to set up and make note of a few things:
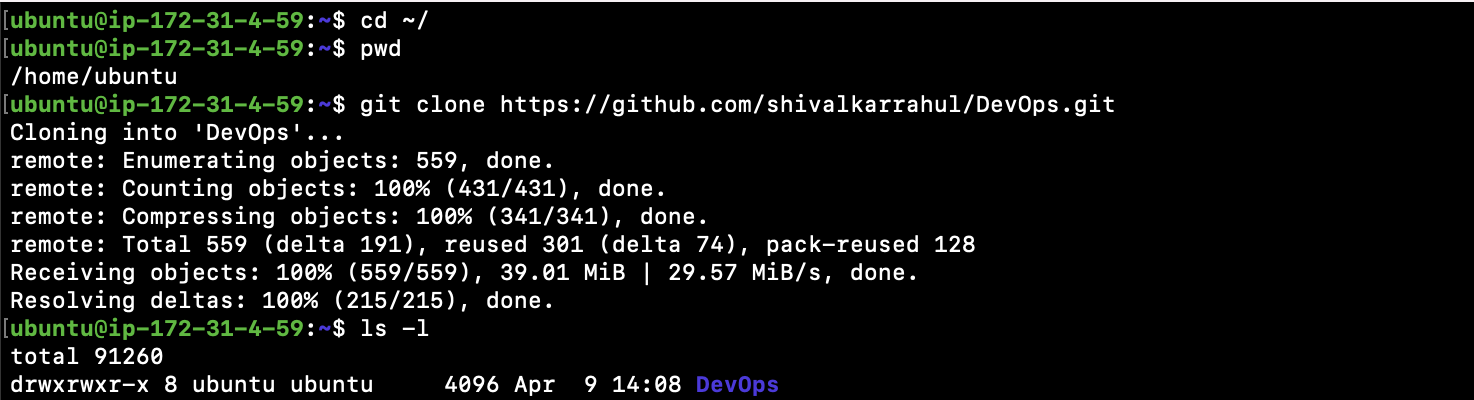
Clone the Github repository in your home directory:
cd ~/
pwd
git clone
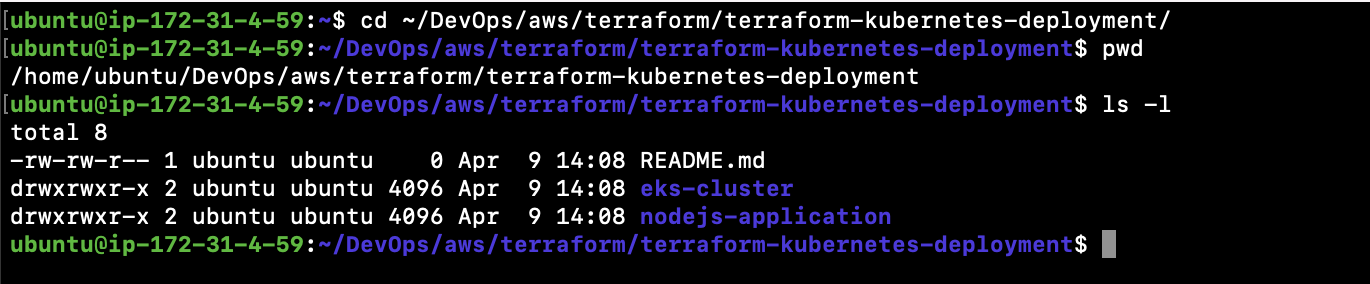
After you clone the repo, change your “Present Working Directory” to ~/DevOps/aws/terraform/terraform-kubernetes-deployment/
cd ~/DevOps/aws/terraform/terraform-kubernetes-deployment/
The Terraform files for creating an EKS cluster must be in one folder and the Terraform files for deploying a sample NodeJs application must be in another.
eks-cluster: This folder contains all of the .tf files required for creating the EKS Cluster.
nodejs-application: This folder contains a .tf file required for deploying the sample NodeJs application.
Now, let’s proceed with the creation of an EKS cluster using Terraform:
Verify your “Present Working Directory,” it should be ~/DevOps/aws/terraform/terraform-kubernetes-deployment/as you have already cloned my Github repository in the previous step.
cd ~/DevOps/aws/terraform/terraform-kubernetes-deployment/
Next, change your “Present Working Directory” to ~/DevOps/aws/terraform/terraform-kubernetes-deployment/eks-cluster
cd ~/DevOps/aws/terraform/terraform-kubernetes-deployment/eks-cluster
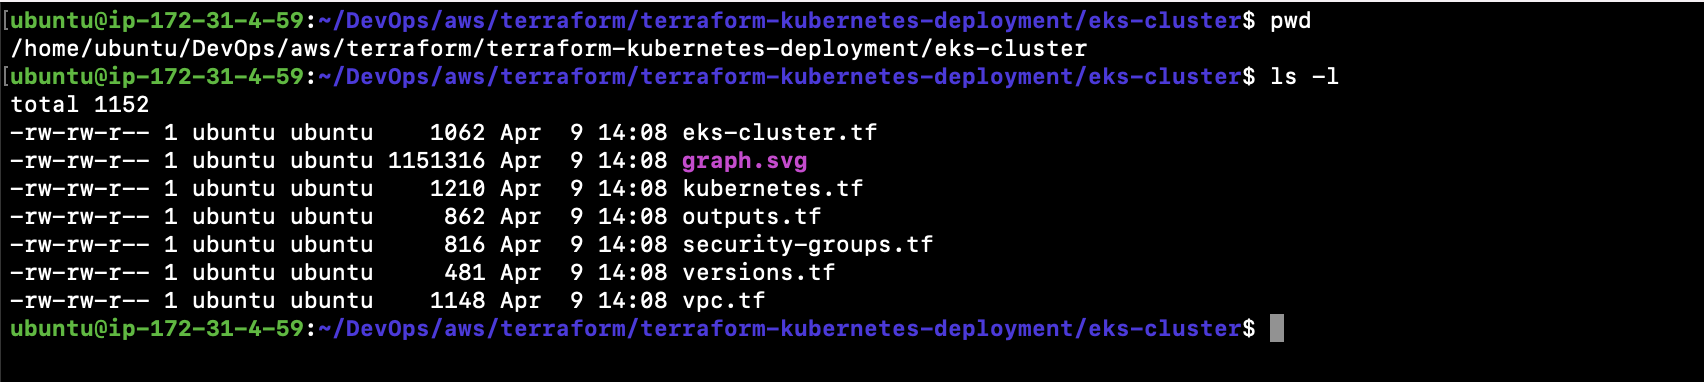
You should now have all the required files:
If you haven’t cloned the repo then you are free to create the required .tf files in a new folder.
Create your eks-cluster.tf file with the content below. In this case, we are using the module from terraform-aws-modules/eks/aws to create our EKS Cluster. Let’s take a look at the most important inputs that you may want to consider changing depending on your requirements.
Source: This informs Terraform of the location of the source code for the module.
Version: It is recommended to explicitly specify the acceptable version number to avoid unexpected or unwanted changes.
cluster_name: The cluster name is passed from the local variable.
cluster_version: This defines the EKS cluster version.
Subnets:This specifies the list of Subnets in which nodes will be created. For this example, we will be creating nodes in the “Private Subnets.” Subnet IDs are passed here from the module in which Subnets are created.
cpc_id:This specifies the VPI in which the EKS cluster will be created. The value is passed from the module in which the VPC is created.
instance_type: You can change this value if you want to create worker nodes with any other instance type.
asg_desired_capacity: Here, you can specify the maximum number of nodes that you want in your auto-scaling worker node groups.
Create a kubernetes.tf file with the following content. Here, we are using Terraform Kubernetes Provider to create Kubernetes objects, such as a namespace, deployment, and service, using Terraform. We are creating these resources for testing purposes only. In the following steps, we will also be deploying a sample application using Terraform. Here are all the resources we will be creating in the EKS cluster.
kubernetes_namespace: We will be creating a “test” namespace and using this namespace to create other Kubernetes objects in the EKS cluster.
kubernetes_deployment: We will be creating a deployment with two replicas of the Nginx pod.
kubernetes_service: A service of type LoadBalancer will be created and used to access our Nginx application.
Create an outputs.tf file with the following content. This is done to export the structured data related to our resources. It will provide information about our EKS infrastructure to other Terraform setups. Output values are equivalent to return values in other programming languages.
output “cluster_id” {
description = “EKS cluster ID.”
value = module.eks.cluster_id
}
output “cluster_endpoint” {
description = “Endpoint for EKS control plane.”
value = module.eks.cluster_endpoint
}
output “cluster_security_group_id” {
description = “Security group ids attached to the cluster control plane.”
value = module.eks.cluster_security_group_id
}
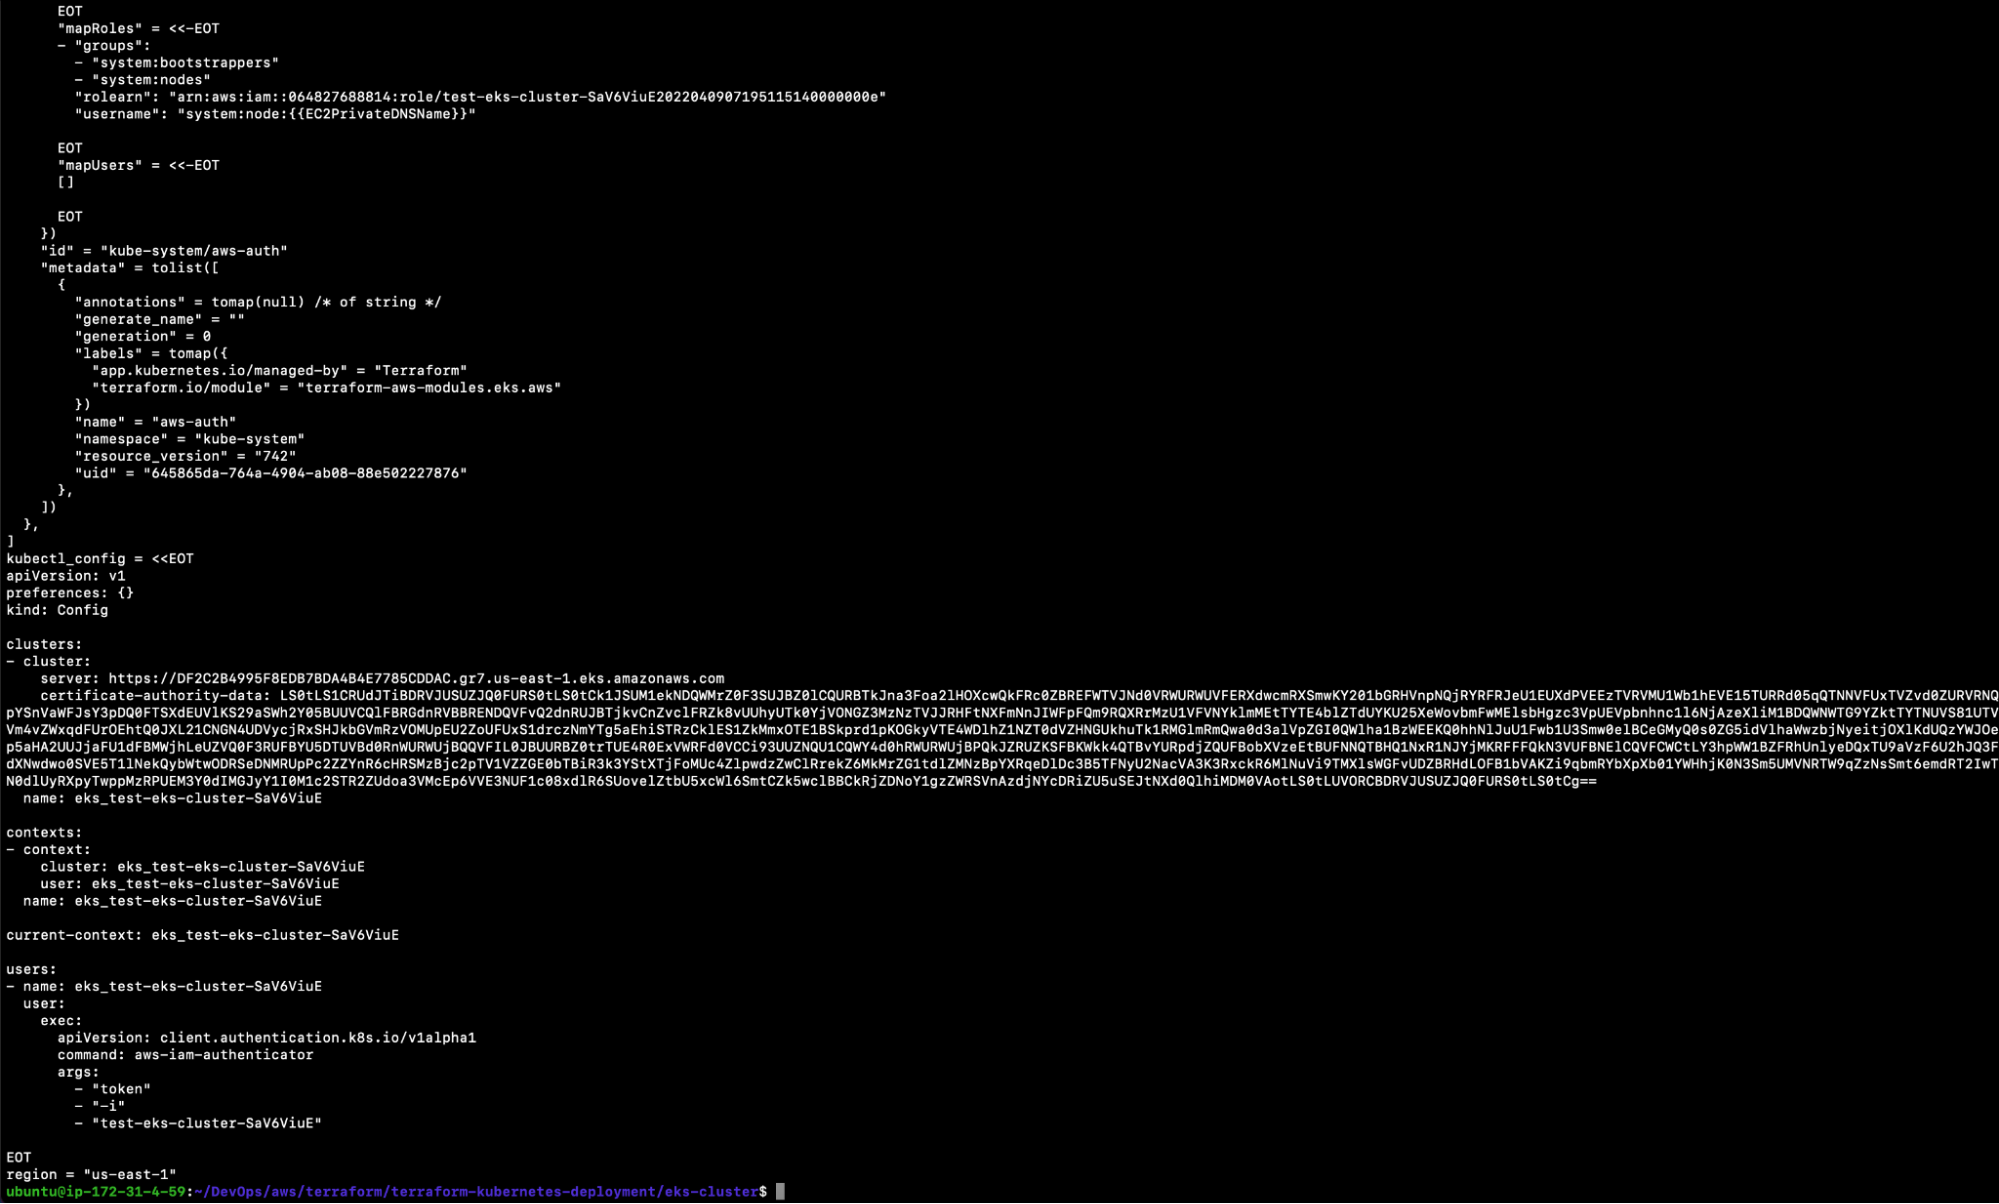
output “kubectl_config” {
description = “kubectl config as generated by the module.”
value = module.eks.kubeconfig
}
output “config_map_aws_auth” {
description = “A kubernetes configuration to authenticate to this EKS cluster.”
value = module.eks.config_map_aws_auth
}
output “region” {
description = “AWS region”
value = var.region
}
output “cluster_name” {
description = “Kubernetes Cluster Name”
value = local.cluster_name
}
Create a security-groups.tf file with the following content. In this case, we are defining the security groups, which will be used by our worker nodes.
Create a versions.tf file with the following content. Here, we are defining version constraints along with a provider as AWS.
terraform {
  required_providers {
    aws = {
      source  = “hashicorp/aws”
      version = “>= 3.20.0”
    }

    random = {
      source  = “hashicorp/random”
      version = “3.1.0”
    }

    local = {
      source  = “hashicorp/local”
      version = “2.1.0”
    }

    null = {
      source  = “hashicorp/null”
      version = “3.1.0”
    }

    kubernetes = {
      source  = “hashicorp/kubernetes”
      version = “>= 2.0.1”
    }
  }

  required_version = “>= 0.14”
}
Create a vpc.tf file with the following content. For the purposes of our example, we have defined a 10.0.0.0/16 CIDR for a new VPC that will be created and used by the EKS cluster. We will also be creating public and private Subnets. To create a VPC, we will be using the terraform-aws-modules/vpc/aws module. All of our resources will be created in the us-east-1 region. If you want to use any other region for creating the EKS cluster, all you need to do is change the value assigned to the “region” variable.
At this point, you should have six files in your current directory (as can be seen below). All of these files should be in one directory. In the next step, you will learn to deploy a sample NodeJs application and, to do so, you will need to create a new folder. That said, if you have cloned the repo herein, you won’t need to worry:
eks-cluster.tf
kubernetes.tf
outputs.tf
security-groups.tf
versions.tf
vpc.tf
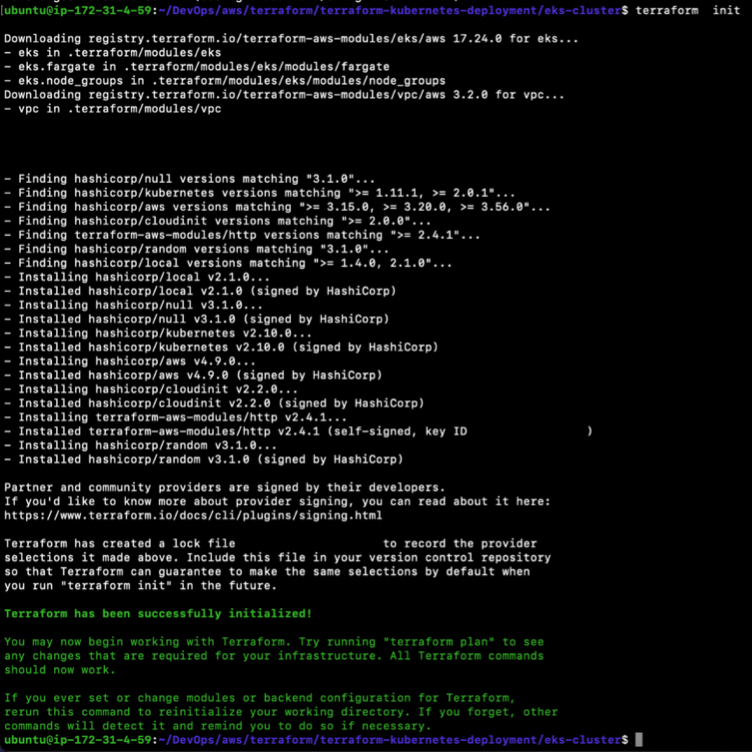
To create an EKS cluster, execute the following command to initialize the current working directory containing the Terraform configuration files (.tffiles).
terraform init
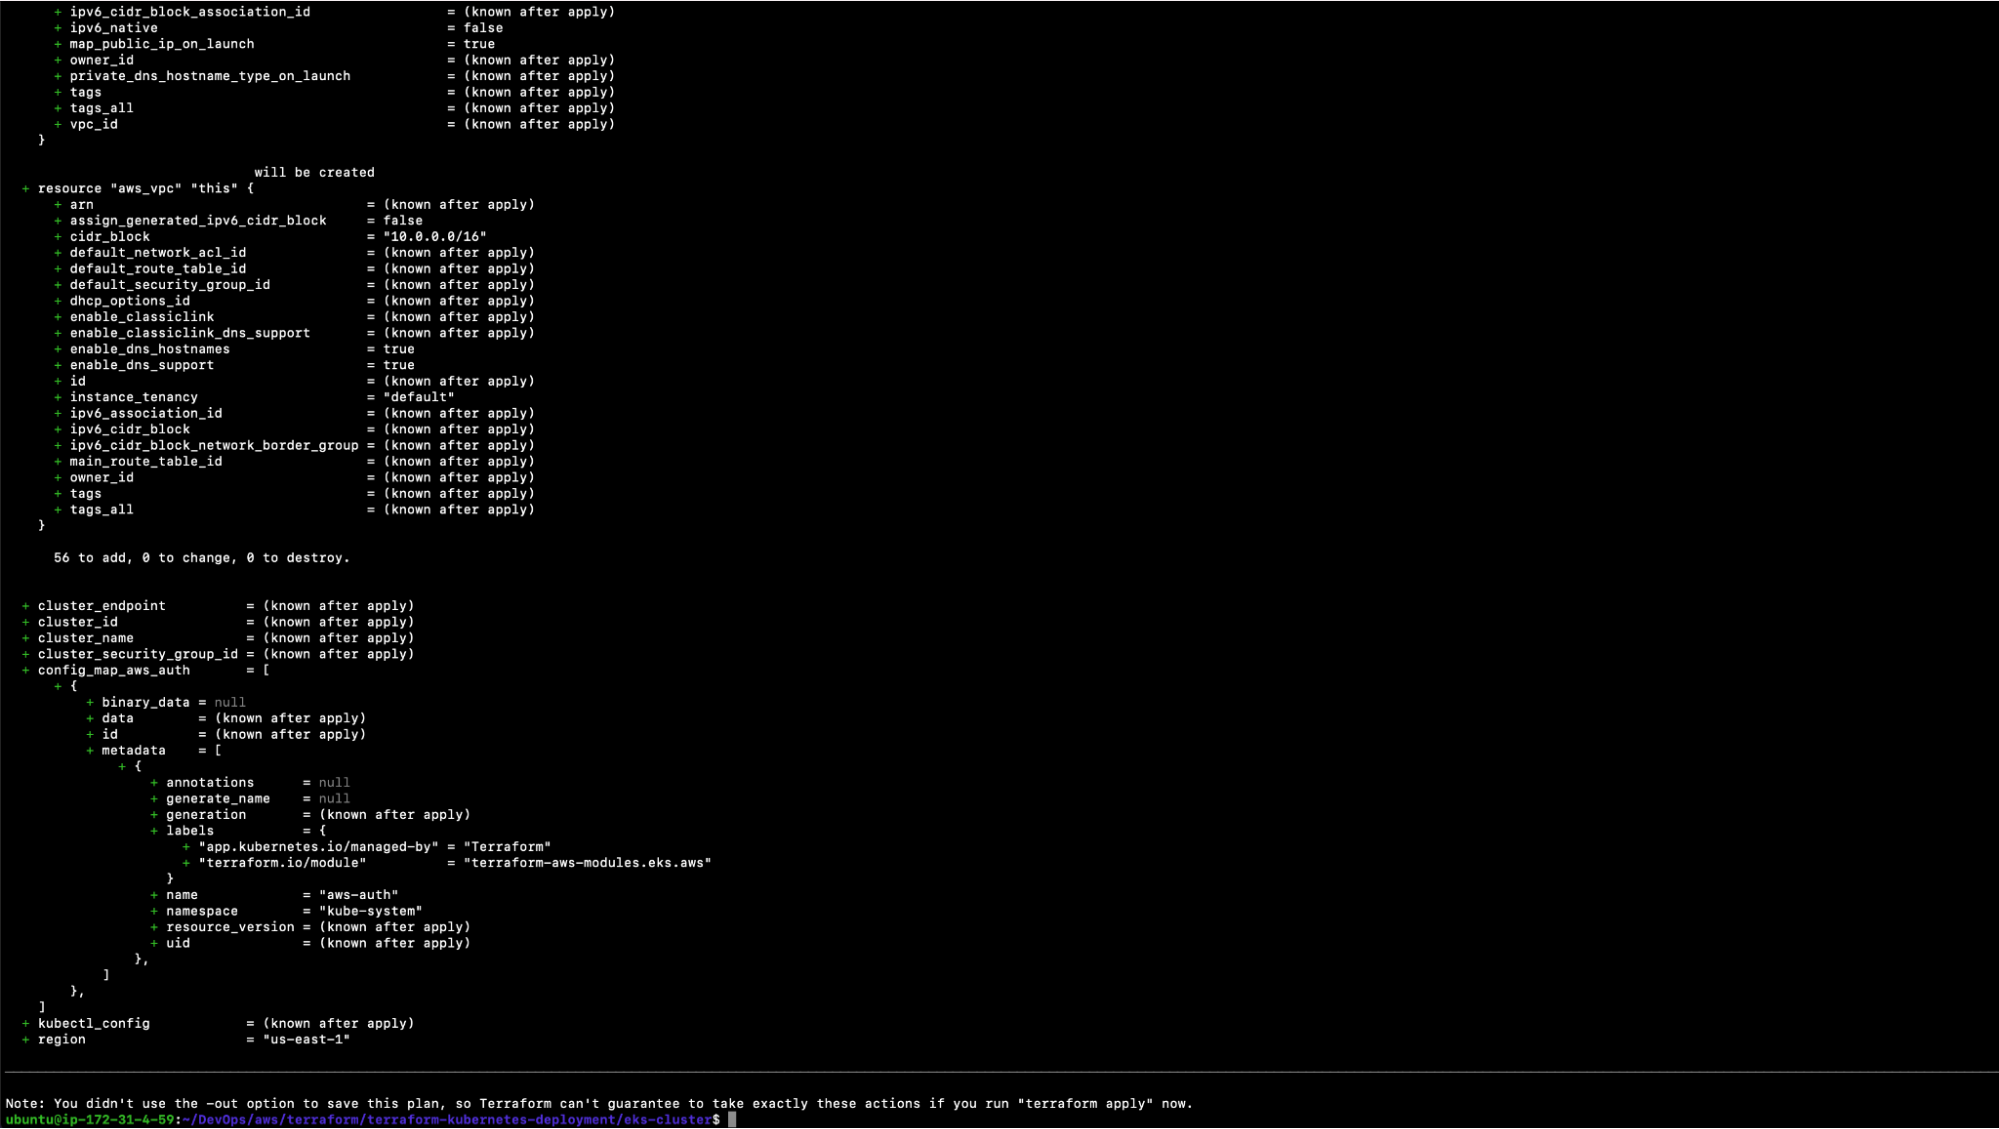
Execute the following command to determine the desired state of all the resources defined in the above .tffiles.
terraform plan
Before we go ahead and create our EKS cluster, let’s take a look at the “terraform graph” command. This is an optional step that you can skip if you wish. Basically, we are simply generating a visual representation of our execution plan. Once you execute the following command, you will get the output in a graph.svgfile. You can try to open the file on your personal computer or online with SVG Viewer.
terraform graph -type plan | dot -Tsvg > graph.svg
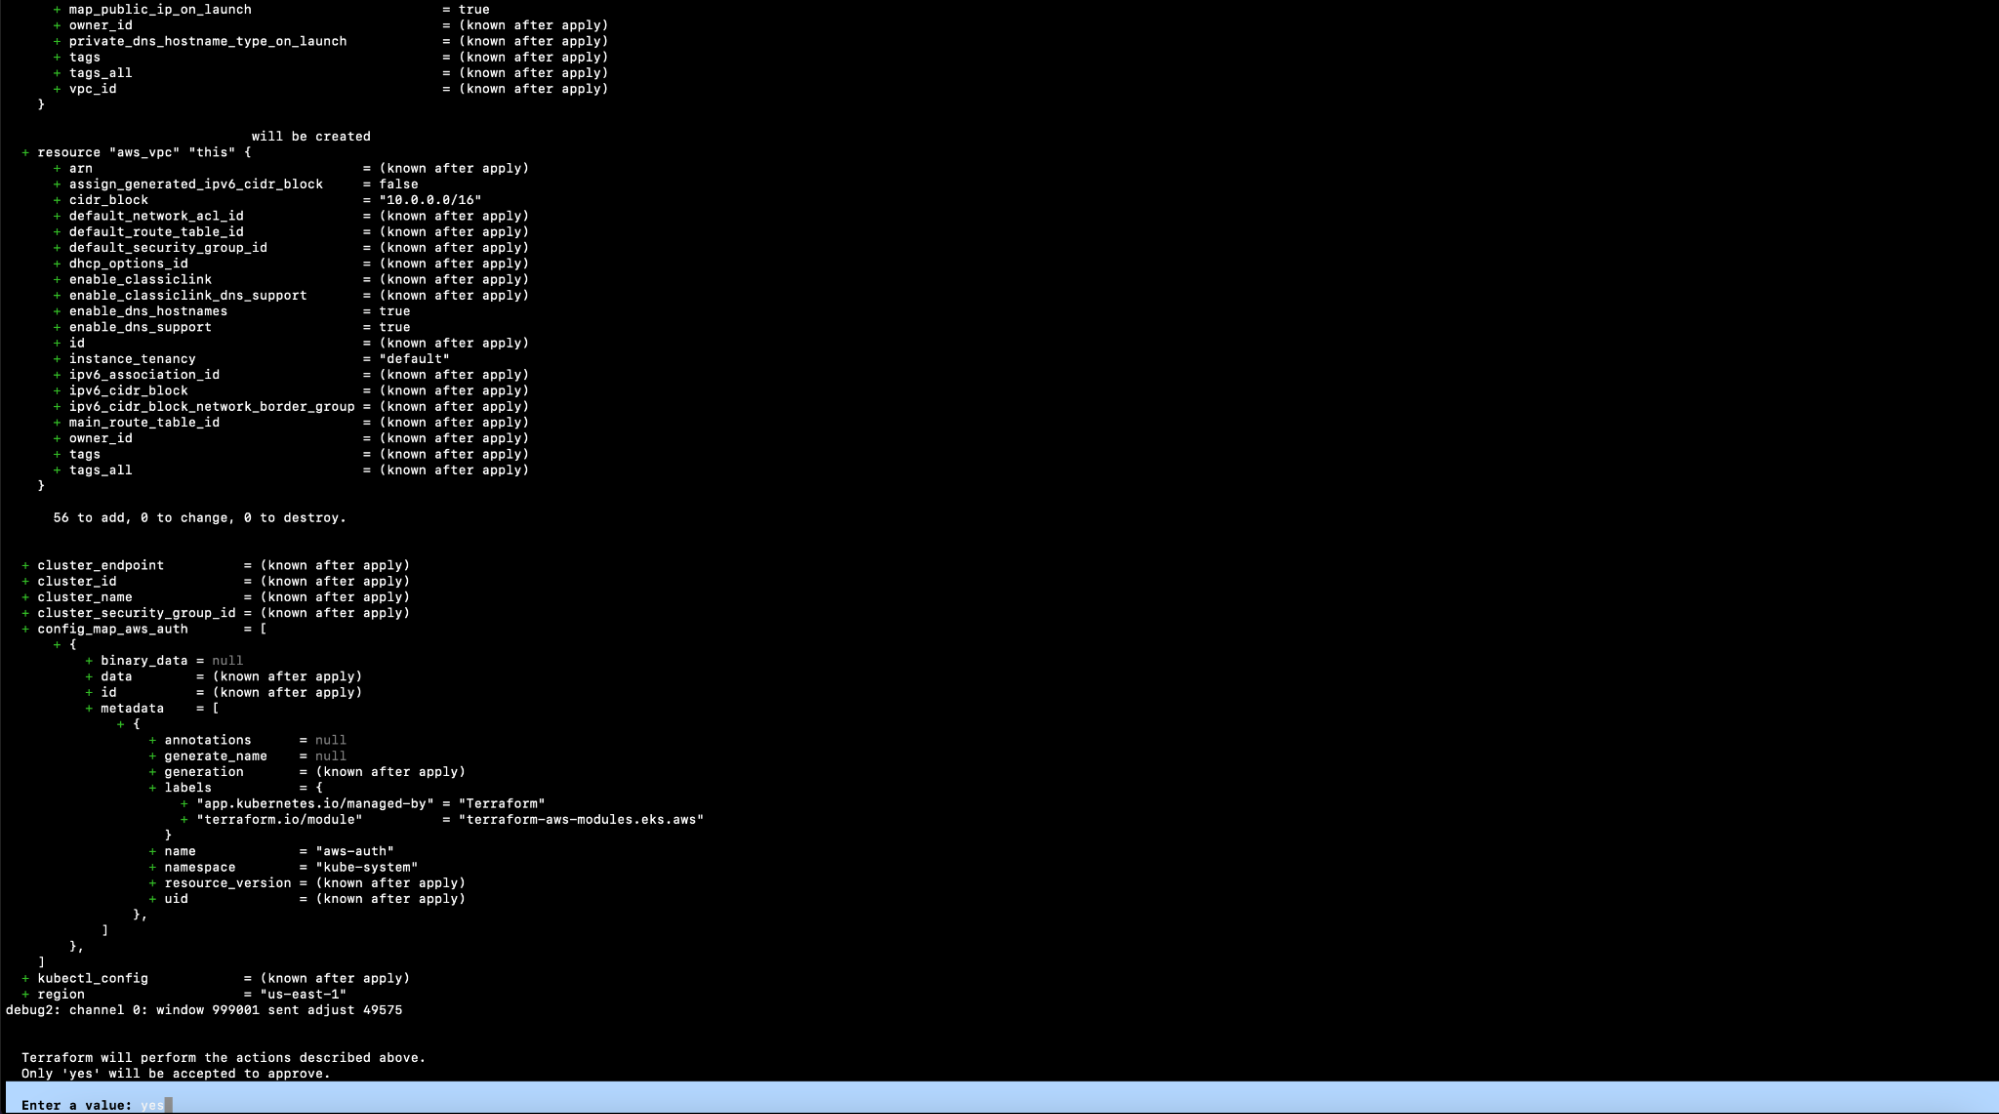
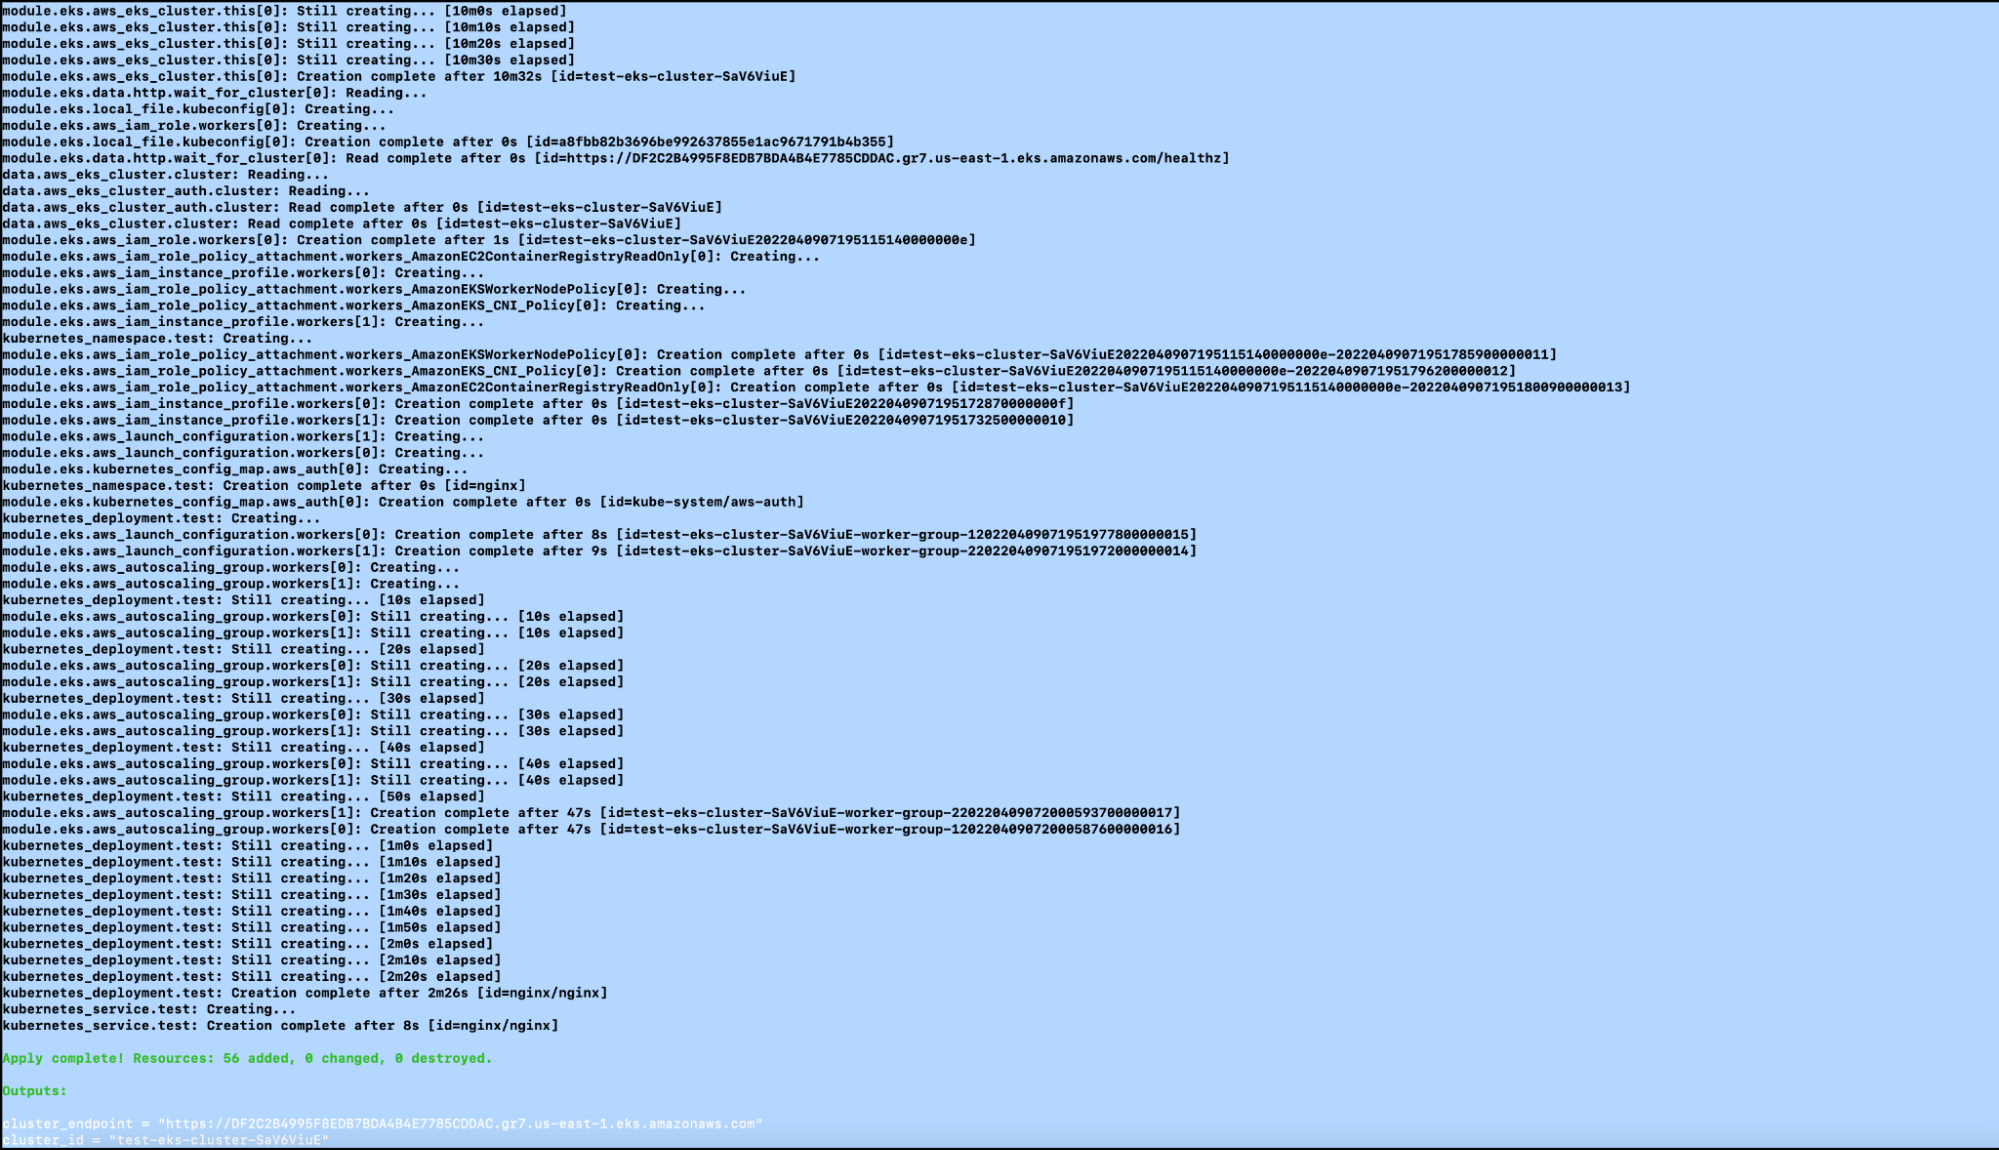
We must now create the resources using the .tffiles in our current working directory. Execute the following command. This will take around ten minutes to complete. Feel free to go have a cup of coffee. Once the command is successfully completed, the EKS cluster will be ready.
terraform apply
16. After the “terraform apply” command is successfully completed, you should see the output as depicted below.
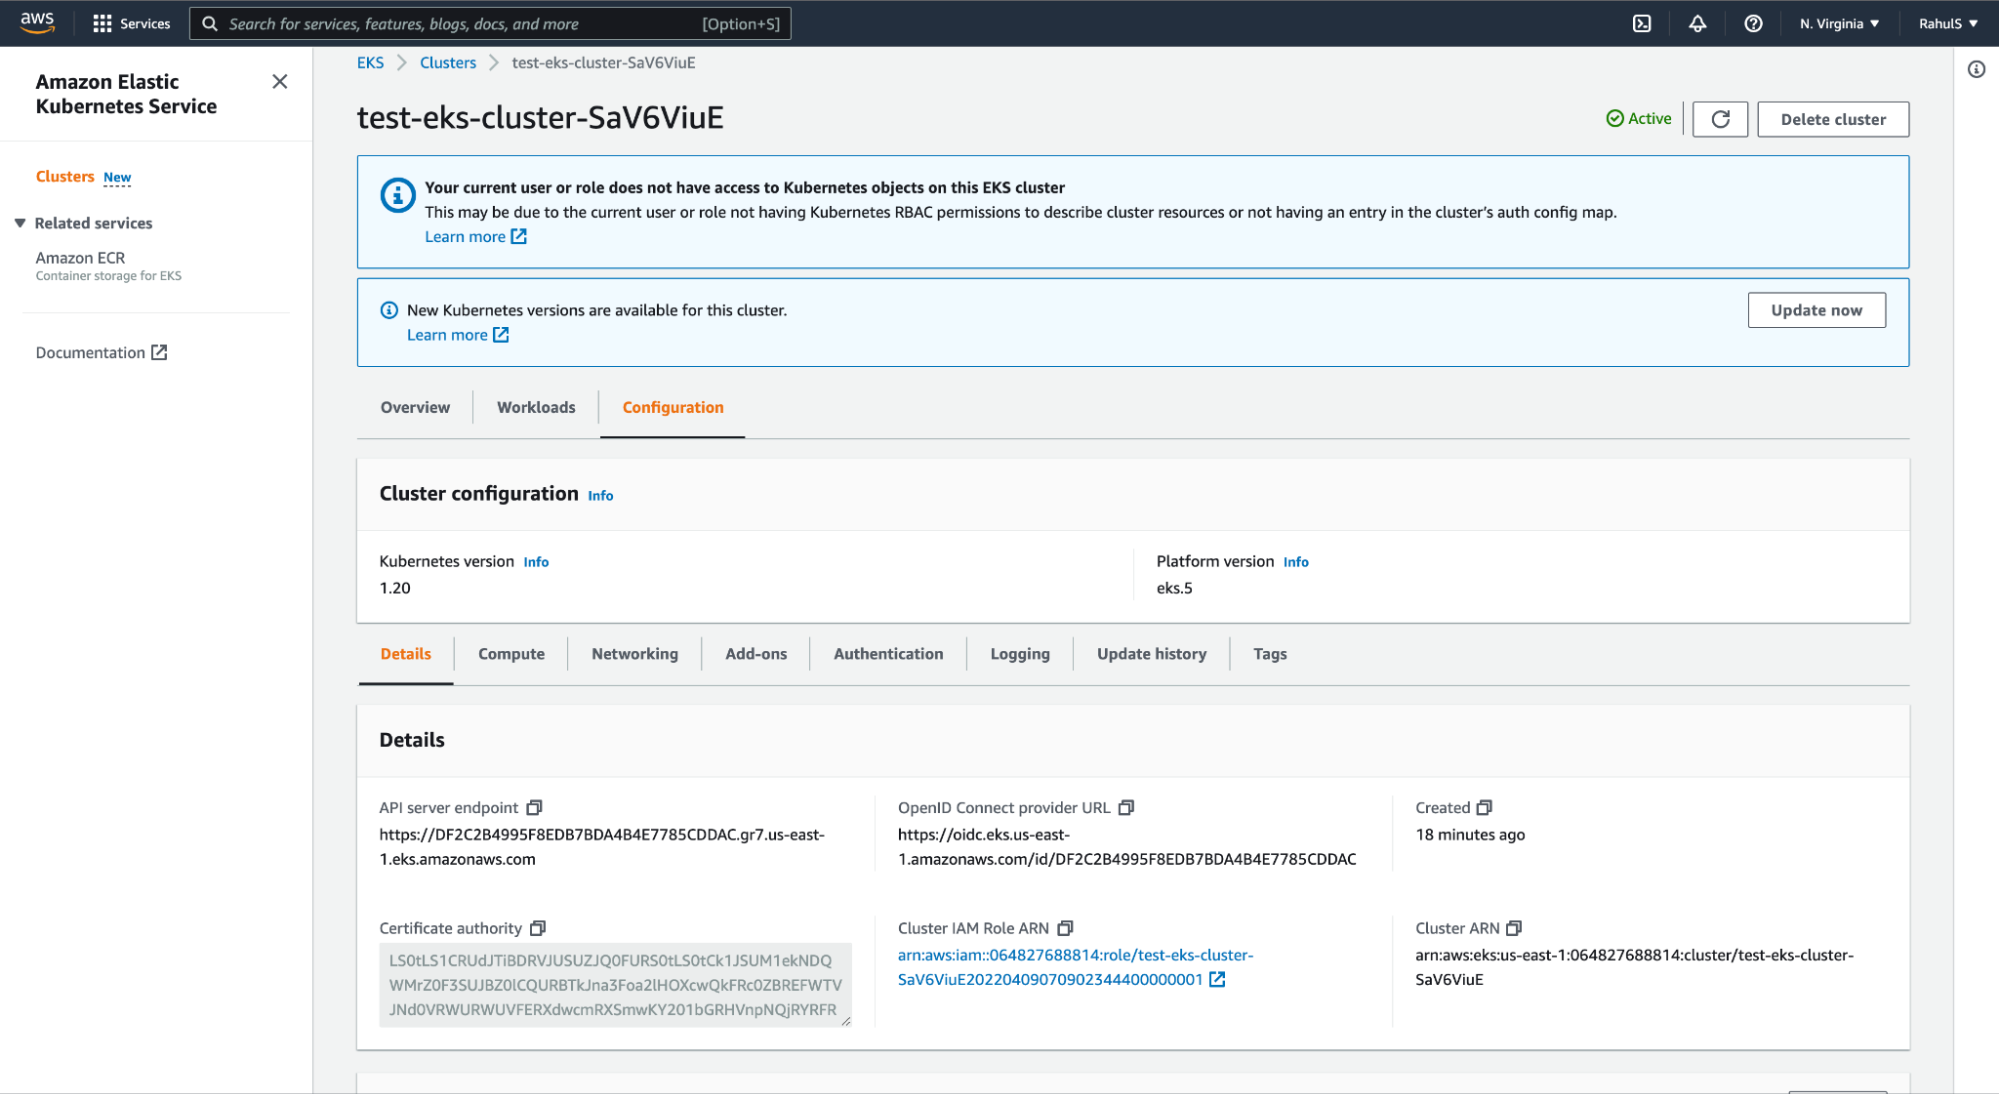
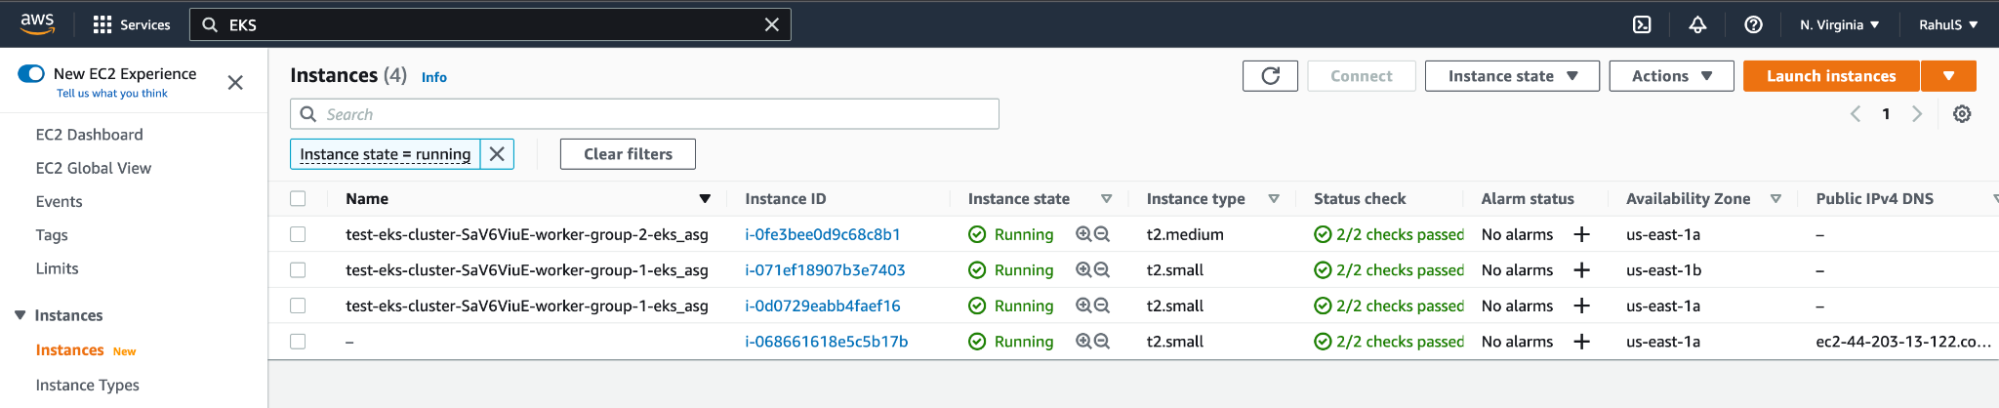
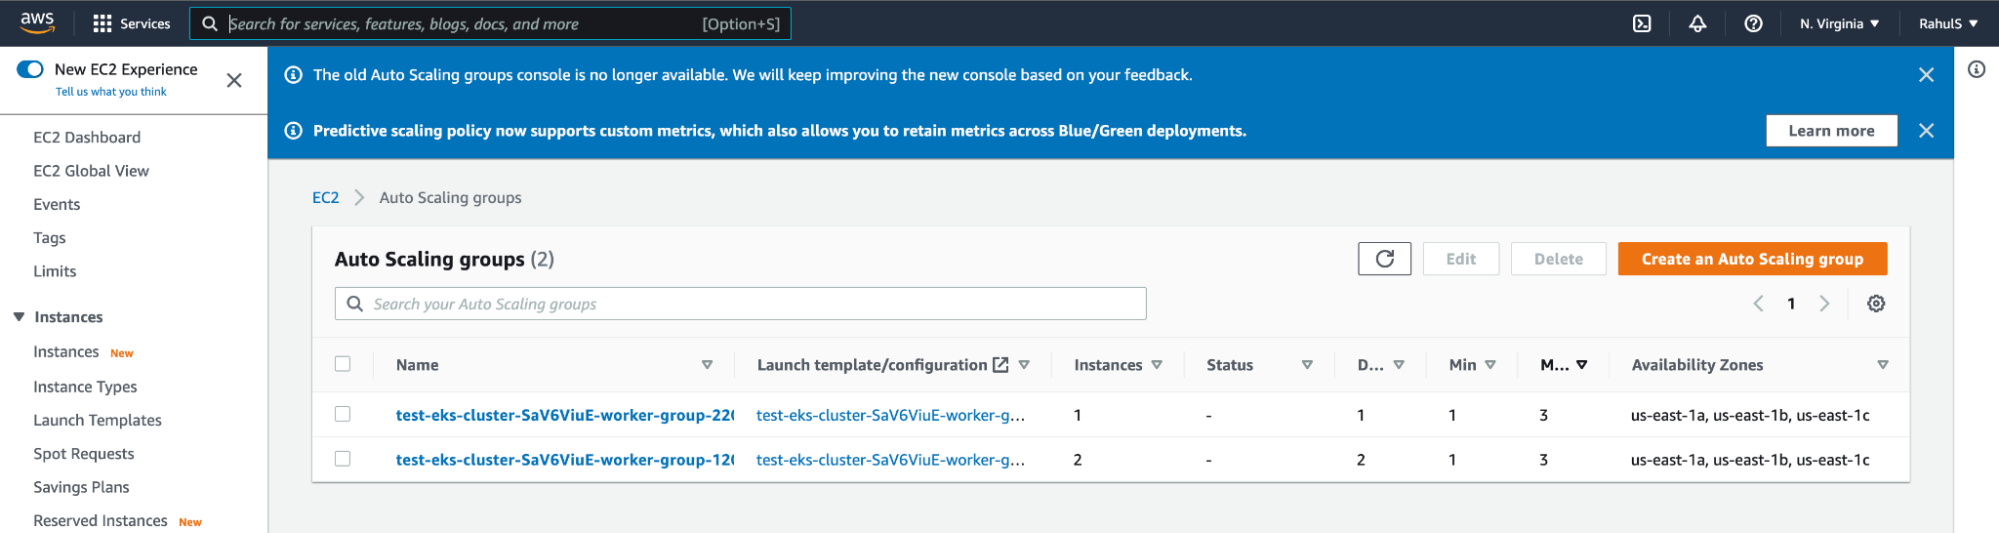
17. You can now go to the AWS Console and verify the resources created as part of the EKS cluster.
Before we deploy a sample NodeJs application, let’s try generating a visual representation of our execution plan in the same way we did while creating the EKS cluster. In this case, this is an optional step that you can skip if you don’t wish to see the graph. Once you execute the following command, you will get the output in a graph.svgfile. You can try to open the file on your personal computer or online with SVG Viewer.
terraform grap—type plan | dot -Tsvg > graph.svg
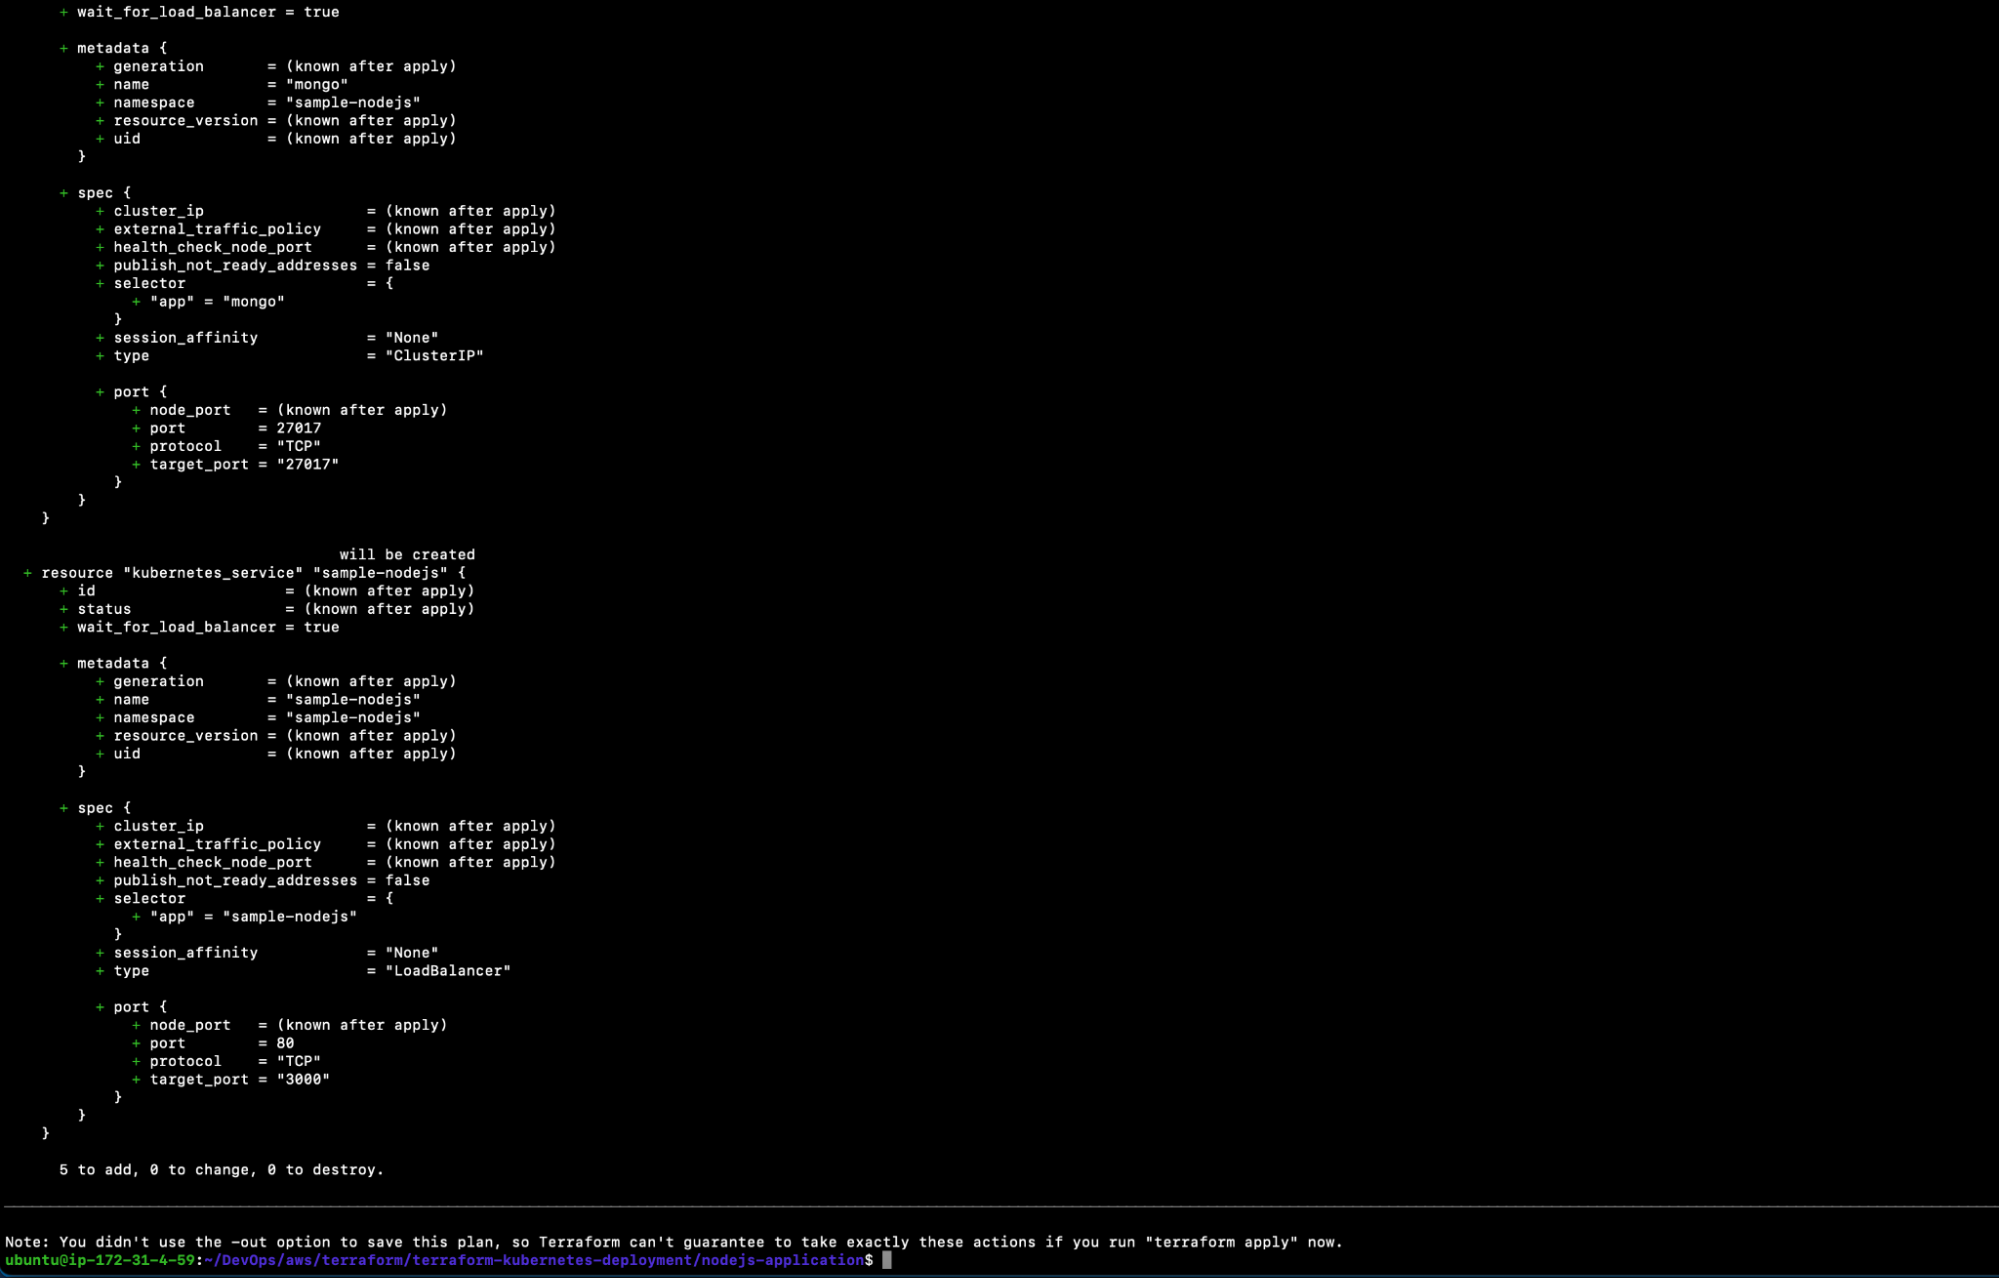
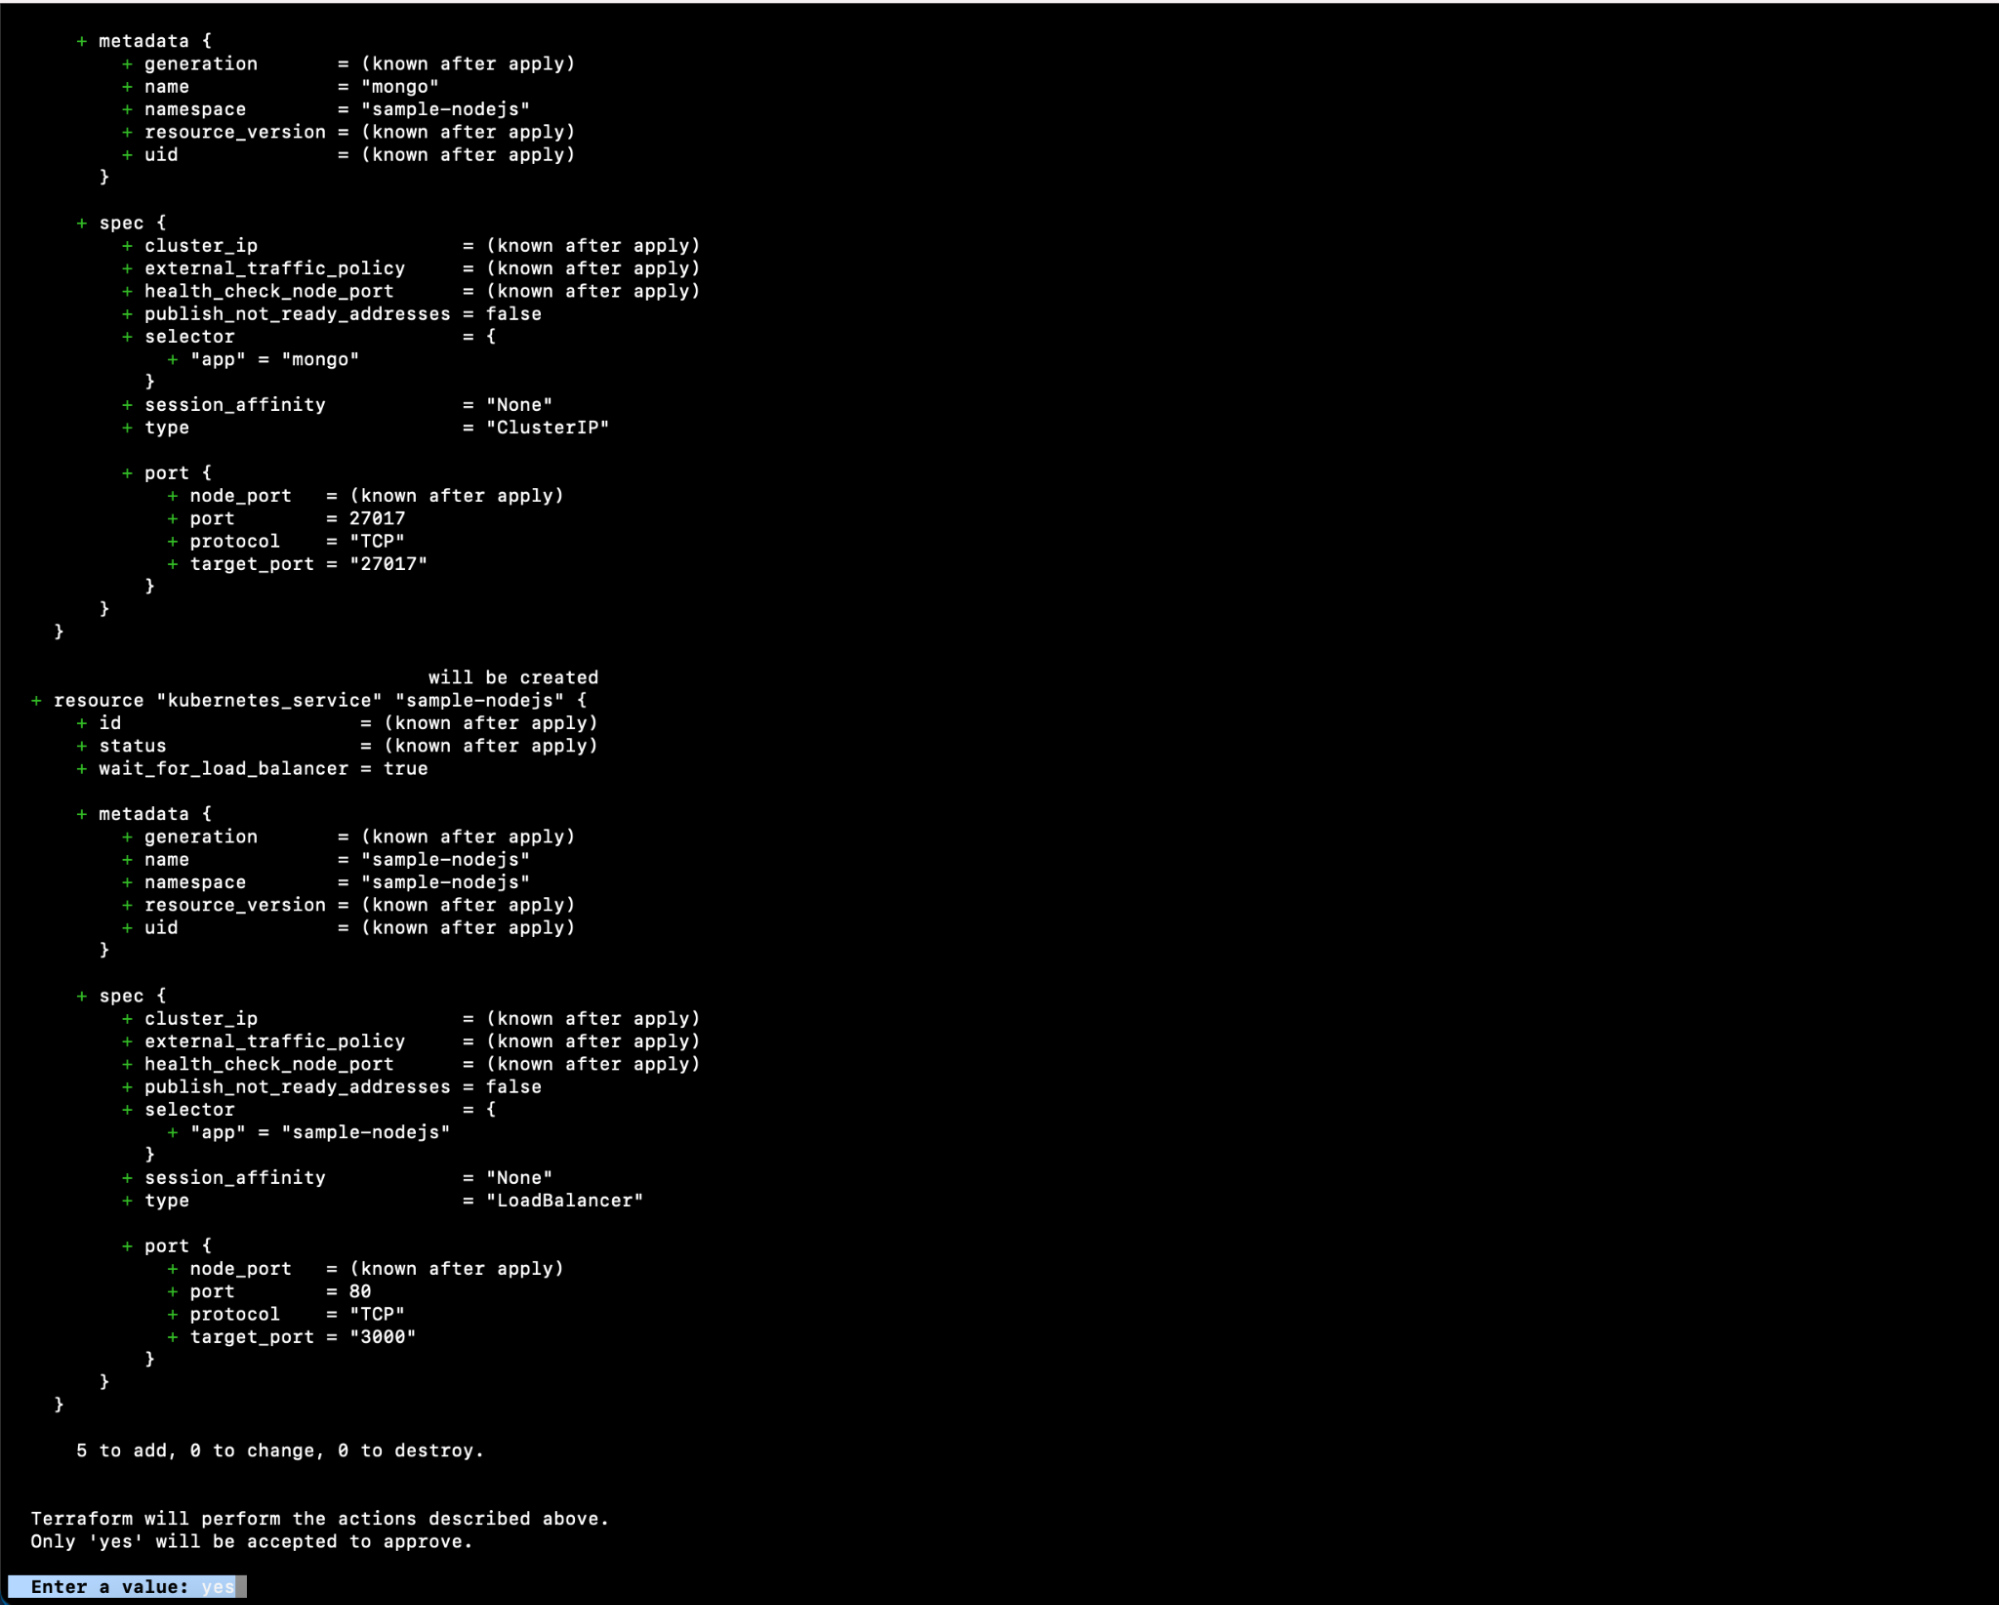
The next step is to deploy the sample Nodejs application using the .tffiles in our current working directory. Execute the following command, and this time, don’t go and have a cup of tea seeing as it should not take more than one minute to complete. Once the command is successfully completed, the sample NodeJs application will be deployed in the EKS cluster using Terraform:
terraform apply
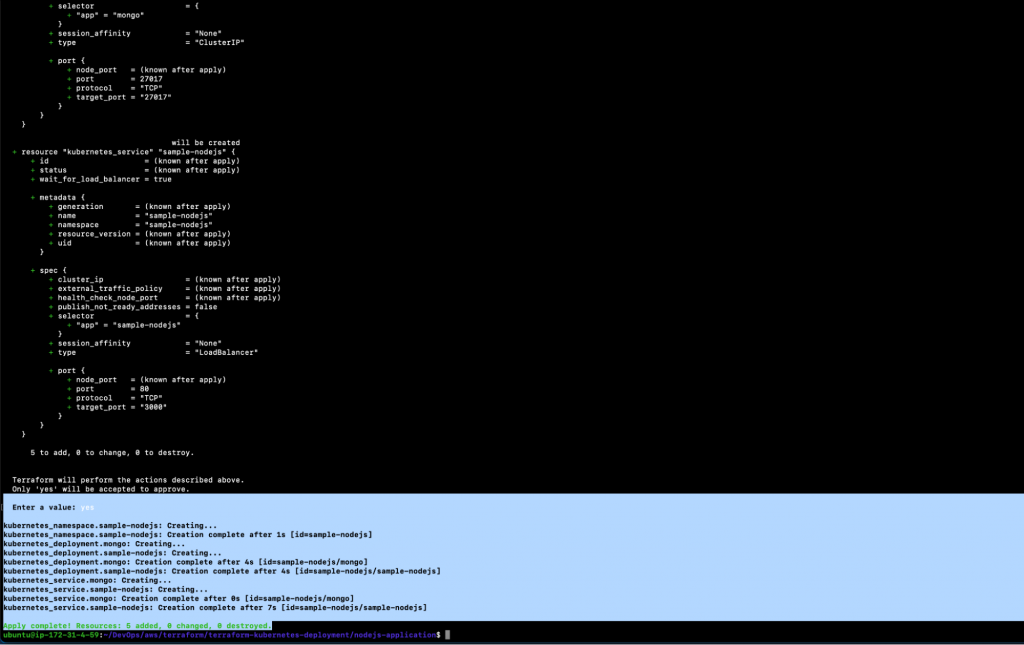
10. Once the “terraform apply” command is successfully completed, you should see the following output:
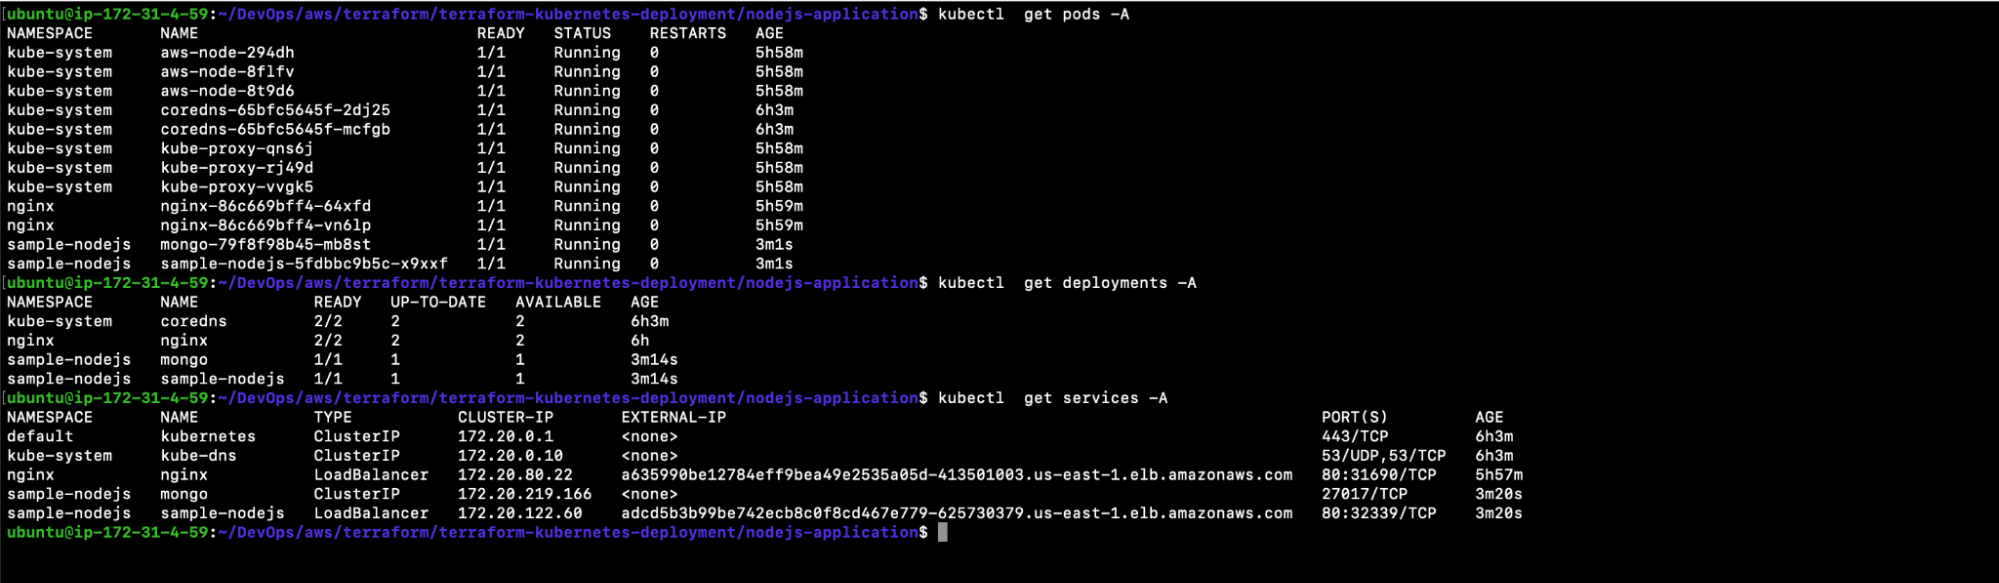
11. You can now verify the objects that have been created using the commands below
kubectl get pods -A
kubectl get deployments -A
kubectl get services -A
In the above screenshot, you can see the namespace, pods, deployment, and service that were created for the sample NodeJs application.
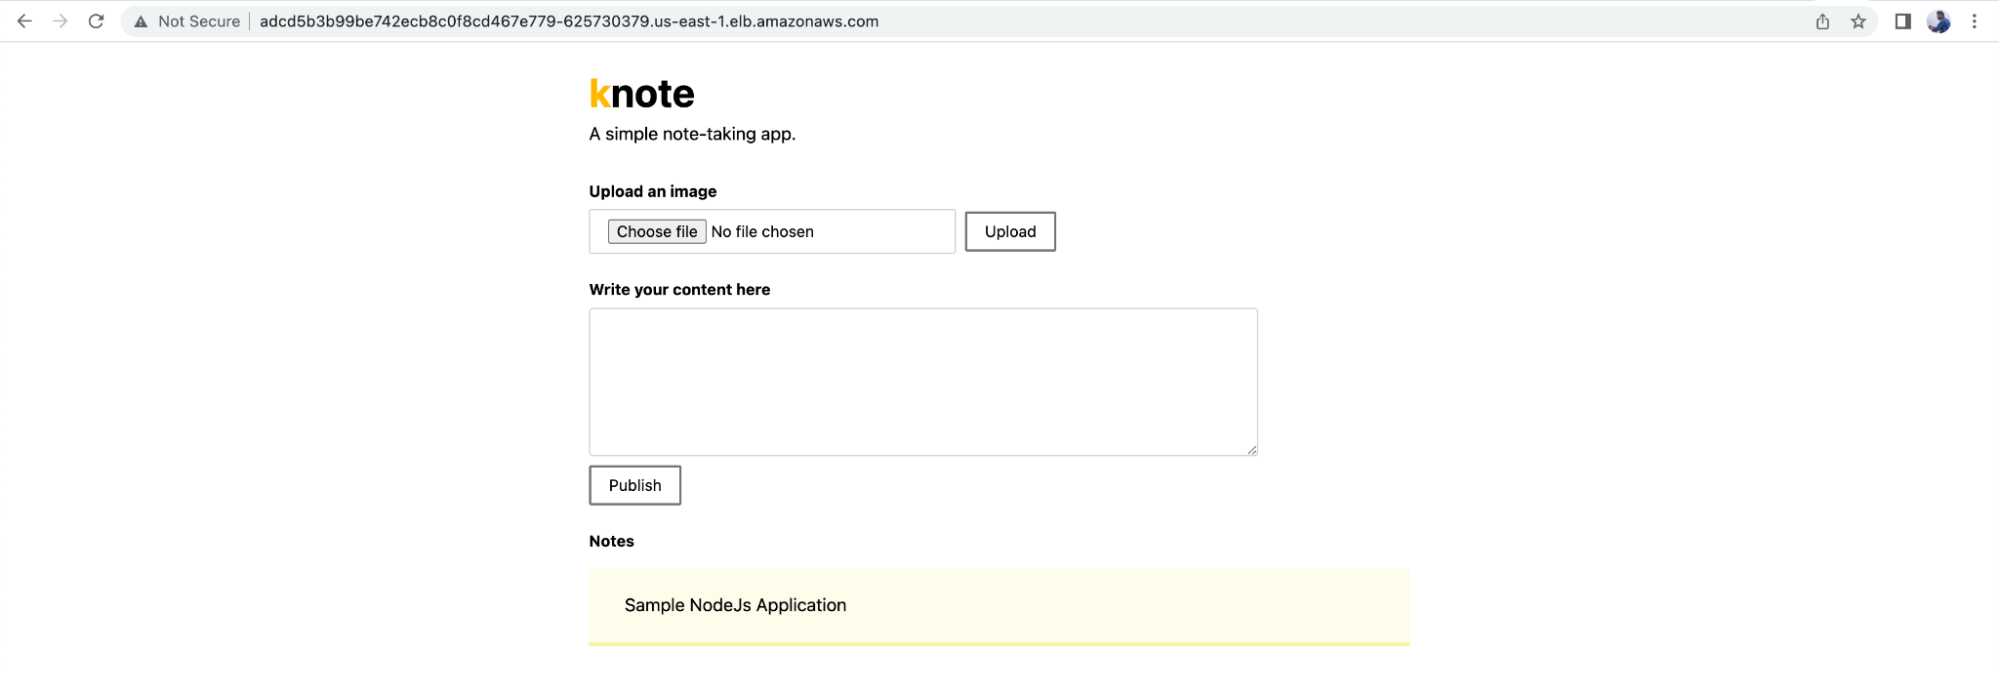
You can also access the sample NodeJs application using the DNS of the LoadBalancer. Upload an image and add a note to it. Once you’ve published the image, it will be saved in the database. It’s important to note that, in this case, we did not use any type of persistent storage for the application, therefore the data will not be retained after the pod is recreated or deleted. To retain data, try using PersistentVolume for the database.
We just deployed a sample NodeJs application that was publicly accessible over the LoadBalancer DNS using Terraform.
Next, we will complete the creation of the EKS Cluster and deployment of the sample NodeJs application using Terraform.
Cleanup the Resources We Created
It’s always better to delete the resource once you’re done with the tests, seeing as this saves costs. To clean up the resources and delete the sample NodeJs application and EKS cluster, follow the steps below:
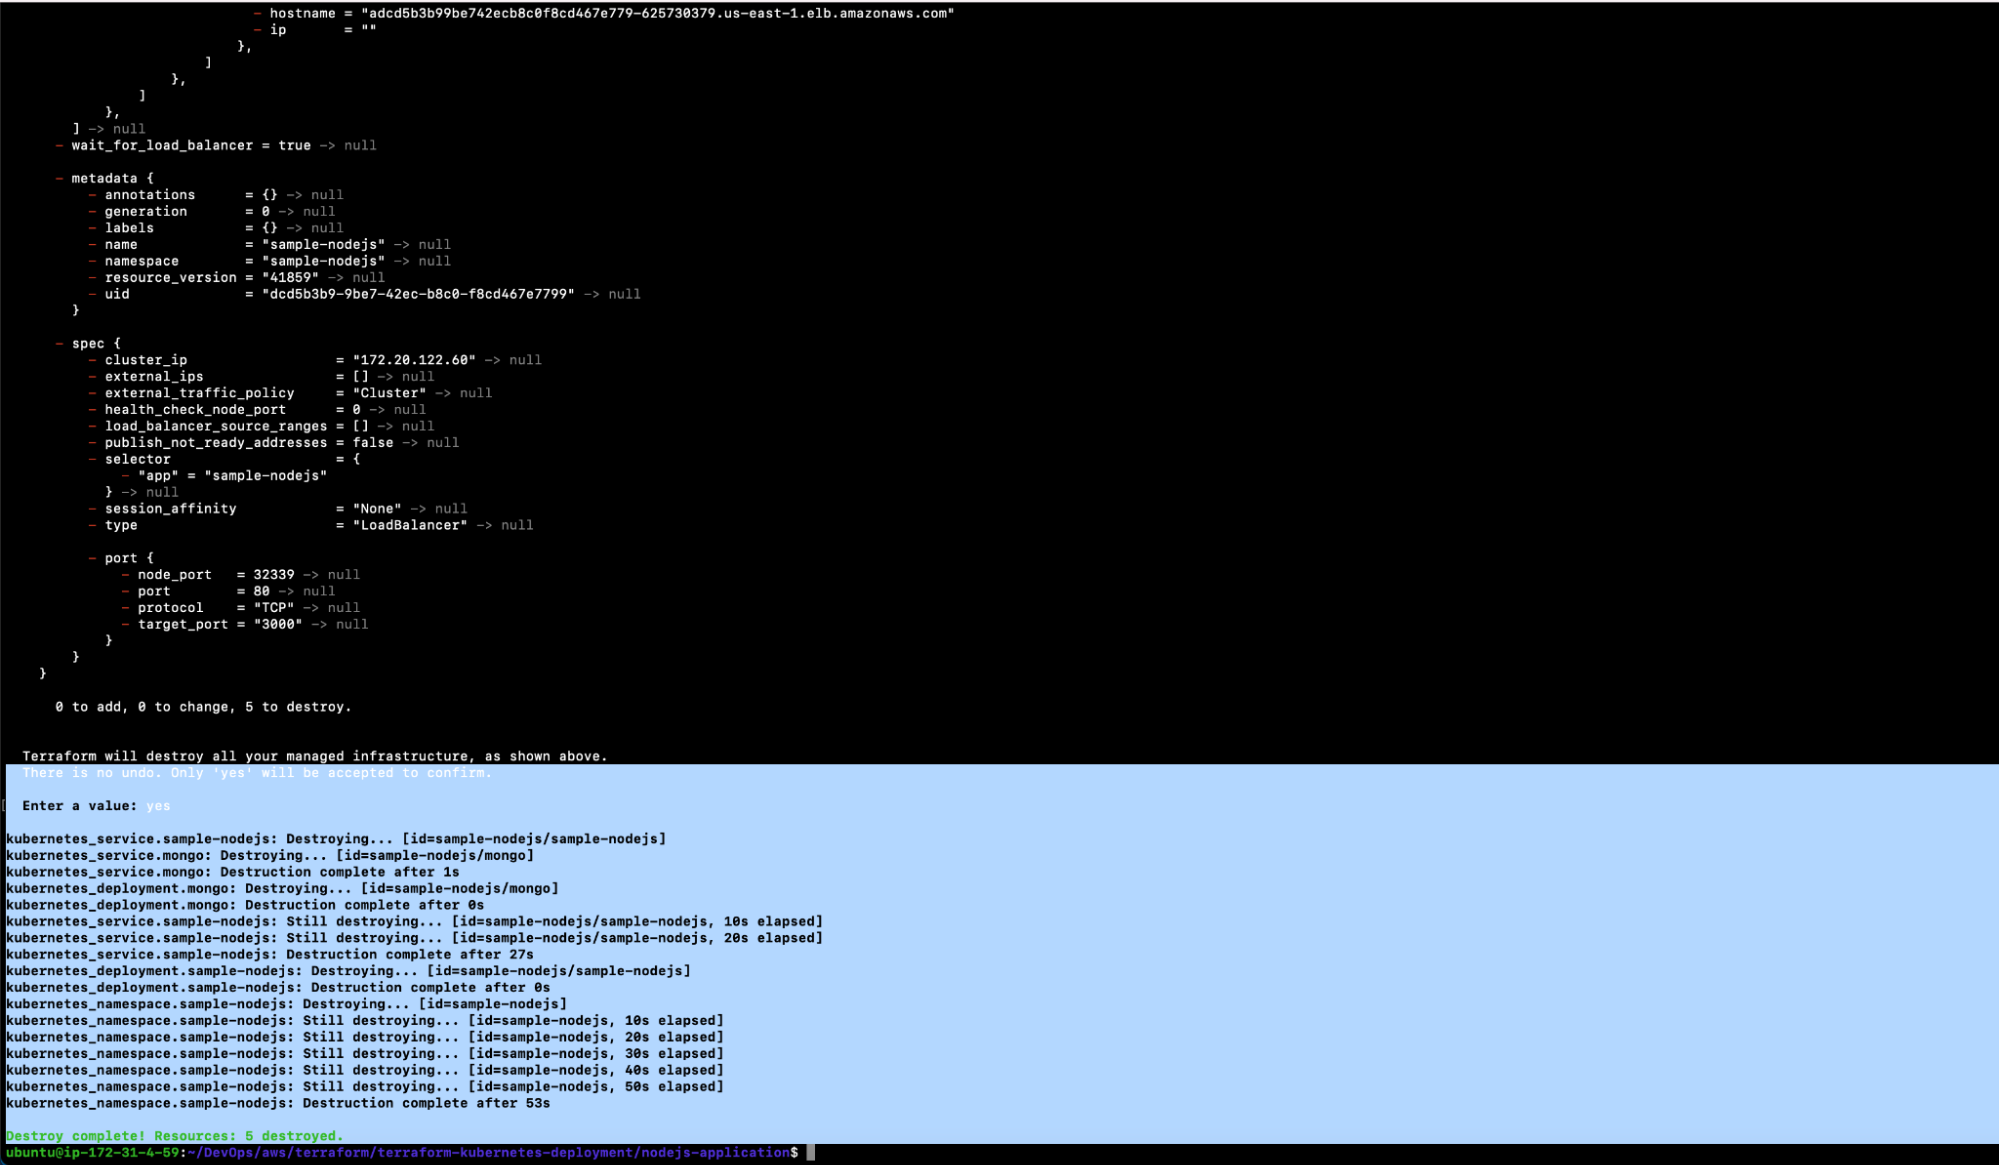
Destroy the sample NodeJs application using the following command:
terraform init Execute this command if you get this error: “Error: Inconsistent dependency lock file.”
terraform destroy
You should see the following output once the above command is successful:
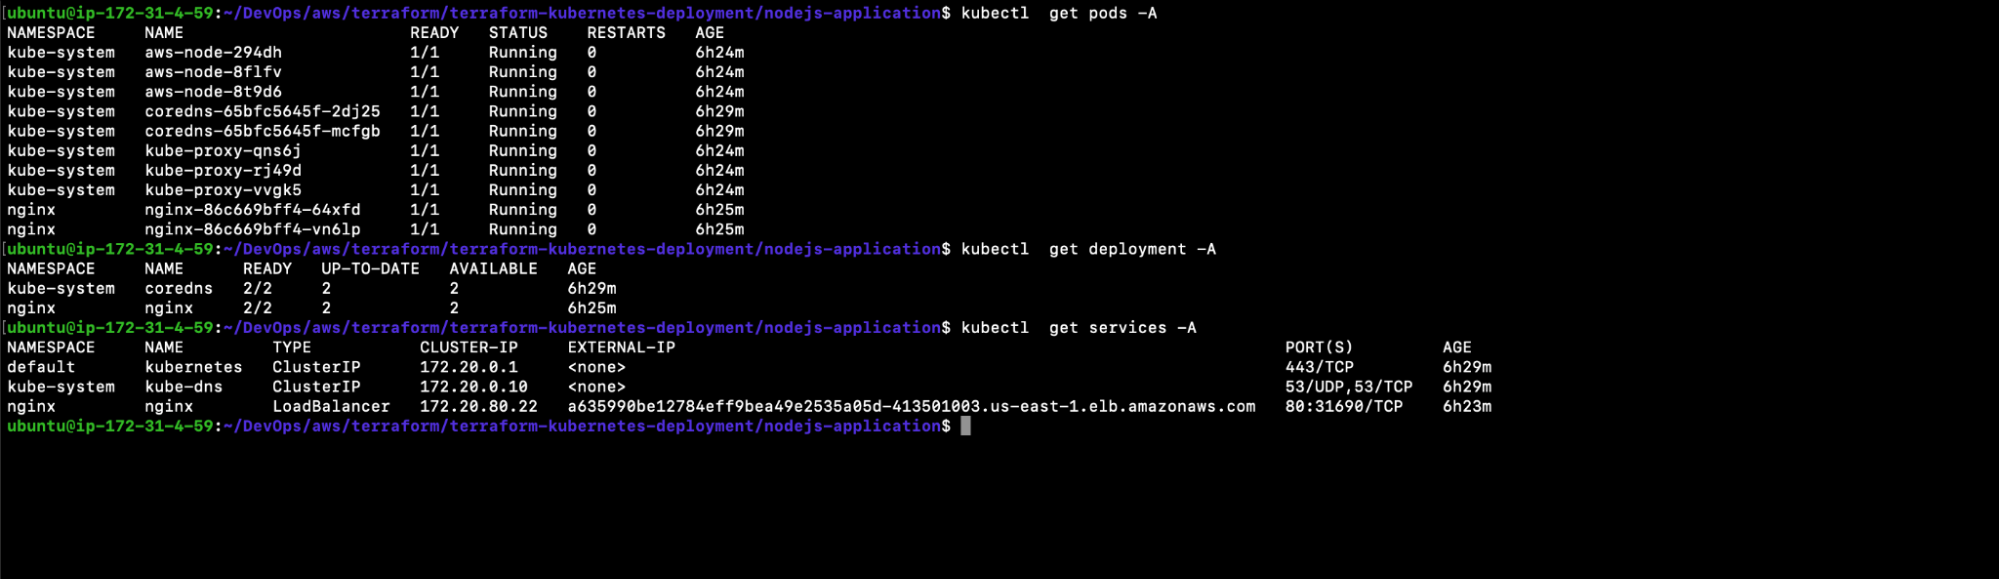
Validate whether or not the NodeJs application has been destroyed:
kubectl get pod—A
kubectl get deployment—A
kubectl get service—A
In the above screenshot you can see that all of the sample Nodejs application resources have been deleted.
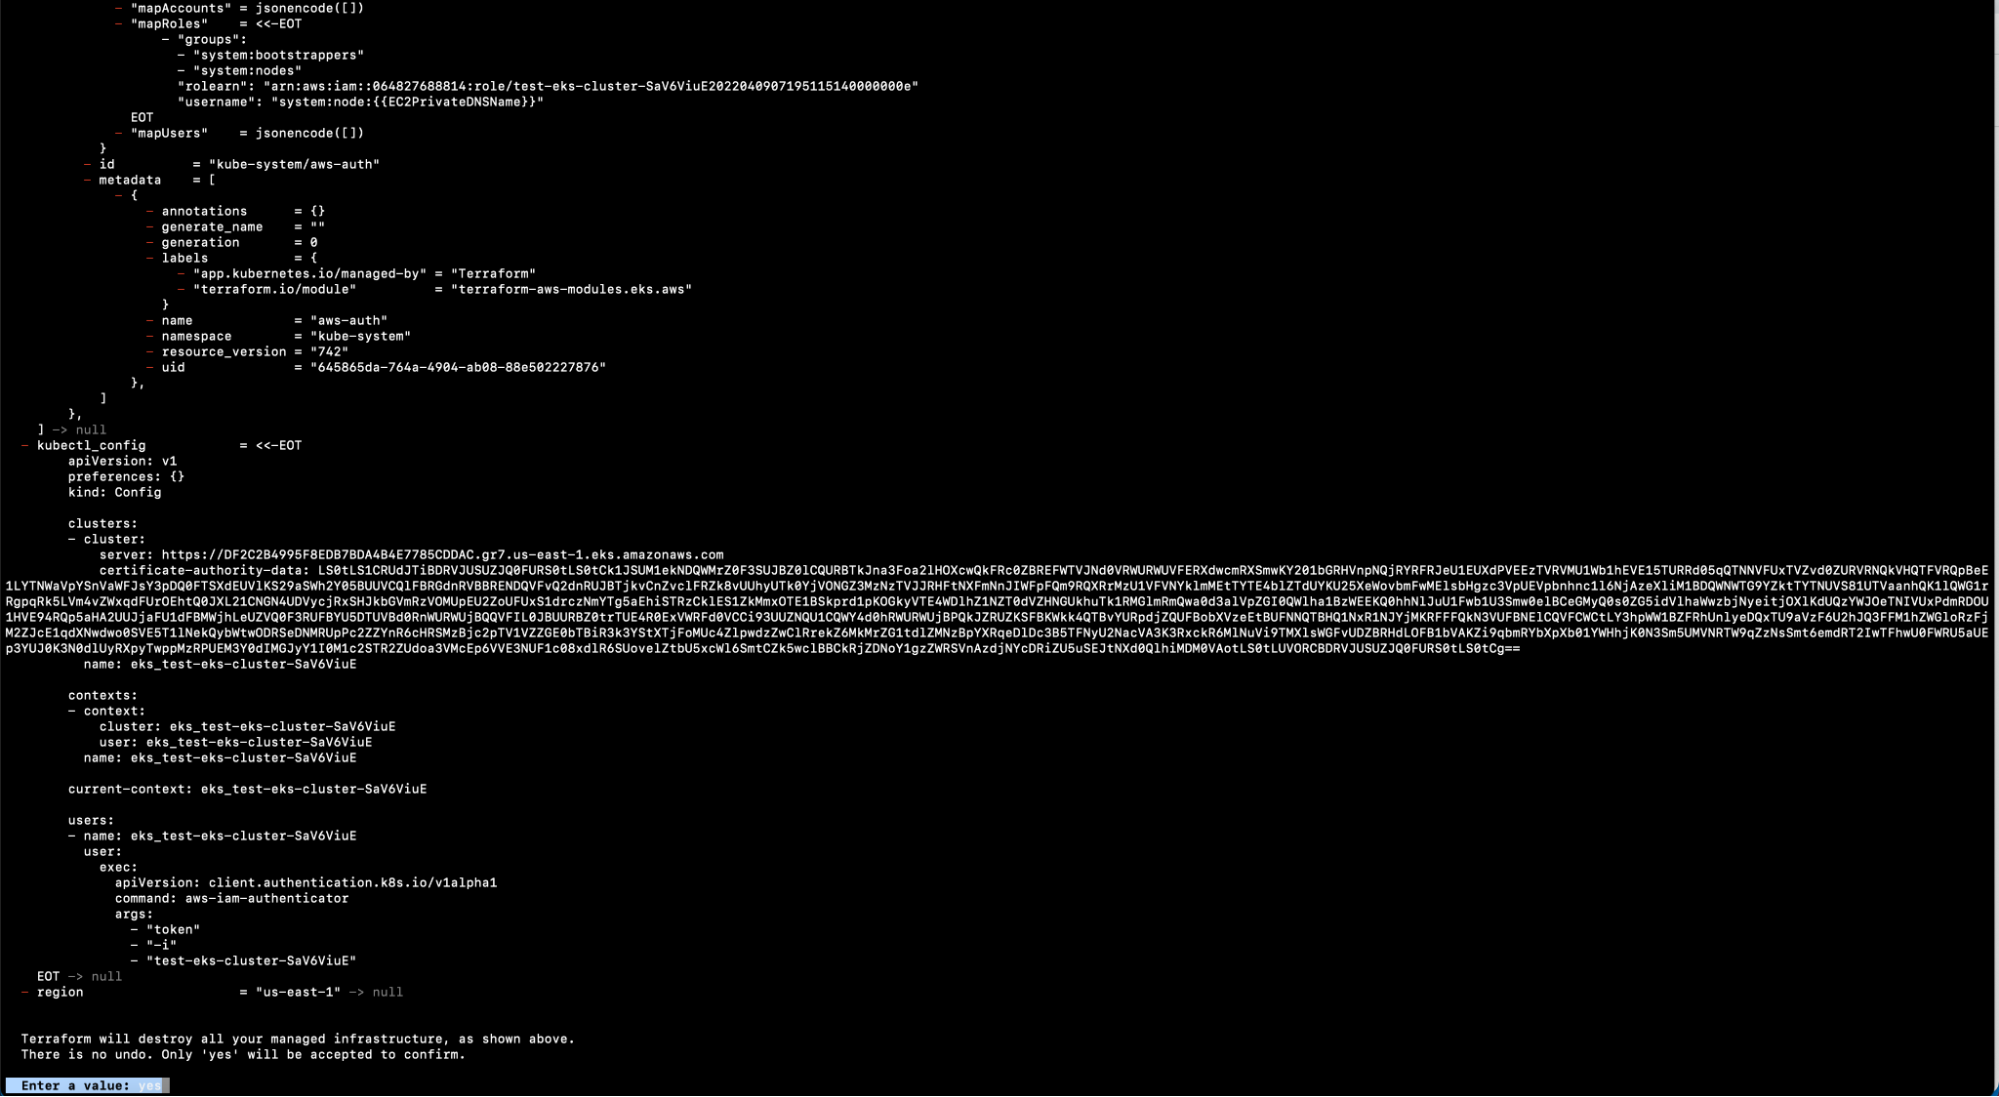
Now, let’s destroy the EKS cluster using the following command:
terraform init: Execute this command if you get the following error: “Error: Inconsistent dependency lock file.”
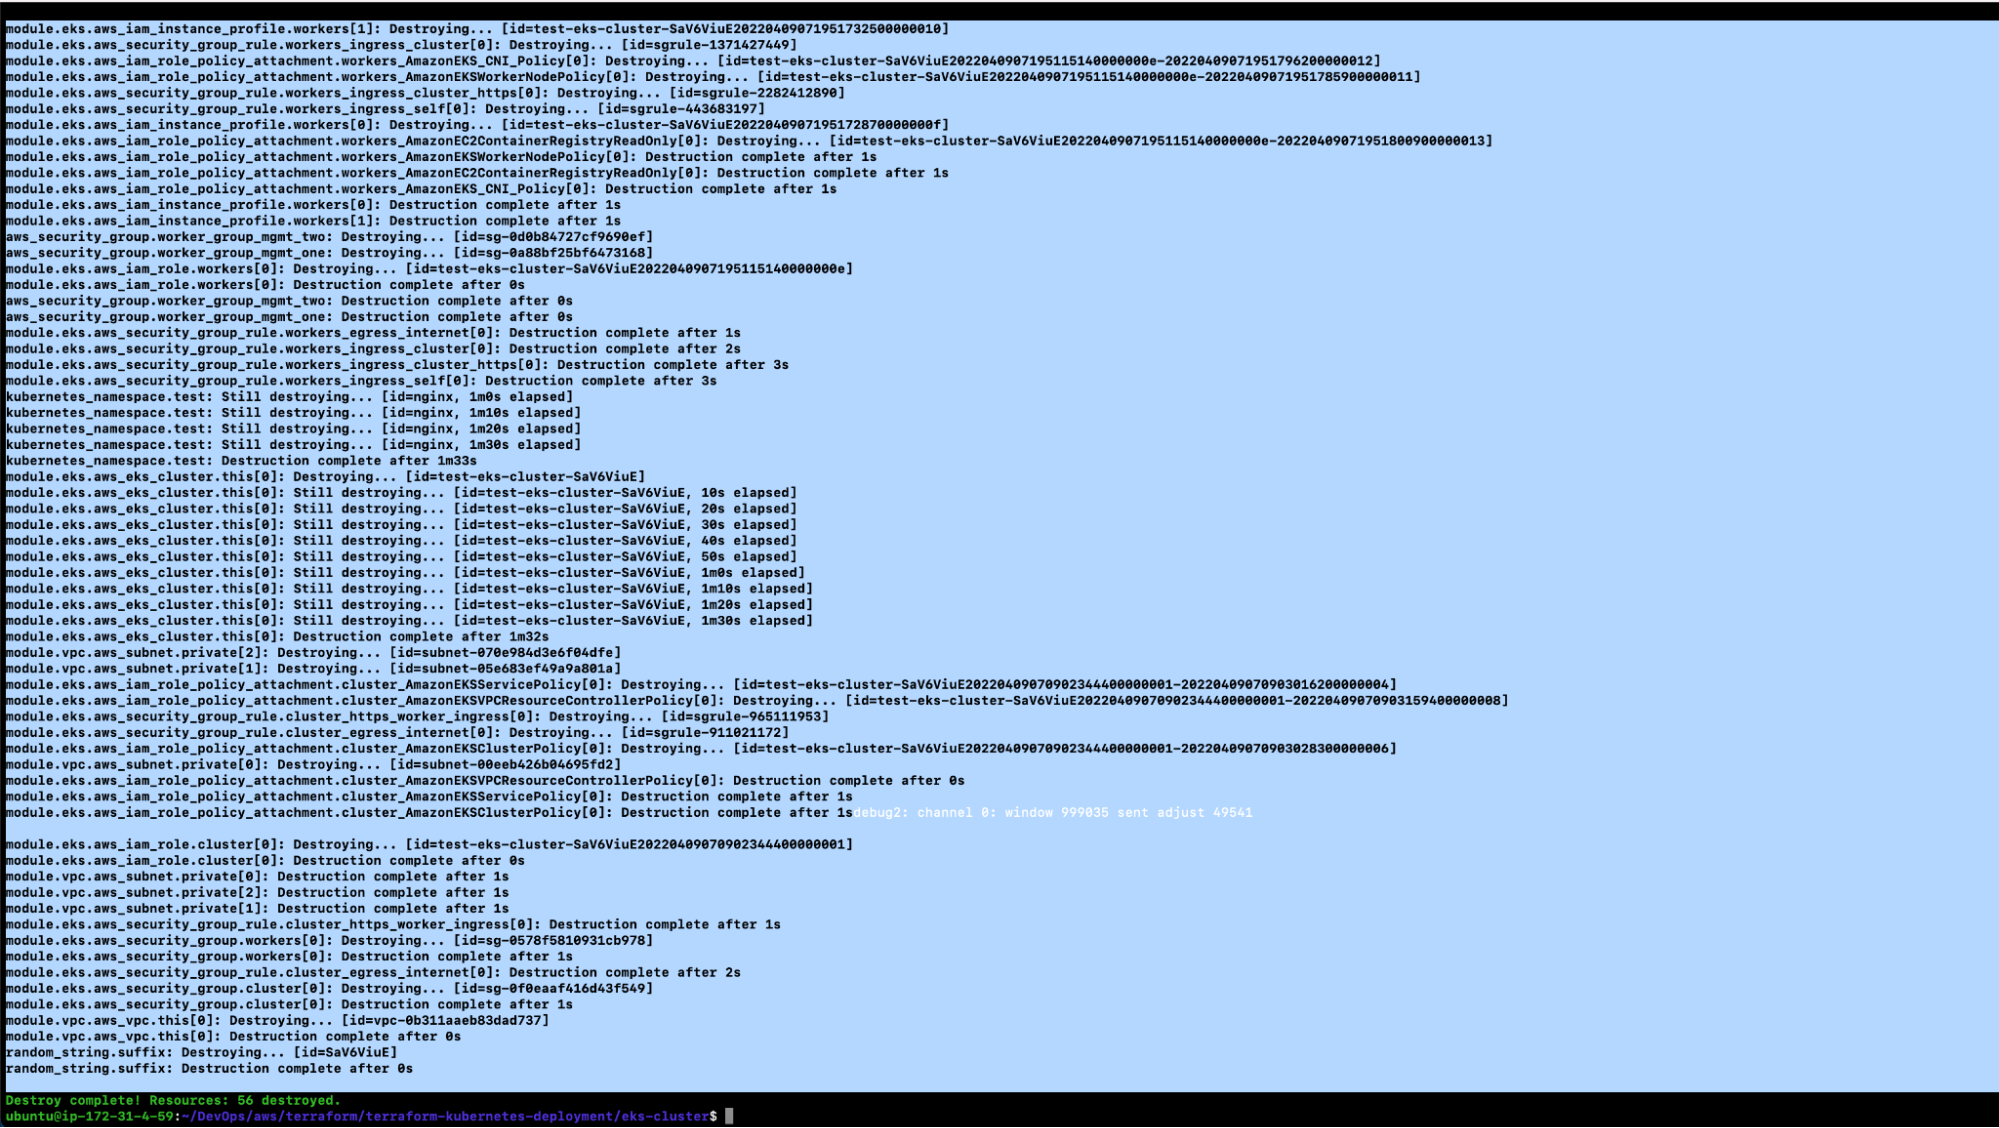
terraform destroy
5. You will see the following output once the above command is successful.
6. You can now go to the AWS console to verify whether or not the resources have been deleted.
There you have it! We have just successfully deleted the EKS cluster, as well as the sample NodeJs application.
Conclusion of Terraform Kubernetes Deployment
Elastic Kubernetes Service (EKS) is a managed Kubernetes service provided by AWS, which takes the complexity and overhead out of provisioning and optimizing a Kubernetes cluster for development teams. An EKS cluster can be created using a variety of methods; nevertheless, using the best possible way is critical in improving the infrastructure management lifecycle.
Terraform is one of the Infrastructure as Code (IaC) tools that allows you to create, modify, and version control cloud and on-premise resources in a secure and efficient manner. You can use the Terraform Kubernetes deployment method to create an EKS cluster using Terraform while automating the creation process of the EKS Cluster and having additional control over the entire infrastructure management process through code. The creation of the EKS cluster and the deployment of Kubernetes objects can also be managed using the Terraform Kubernetes provider.
