In this article, we’ll explore the newest version of Lerna at the time of writing, v6.
Jump ahead:
Why use a monorepo?
Using a monorepo is a great approach for defining an application’s architecture, particularly for maintaining distinct projects with well-defined relationships. When working on a team, a monorepo provides better dependency management and code sharing. You also get a fast, unified CI, which makes it possible to develop multiple packages in the same repository and share configurations like Prettier and ESLint throughout your different projects, thereby ensuring uniformity.
Importance of tools like Lerna
Publishing individual packages and sequential builds takes a long time, so monorepos can be challenging to manage, especially in bigger projects. To help us manage this, we can use tools like pnpm, Yarn, or npm.
However, these tools lack some vital features that you can only get with a tool like Lerna. Lerna modularizes the code into smaller, more manageable packages and abstracts out shareable code, thereby making monorepos more scalable. Other major players in the monorepo space include Rush Stack, Nx, and Turborepo.
Lerna’s new era
Lerna was among the first monorepo tools. However, Lerna was considered obsolete or deprecated in April 2022 after an announcement was published in its main README file notifying users that it would no longer be maintained.
Barely a month after this new development, Nrwl, the company that created Nx, a build system developed by ex-Googlers, took over Lerna. Given their long history in the monorepo space, this was good news for developers.
In addition to conducting a cleanup on the Lerna repository and updating the outdated packages, starting with v5.1+, the first version, Lerna received several notable upgrades that have since improved usability for large monorepo projects. Some of these include:
- Integration with Nx
- The launch of a brand new website
- Updated documentation
- 10x faster speed than previous Lerna versions and around 4x faster speed than Turborepo
- Caching by default, which improved Lerna’s build times and made the build process generally faster
Integration with Nx
In v6, Lerna can integrate with and defer a lot of tasks to Nx, resulting in an array of features including:
- Smart rebuilds: Lerna only rebuilds and retests whatever is affected by our changes
- Caching capabilities
- Project graph: Lerna has a powerful interactive visualizer that simplifies the understanding of your workspaces
- Distributed task execution
- Computation and remote caching
- Improved developer experience: Lerna now has a beautiful terminal output that improves usability and makes it easier to see what has failed and why it failed
- Ownership management
To enable Nx in Lerna v5, you had to enable Nx support by setting the useNX flag to true in lerna.json:
// lerna.json
{
    ...
    "useNx": true
}
However in v6, all Lerna workspaces set the useNX flag to true by default, even if you don’t have it in your Lerna config file.
Before Lerna was acquired, npm packages were used to delegate scheduling. However, after its change in stewardship, Nx integration was made possible.
With Nx’s built-in caching, Lerna has support for caching included, thereby improving its speed. By using a computation cache, Lerna never rebuilds or retests the same code twice. It knows when the task you are about to run has been executed before and uses the cache to restore the results of previously running that task, resulting in cost and resource savings.
To ensure you have default caching, you can run the following command:
npx lerna add-caching
The command above will automatically scan the workspace, find the package.json scripts, guide you through the configuration of both your cacheable operations as well as your task pipeline, and then generate a nx.json file based on the existing Lerna workspace.
An alternative method is to create a nx.json file at the root of the workspace where you define your cacheable operations:
// nx.json
{
 "tasksRunnerOptions": {
 "default": {
 "runner": "nx/tasks-runners/default",
 "options": {
 "cacheableOperations": ["build", "test"]
       }
     }
   }
}
Remote caching via Nx Cloud
Remote caching is an improvement Lerna gets from adopting Nx as its task scheduler. Remote caching and distributed task execution (DTE) are especially helpful when working on a project as a team. It makes it possible for you to distribute your local cache with the rest of the team as well as the CI system. All of this is possible via the Nx Cloud.
Run view, an option in Nx Cloud, also makes it possible to visualize your CI run and distribute the project tasks dynamically across several machines. It does so by optimizing the best machine utilization and parallelization. Lastly, Nx Cloud also has multi-platform integration that integrates with all popular CI providers on any OS.
Sample project
To better demonstrate the new features, clone the following repo from Lerna’s official documentation. Once it is cloned, checkout to the prelerna branch, which contains three projects, each with its own package.json file. We’ll use the project to try out the new features.
To add Lerna to the prelerna branch, run the following command:
npx lerna@latest init
Before we can use Nx Cloud, we need to have a workspace configured:
npx create-nx-workspace@latest <workspace name>
The command above will install the create-nx-workspace package. To configure the type of workspace we want, we’ll need to answer several questions. In our case, we select a React project, webpack as the bundler for the workspace, CSS for styling, and enabled distributed caching:
To use remote caching, run the following command:
npx nx connect-to-nx-cloud
The command above will guide you through a set of questions and help you set up an Nx Cloud.
Target dependencies: Defining a task pipeline
We mentioned that integrating Nx with Lerna maximizes parallelization, however, when running tasks in a monorepo, we also need to account for any potential dependencies among different tasks.
For example, in our sample project, we may depend on a library for an example chat UI library. In this case, this library needs to be built before we can build the applications that depend on it. With Lerna v6, we specify this in the nx.json file by defining the targetDefaults:
// nx.json
{
  ...
  "targetDefaults": {
    "build": {
      "dependsOn": ["^build"]
    },
    "dev": {
      "dependsOn": ["^build"]
    }
  }
}
The code above shows an example in our project with chat, navbar, and secondera:
npx lerna run build: Runs the build targets in the right ordernpx lerna run dev --scope=secondera: Runs the build targets fornavbarandchatfirst, then runs the dev target forseconderanpx lerna run test: Runs all three test targets in parallel
pnpm support
Now, it’s possible to use Lerna in a pnpm workspace, making it possible to utilize the best qualities of both tools. When Lerna is used in a pnpm workspace, it will resolve package locations with pnpm-workspace.yaml, restrict the use of Bootstrap and link, and add commands replacing their usage with pnpm commands to manage the dependencies directly.
Using pnpm with Lerna also enforces useWorkspaces:true in lerna.json and ignores packages in package.json.
Lastly, it will ensure that workspace protocol for package dependencies is respected. This is important when updating dependencies. In cases where a workspace alias is used, lerna version will not update the version because aliases do not specify version numbers that need to be updated.
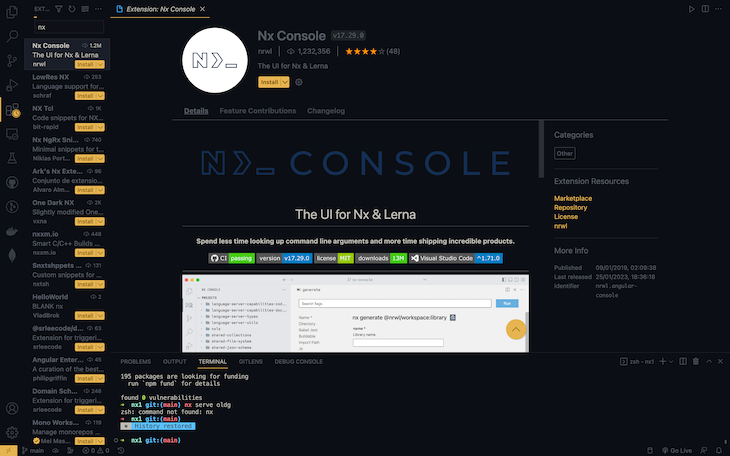
Plugin ecosystem: VS Code extension
To help when navigating the monorepo, Lerna provides a VS Code extension. With the extension installed, you can run commands directly by right-clicking on the project. You can also visualize the project and how it relates to other projects in the workspace. Finally, you also get intelligent autocompletion when writing configuration files.
To run the project visualization, we run the following command:
nx graph
In the example above, running the nx graph command gives us the following interactive visual representation in the browser window of our project, which shows the dependency links between secondera, chat, and navbar, providing a good overview of the project:

Prettier support
Formatting can be time-consuming. In Lerna v6, there is a feature that auto-detects if Prettier is set up in the workspace. Once the lerna version command is run, it applies the formats set to all the files in the project.
Dynamic terminal output
When working on different packages or projects, we may need to run tasks from these packages in parallel. In these situations, it becomes increasingly difficult to keep track of what tasks were built and which tasks failed as the project grows.
With the introduction of dynamic terminal output in the new Lerna, only the most relevant output is displayed at any given moment.
lerna repair
The new Lerna has the lerna repair command, which ensures that any configuration file changes for the latest version of lerna are applied. Running this command automatically updates the lerna.json file with the new configuration details, keeping the application you are working on from breaking and taking away the need to manually update the configuration, reducing the possibility of errors.
It is recommended that you run this command after upgrading to the latest version, as shown below:
$ npm i lerna@latest
$ lerna repair
Conclusion
Although monorepos provide a great architectural approach for many projects, they have their share of limitations. Tools like Lerna help to alleviate these, making monorepos a more appealing option.
The change in stewardship has brought about significant improvements to Lerna as a tool for managing monorepos. Integration with Nx has resulted in the most notable changes, making caching by default and remote caching possible. Caching translates to faster build times, making Lerna faster than most tools available in the monorepo space.
The new Lerna also allows integration with Prettier and pnpm, which reduce redundancy and improve usability for large monorepo projects. New commands like lerna repair ease the process when updating from previous versions.
Finally, the addition of features like dynamic terminal output and the plugin ecosystem improve the user experience and simplify the workspace by visually showing the relationships between different packages.
I hope you enjoyed this article, and be sure to leave a comment if you have any questions. Happy coding!
The post Exploring Lerna’s second era appeared first on LogRocket Blog.
from LogRocket Blog https://ift.tt/FDckBE2
Gain $200 in a week
via Read more
Source link
