Watch “Create App DevTools to enhance development productivity” on egghead.io
How many times have you entered the username/password on the local version of
your app? How many times have you filled out that one form just so you could fix
that bug that only shows up when some specific fields are filled in a specific
way? How annoying is it to have to restart your dev server when you want to
change which backend environments your frontend is hitting?
I don’t know whether these things all apply to your situation at work, but these
things were really annoying for me when I worked on an admin portal at Alianza.
So I thought about creating a browser extension like I’d seen people do at
previous jobs I had worked at. That way I could have the extension control the
app/environment. But I remembered trying to work on and contribute to those and
it was pretty indirect and not entirely straightforward. And there were some
things I wanted to do only temporarily, and only for my own development, not the
rest of the people using the extension. The other problem with an extension is
that there are quite a few limitations to extensions and I didn’t want to have
to hack around those.
So instead, I had this idea to have some code that’s actually in the app
instead. Both in the repo, and actually running in the app, like the rest of the
code in the app. Here’s what it looked like (screen-grabbed from a demo video I
made when I left the company):
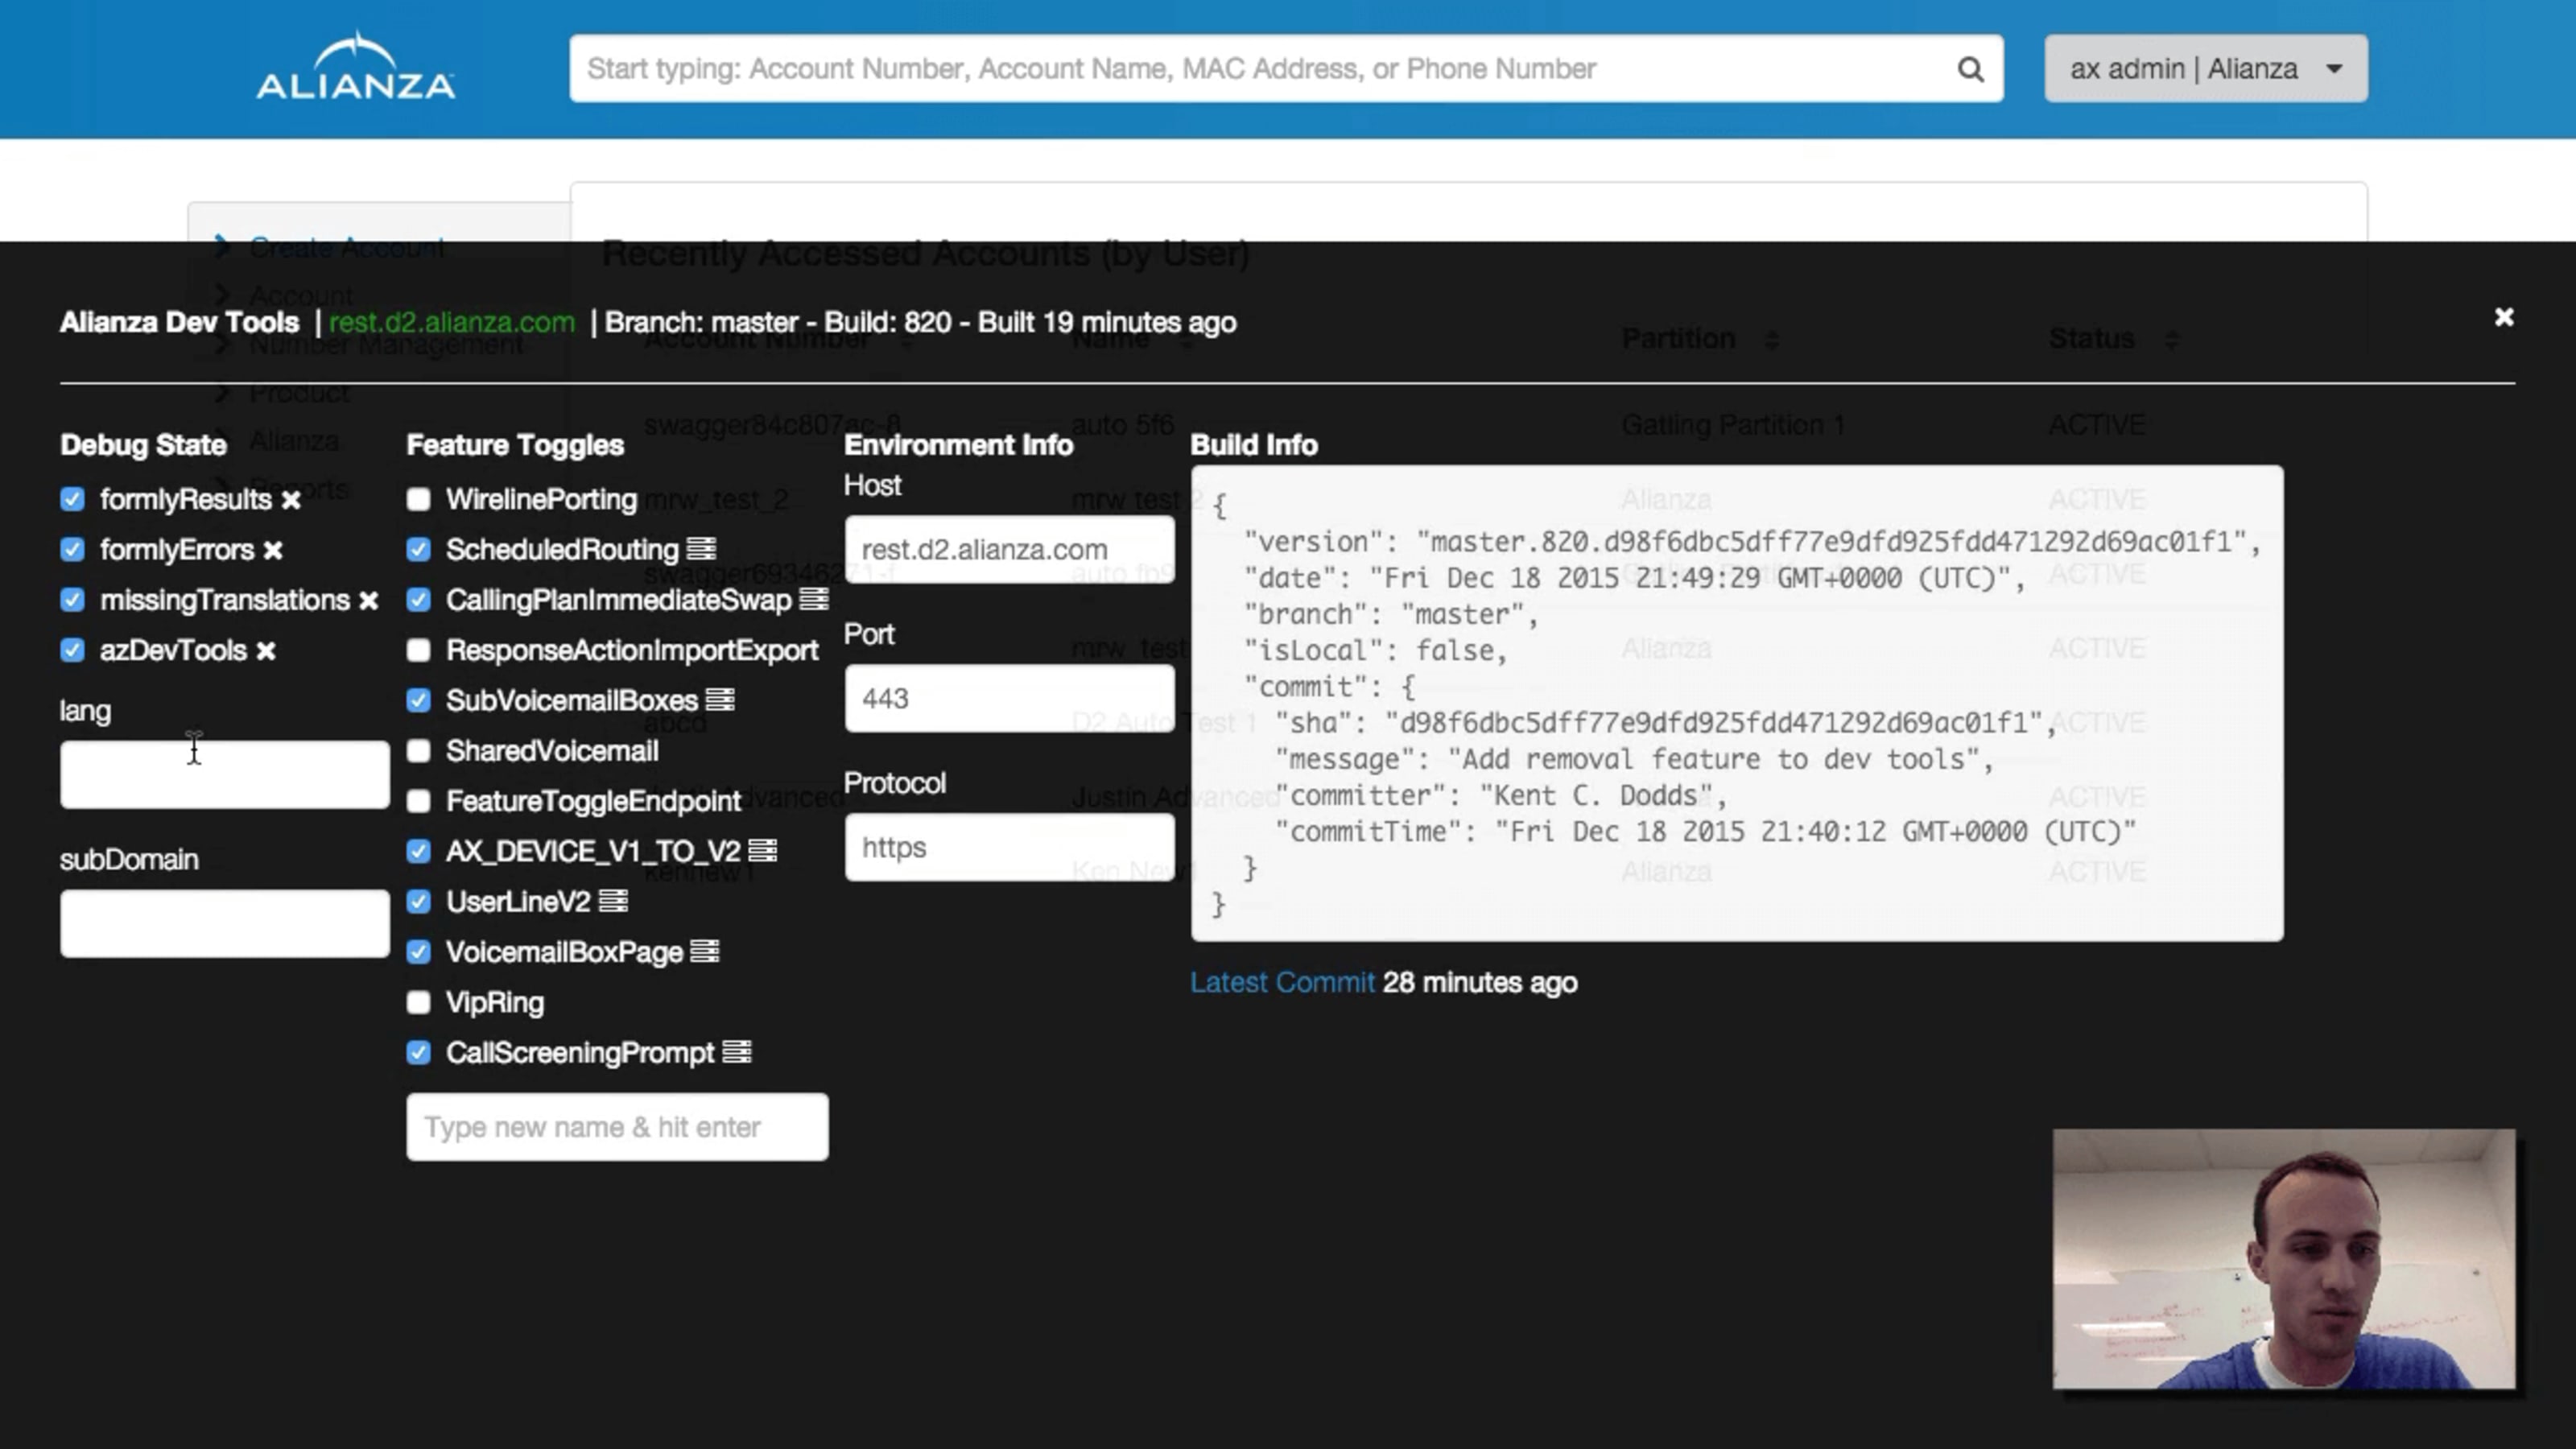
That was an AngularJS app and I did a few fancy things to make that work. I’ve
put together
a relatively small demo React app
(repo) to show you an example of
how this could work. In this app we’re using the DevTools to control a
feature toggle, but remember
that App DevTools enable you to do just about anything.
If you don’t want to play around with it yourself, here’s what that looks like:
Here’s the basic idea:
import loadDevTools from './dev-tools/load'
import * as React from 'react'
import ReactDOM from 'react-dom'
import './index.css'
import App from './App'

// load and install the dev tools (if they need to be)
// and when that's done, let's render the app
// NOTE: if we don't need to install the devtools, then the callback
// is called synchronously so there's no penalty for including this
// in production.
loadDevTools(() => {
  ReactDOM.render(<App />, document.getElementById('root'))
})
And then:
function loadDevTools(callback) {
  // this allows you to explicitly disable it in development for example
  const explicitlyDisabled =
    window.location.search.includes('dev-tools=false') ||
    window.localStorage.getItem('dev-tools') === 'false'

  const explicitlyEnabled =
    window.location.search.includes('dev-tools=true') ||
    window.localStorage.getItem('dev-tools') === 'true'

  // we want it enabled by default everywhere but production and we also want
  // to support the dev tools in production (to make us more productive triaging production issues).
  // you can enable the DevTools via localStorage or the query string.
  if (
    !explicitlyDisabled &&
    (process.env.NODE_ENV === 'development' || explicitlyEnabled)
  ) {
    // use a dynamic import so the dev-tools code isn't bundled with the regular
    // app code so we don't worry about bundle size.
    import('./dev-tools')
      .then(devTools => devTools.install())
      .finally(callback)
  } else {
    // if we don't need the DevTools, call the callback immediately.
    callback()
  }
}

export default loadDevTools
Here are a few key takeaways:
- The DevTools are available if we haven’t explicitly disabled them and we’re
in development. Or if we’re in production, we have to explicitly enable them. - The code for the DevTools do NOT end up in our production bundle. They’re
chunked separately from the rest of the app. Whenever we’re doing something
to improve the developer experience productivity, we want to limit (or
eliminate) the impact on the user experience (because
users care about how you write code). - We wait to render the app until the DevTools have been installed so it can
make all the adjustments to the global environment before the app renders. - If we don’t need to install the DevTools, then we immediately call the
callback so we can get to rendering our app as soon as possible (with the way
this is coded, there’s no penalty for including the DevTools code and doing
this check to install the DevTools). For the same reason as in #2.
Once you get into the dev-tools.js file, you have free reign to do whatever
you want (even async stuff). Just export an install function and you’re off to
the races:
import * as React from 'react'

function install() {
  function DevTools() {
    return <div>Hi from the DevTools</div>
  }
  // add dev tools UI to the page
  const devToolsRoot = document.createElement('div')
  document.body.appendChild(devToolsRoot)
  ReactDOM.render(<DevTools />, devToolsRoot)
}

export {install}
You can check out
the src/dev-tools/dev-tools.js file in the repo
for an idea of what you can put in there.
One thing I think is pretty neat and want to call out specifically is the
concept of “local” DevTools. So, there could be things (functions, automations,
etc.) that you’d like to have on your own machine, but nobody else wants those
things or maybe you’re in the middle of working on them. Whatever the case may
be, having a script you can have run for you and you alone in your app can be
really helpful. So in the App DevTools script we have something like this:
// load local dev tools if it's there
// NOTE: this is using some webpack-sepecific features.
// if you're not using webpack, you might consider using
// https://npm.im/preval.macro or https://npm.im/codegen.macro
const requireDevToolsLocal = require.context(
  './',
  false,
  /dev-tools\.local\.js/,
)
const local = requireDevToolsLocal.keys()[0]
if (local) {
  requireDevToolsLocal(local).default
}
That basically says: Hey, if there’s a file in
src/dev-tools/dev-tools.local.js then go ahead and load it. Then you just put
*.local.* in your .gitignore and voilà! You can now have a script that runs
in your app whenever you load it up, but doesn’t run for anyone else or even get
committed to the repo.
So aside from giving a great UI for enabling/disabling feature toggles, you can
also listen to changes to the URL and automatically fill out forms (using the
screen and async utilities from @testing-library/dom and the event utilities
from @testing-library/user-event). You could also list out model data under
forms to show the state of validation/etc. Also, the ability to change the
backend I was hitting was hugely valuable.
The potential for automating your local development is endless. This gives you
so much power.
With the power of App DevTools comes great responsibility. You need to take care
that your User Experience doesn’t take a back seat to your Developer Experience
(one of those categories of people pay you money and the other costs you money)!
That’s why we take care in the way this is set up to not increase our bundle
size or slow down our rendering time.
Also, please please please make sure you don’t ship anything that won’t work
without the DevTools enabled! That can be surprisingly easy to do when you spend
all of your time developing the app with the DevTools enabled. To avoid this,
make sure that you have a good suite of tests that run with the DevTools
disabled.
When I implemented App DevTools at Alianza, I was surprised to find that they
were just as useful to Backend, QA, and Product folks as they were to me. The
ability to have them loaded up and useful in production helped me quickly
resolve production bugs. When done carefully, these can really enhance your
productivity as well. I hope you give it a shot and let me know how it went.
Good luck!
Source link