
In this article, I am going to explain the following:
- How you can Set up the React component.
- How you can test React component with the help of Cypress.
What Is Component Testing?
Component testing, also known as unit testing or module testing, is a software testing technique that involves testing individual units or components of a software application. These units are typically isolated from the rest of the application and tested in isolation to ensure they function as intended.
To perform component testing, developers typically create test cases that exercise the various functionalities of the component being tested. These test cases can be automated, which makes it easier to run them repeatedly and ensure that the component is functioning correctly even after changes are made to the code.
Cypress for Component Testing?
Cypress is a front-end testing tool that allows developers to write and run tests for web applications. One aspect of Cypress is component testing, which involves testing individual components in isolation from the rest of the application. This can help identify issues with a specific component and ensure that it is working correctly before integrating it into the larger application.
In component testing with Cypress, developers can write test scripts that interact with a single component in various ways. For example, they can simulate user input, test the component’s rendering and behavior under different conditions, and verify that the component is producing the expected output.
End-to-End Testing vs. Component Testing
End-to-End Testing
End-to-End testing, also known as integration testing, tests the entire system from start to finish, simulating real-world scenarios and user interactions. This type of testing is used to ensure that all the components of the system work together as expected and that the system meets its functional and non-functional requirements.
Component Testing
Component testing, also known as unit testing, tests individual components or units of the system in isolation. This type of testing is used to ensure that each individual component works as expected and that the system meets its functional and non-functional requirements. Component testing is typically faster and simpler than end-to-end testing and can reveal issues within a single component.
Below are a few Comparison between End to End Testing vs. Component Testing:
Why Do We Need Component Testing?
Component testing is a type of testing that focuses on testing the individual components of a software application in isolation from the other components. It is an important part of the software development process because it helps to ensure that each component of the application is working correctly and meets the requirements that have been set for it.
There are several reasons why component testing is important:
- It helps to identify and fix defects early in the development process, which can save time and resources in the long run.
- It allows developers to test the components of the application in isolation, which can make it easier to identify the root cause of any issues that are discovered.
- It can improve the overall quality of the application by ensuring that each component is working correctly and meets the required specifications.
- It can reduce the risk of integration issues by identifying problems with individual components before they are integrated with the rest of the application.
Overall, component testing is an important part of the software development process because it helps to ensure that the individual components of an application are working correctly and meet the required specifications, which can improve the overall quality of the application and reduce the risk of problems occurring when the application is deployed.
Advantages of Component Testing
There are various advantages of Component testing few of which are explained below.
Isolation: By testing individual components in isolation, developers can identify and fix issues more easily, rather than having to investigate and debug complex interactions between multiple components.
Reusability: By thoroughly testing individual components, developers can ensure that they are functional and can be reused in other parts of the system.
Faster debugging: Component testing allows developers to quickly identify the source of an issue rather than having to search through the entire system to find it.
Early detection of issues: By testing components early in the development process, developers can catch issues before they become more difficult and time-consuming to fix.
Cost-effective: Component testing is a cost-effective way to test the system as it allows developers to test the smaller parts of the system, which would be less time-consuming and less expensive.
Modularity: By testing individual components, developers can build a more modular system that is easier to maintain, update, and scale.
Better test coverage: By testing individual components, developers can ensure that every part of the system is thoroughly tested, which can help to improve overall test coverage.
Pre-request
- Node is installed.
- Vs. The code is installed.
For Demo purposes, we are using the counter react component and Using Cypress Version 12.4.0 for testing THE component.
Create a Sample React component to Get Started With the Cypress
This section describes how to set up Counter React Component, Install Cypress, and integrate it with React before you can create component tests.
Step 1
Run the below command in the terminal.
npx create-react-app my-new-sample-appAfter running the above command, look like the attached below:
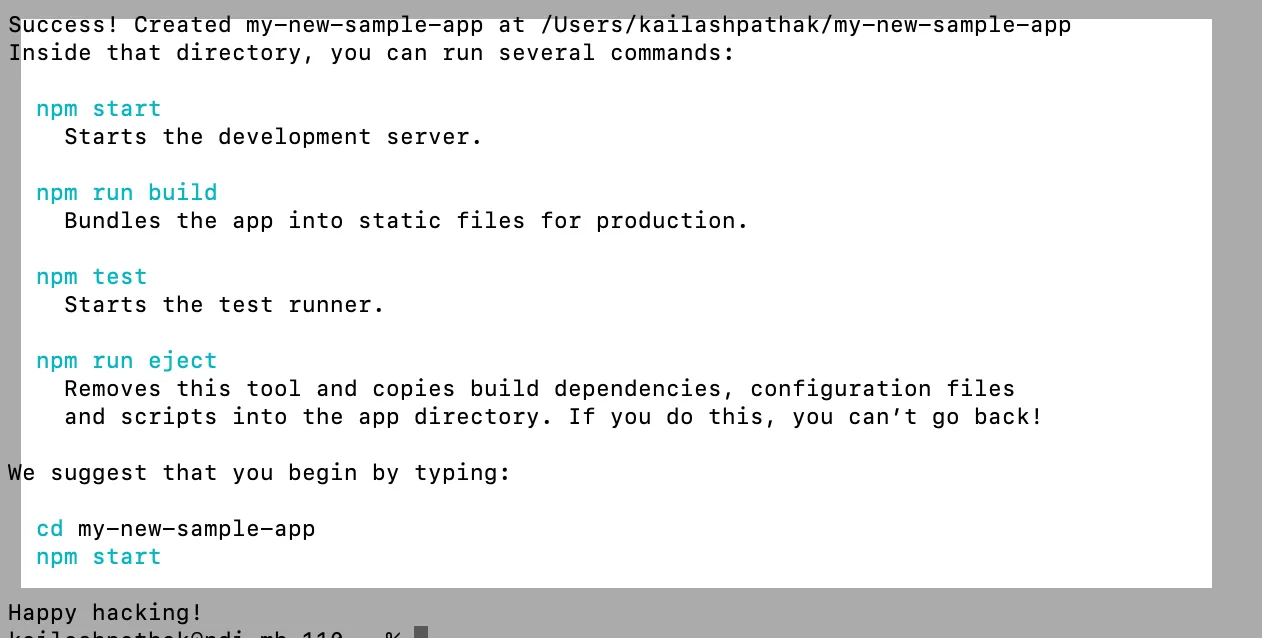
Step 2
Go into the root directory and run the below command to launch React app and install Cypress.
cd my-new-sample-app
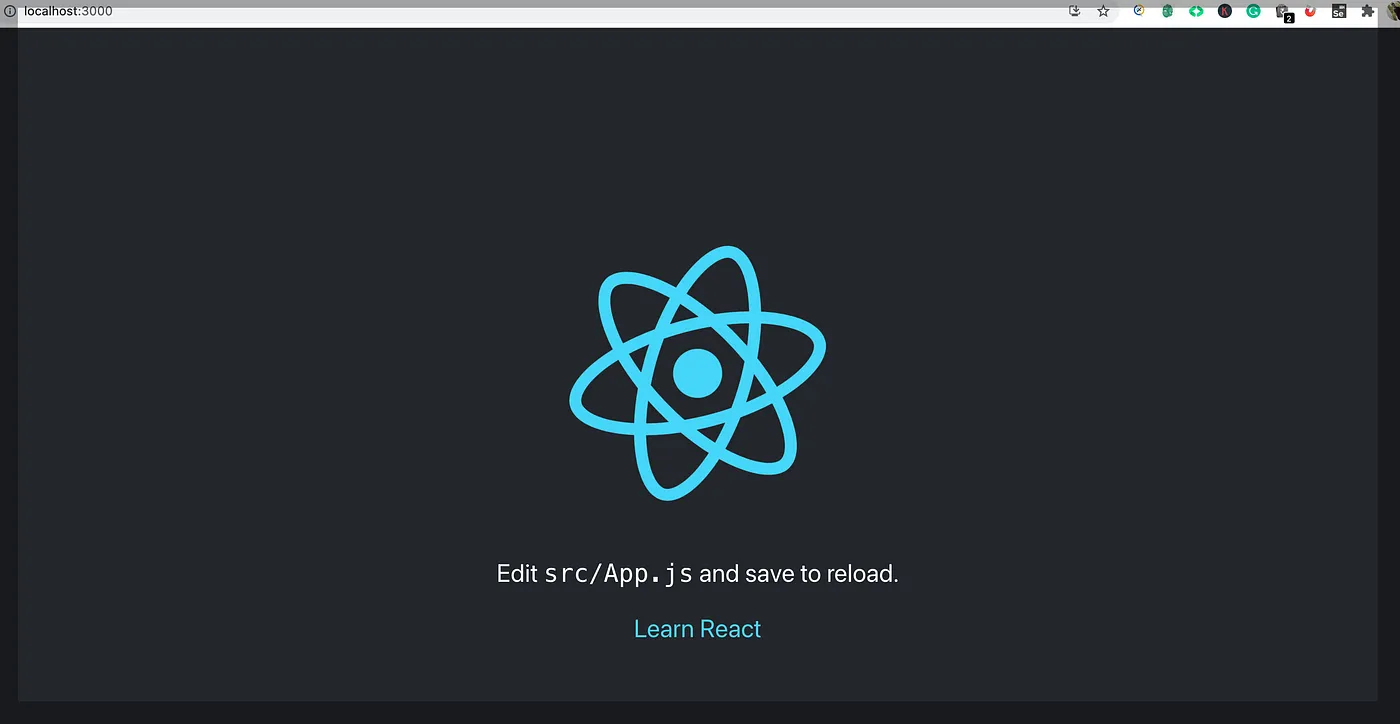
npm start
npm install cypress -DAfter the npm start command server is started.
Step 3
Run the below command to open Cypress.
npx cypress open OR yarn cypress open Step 4
Select ‘Component Testing”.
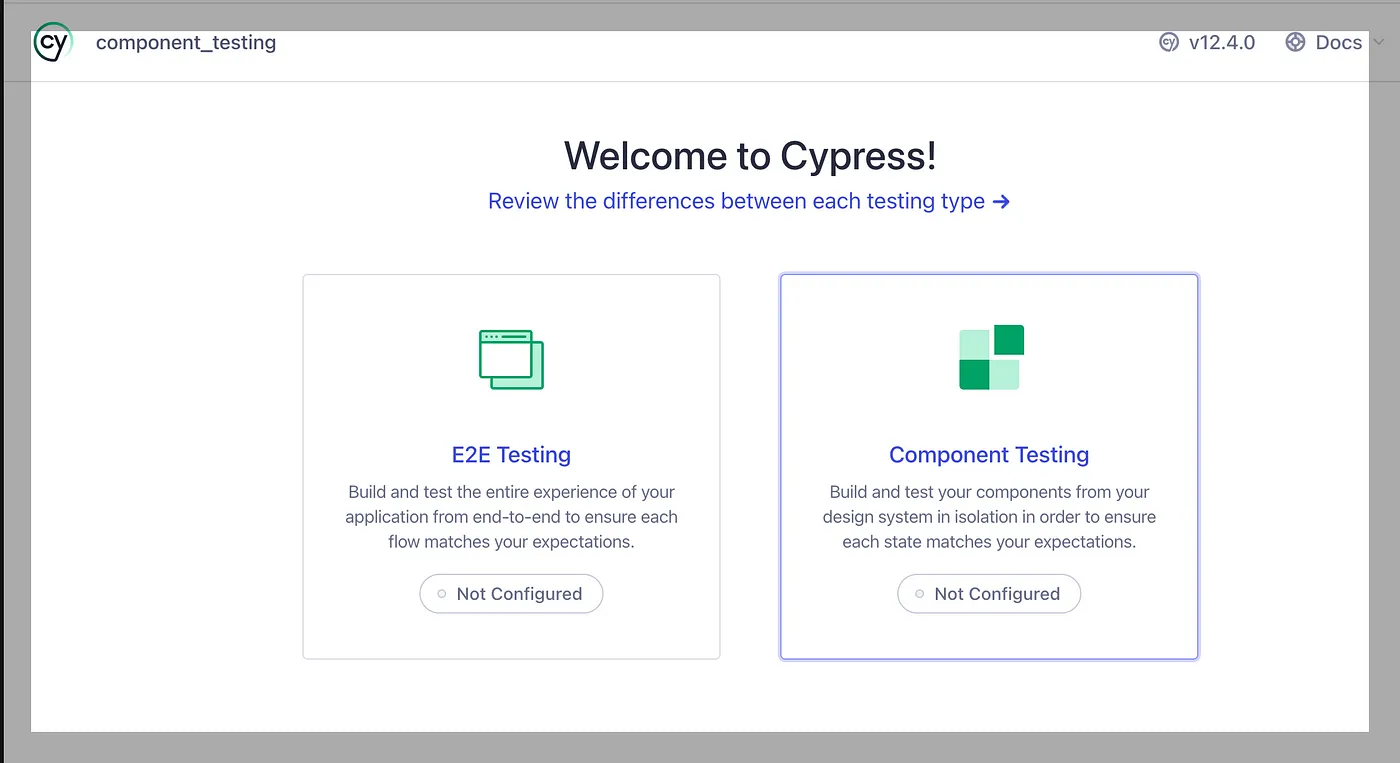
Step 5
After selecting ‘Component Testing,” the below screen is open.
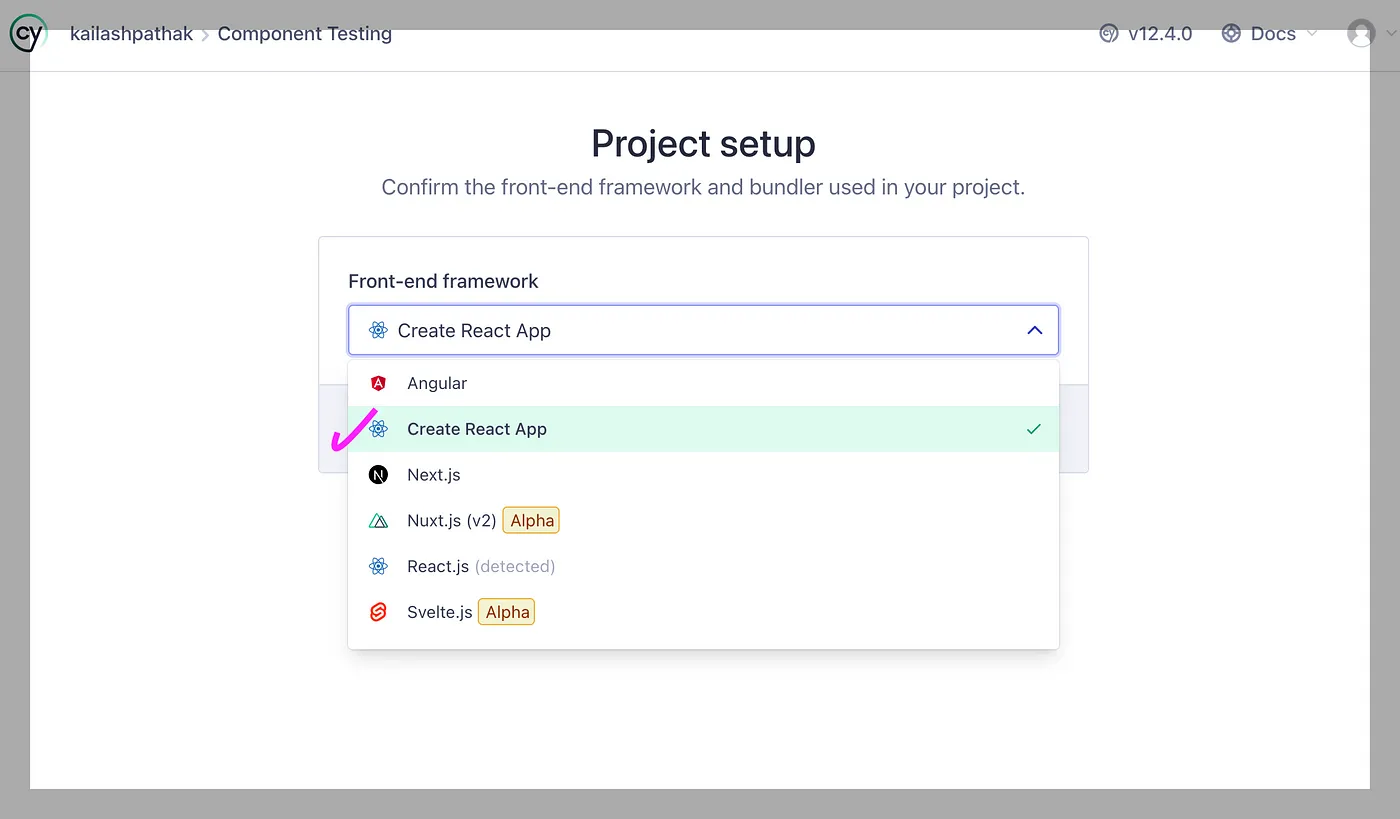
Select ‘Create React App’ from the above screen.
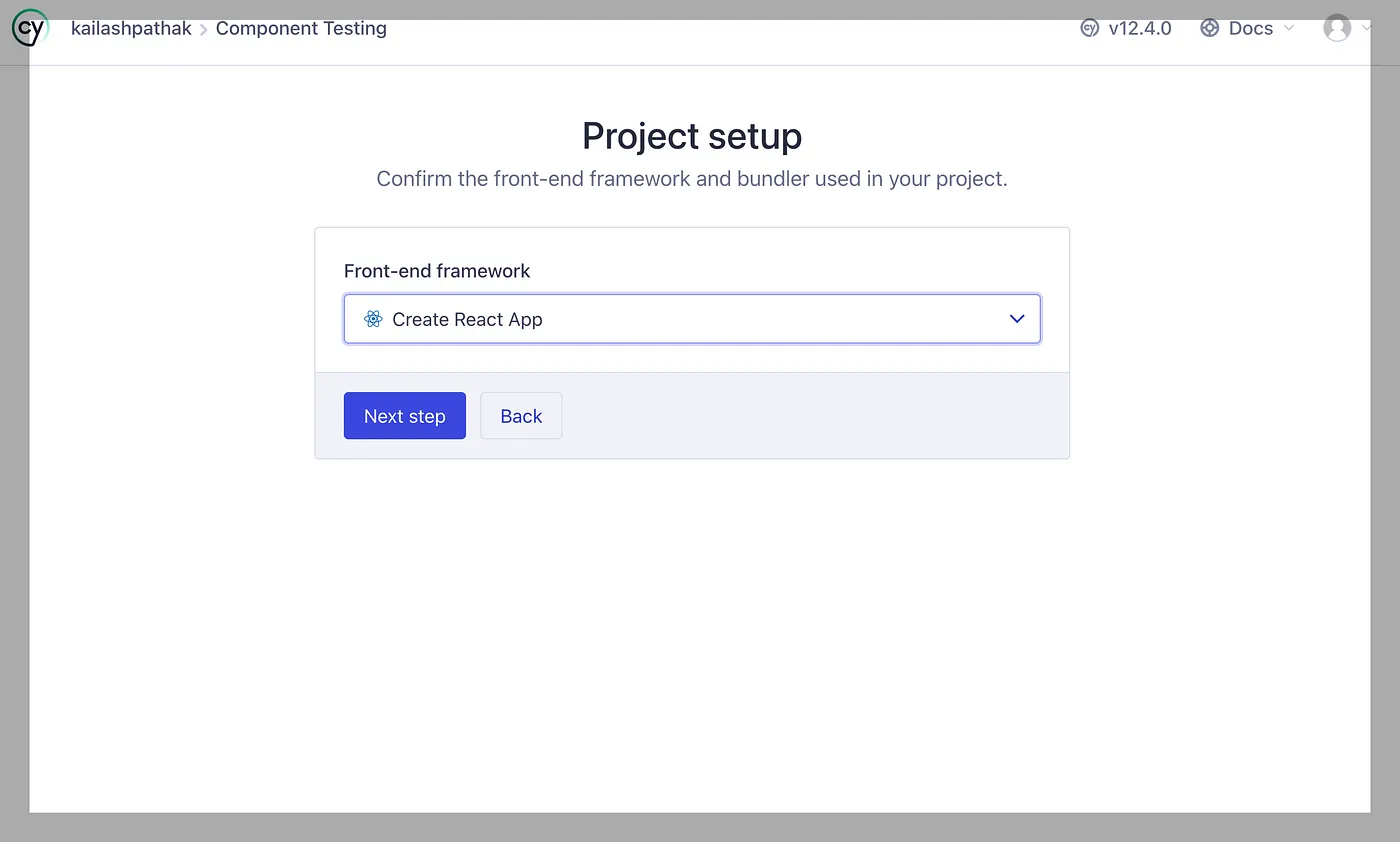
Click on Next Step and wait for dependencies to Install once all dependencies are installed screen will look like the attached below.
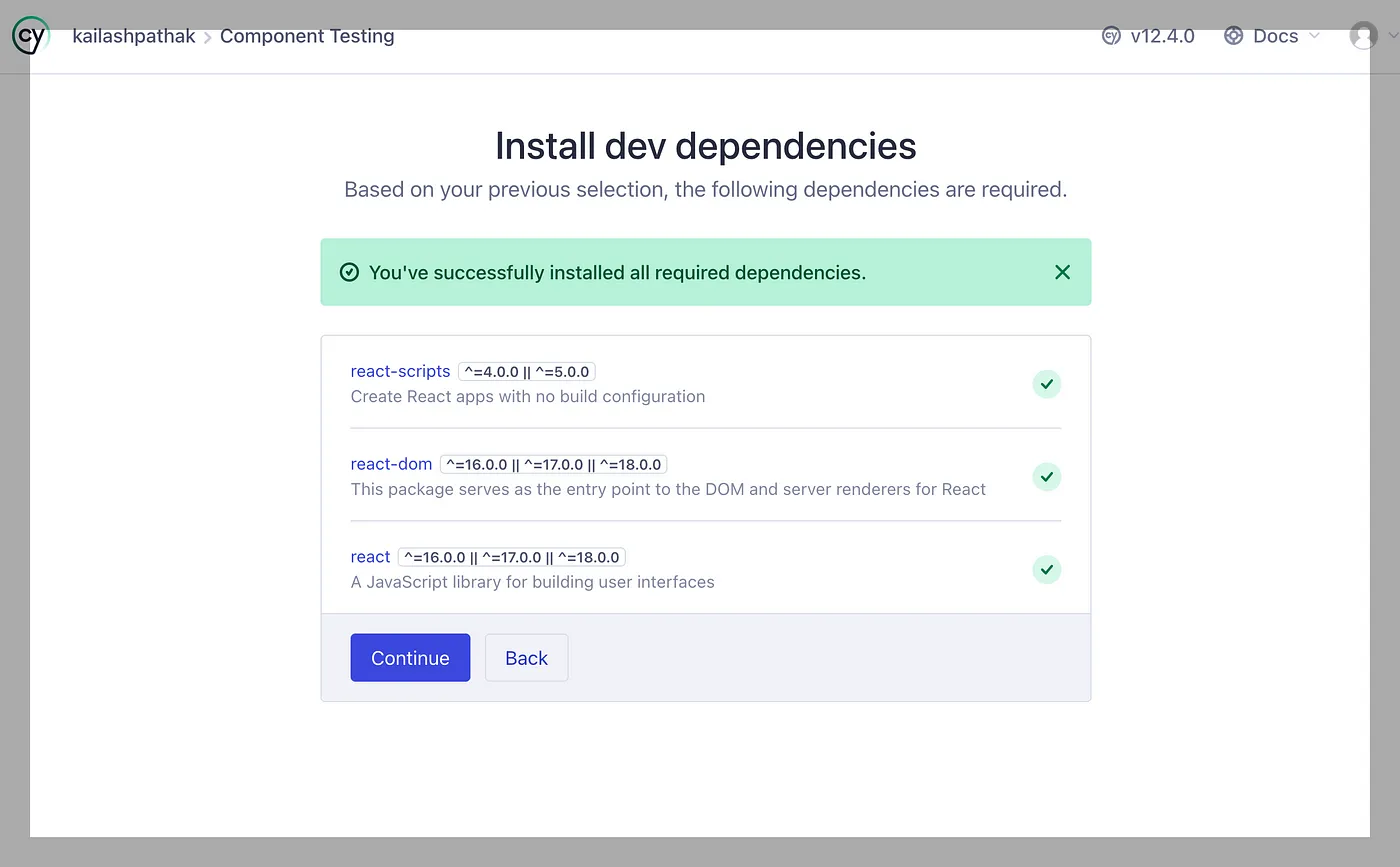
Step 6
Click on the Continue button; the below screen is open.
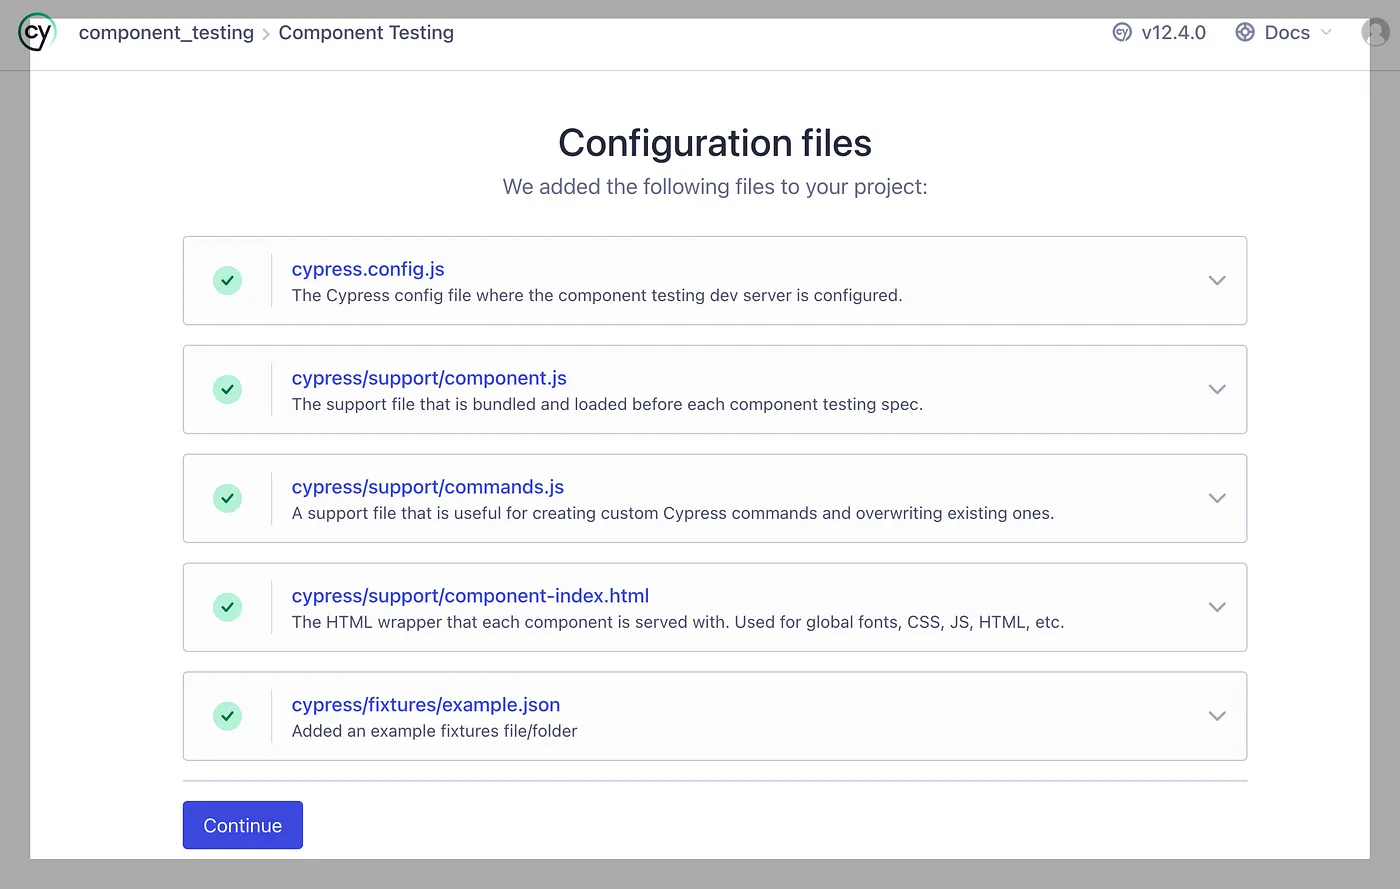
Step 7
Click on the Continue button from the above screen.
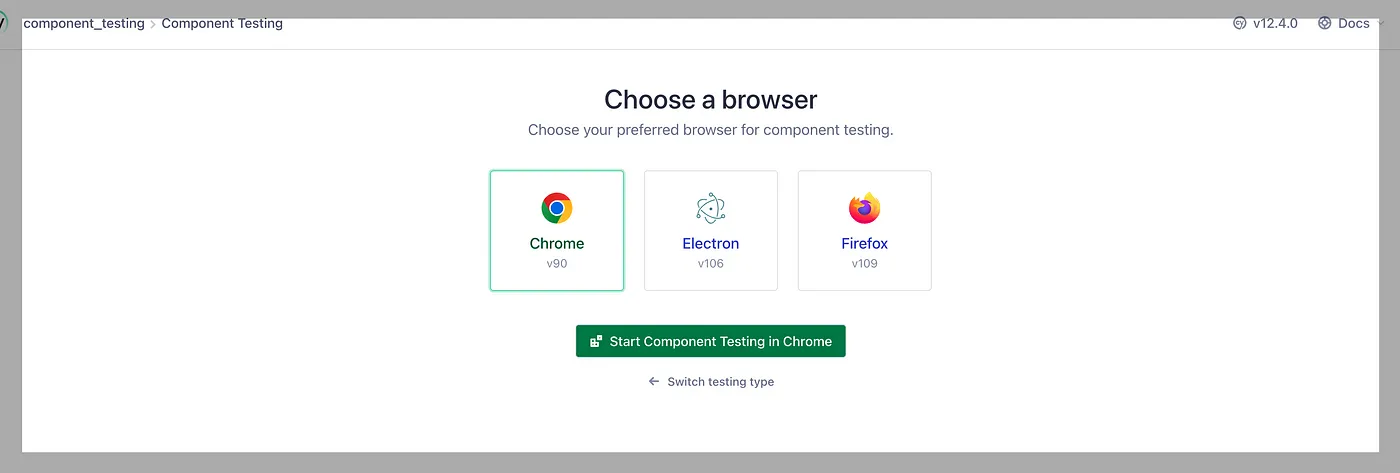
Select your browser, in my case Chrome, and click ‘Start Component Testing in Chrome’; the screen is open below.
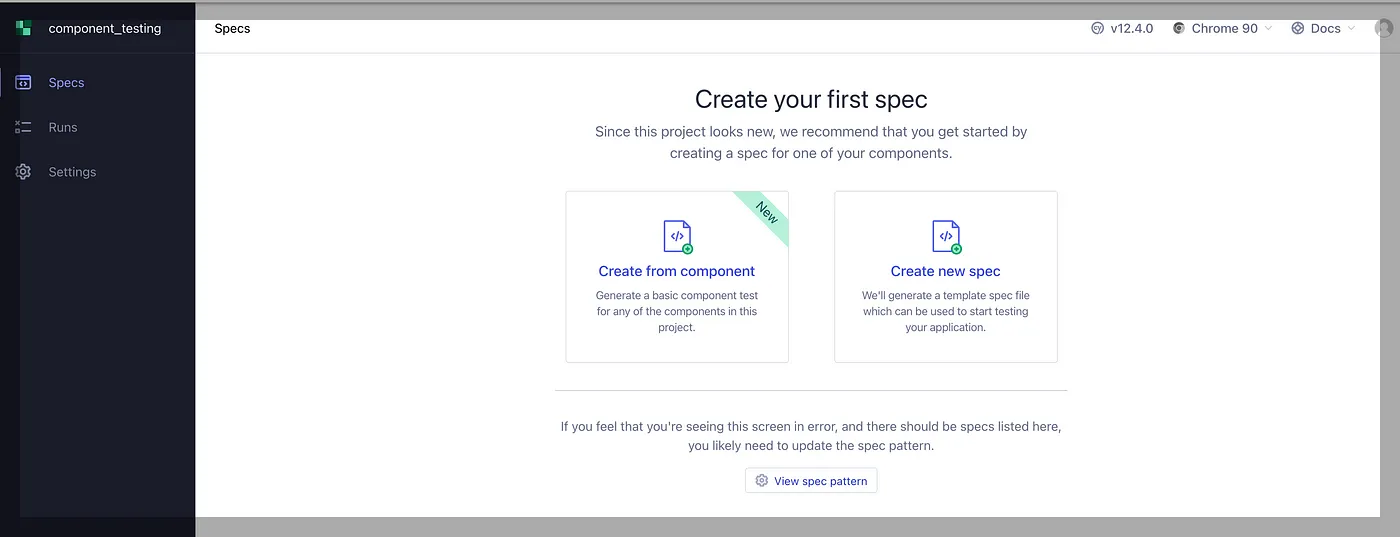
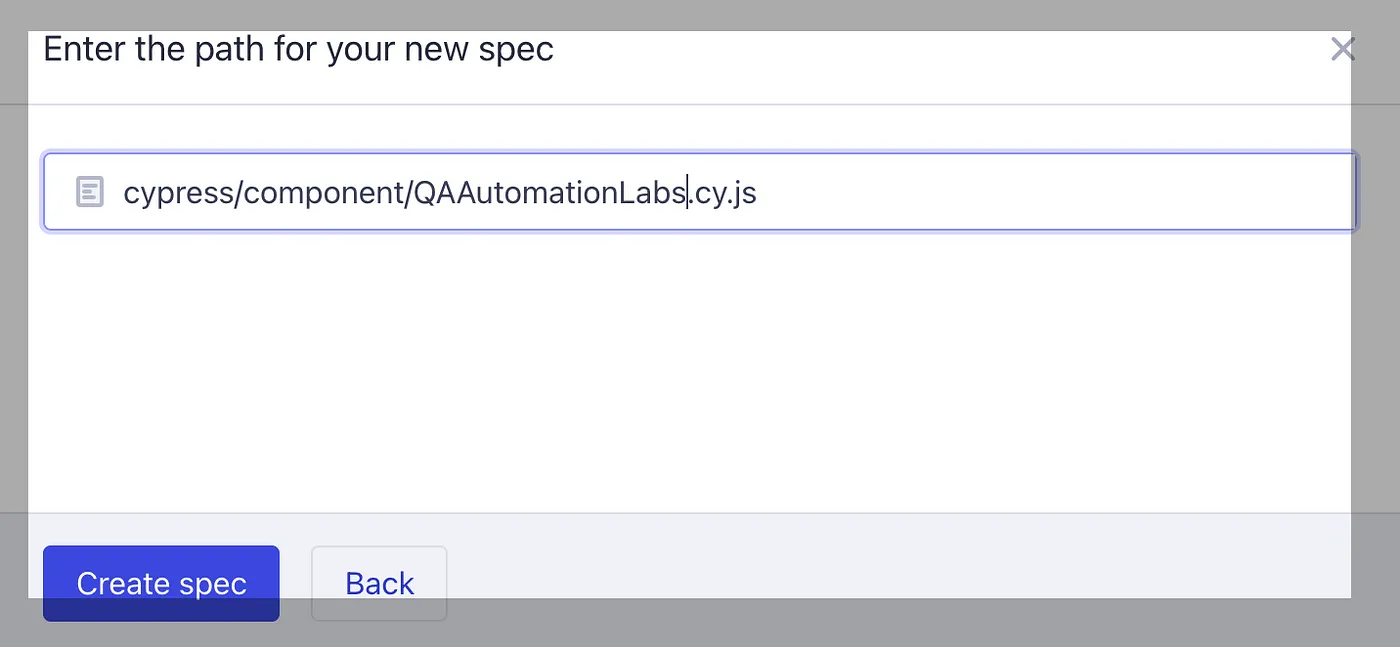
Step 8
Select ‘Create new spec,’ enter the path of the new spec, and click on ‘Create spec.’
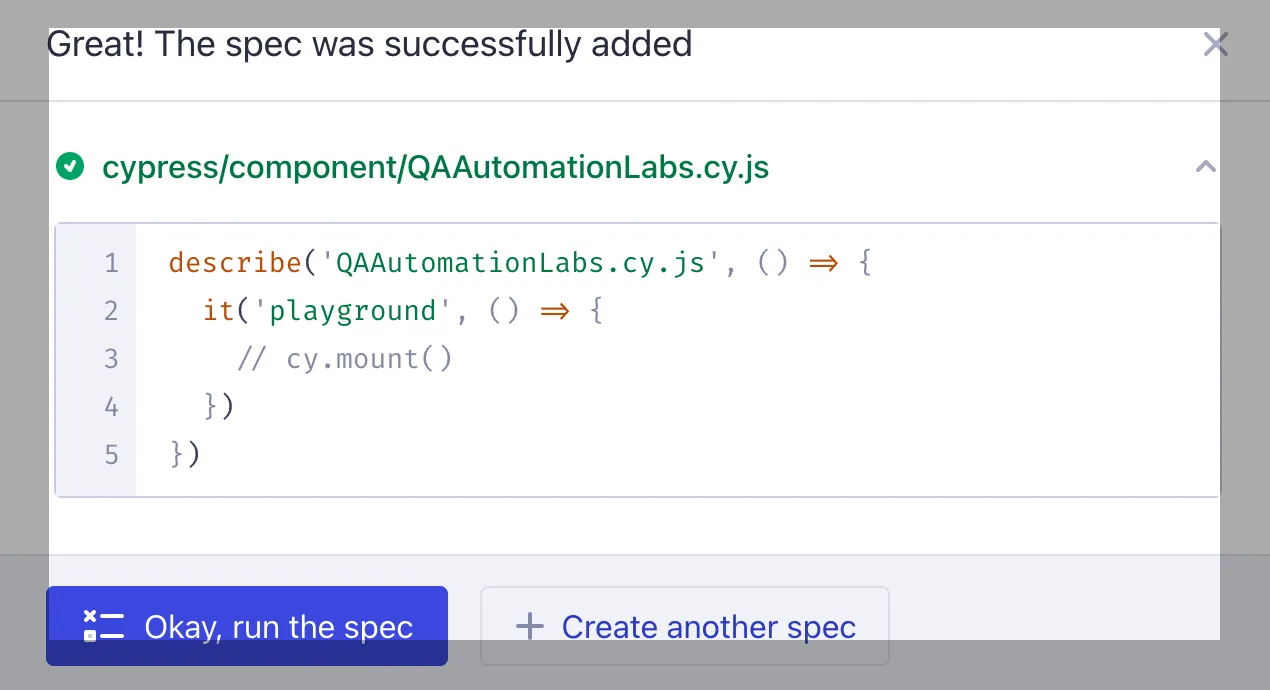
Once you click on the Okay button.
Below is the Screenshot of the folder structure after installing React App.
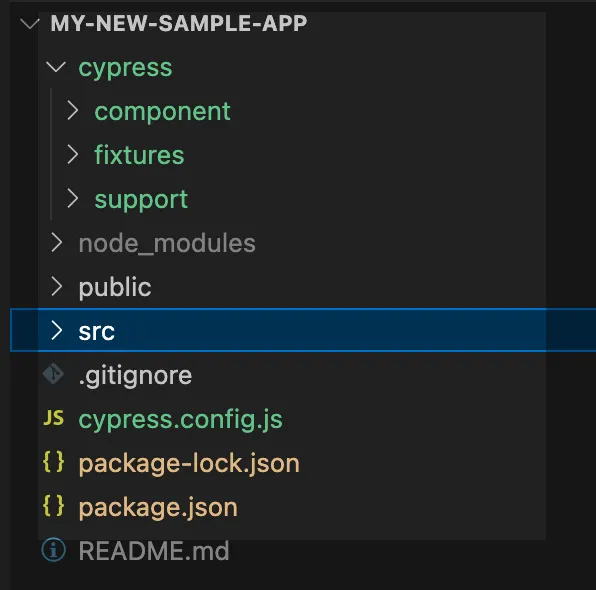
Step 9
Create a counter component inside the src folder and give its name QAAutomationLabs.jsx
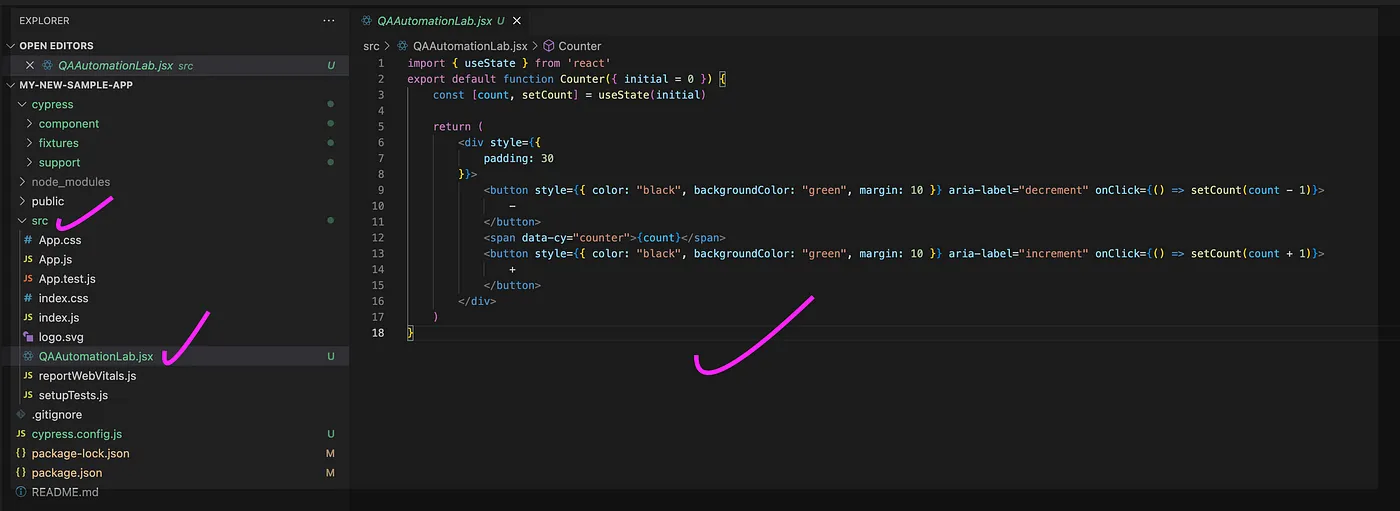
import { useState } from 'react'
export default function Counter({ initial = 0 }) {
    const [count, setCount] = useState(initial)

    return (
        <div style={{
            padding: 30
        }}>
            <button style={{ color: "black", backgroundColor: "green", margin: 10 }} aria-label="decrement" onClick={() => setCount(count - 1)}>
                -
            </button>
            <span data-cy="counter">{count}</span>
            <button style={{ color: "black", backgroundColor: "green", margin: 10 }} aria-label="increment" onClick={() => setCount(count + 1)}>
                +
            </button>
        </div>
    )
}
Step 10
Now Create ‘QAAutomationLabs.cy.js’ under the Component folder. Here, we have a single test that ensures that our component mounts.
import { mount } from 'cypress/react'
import Counter from '../../src/QAAutomationLab'

describe('<Counter>', () => {
    it('mounts', () => {
        cy.mount(<Counter ></Counter>)
    })
})
Step 11
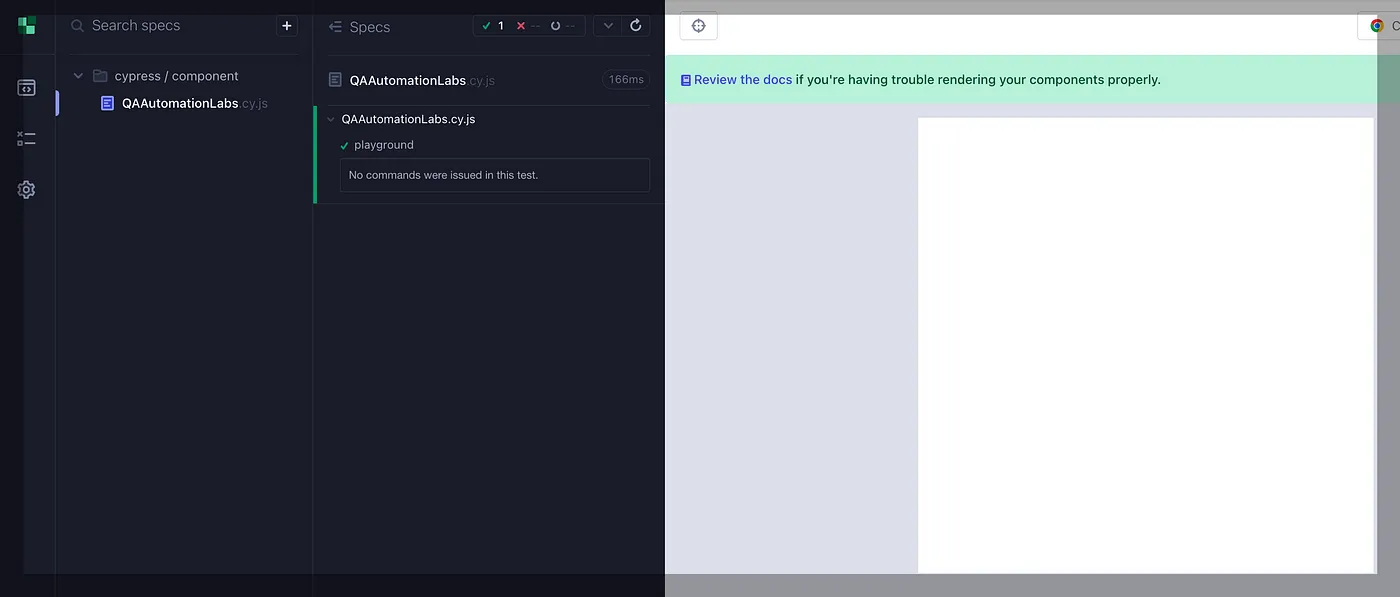
Run the below command to run the component test case. And launch the below:
npx cypress open --componentIn the spec list, click on QAAutomationLabs.cy.js and see the counter component mounted in the test area.

Testing of Counter Component Using Cypress
Now Let’s do the testing of this Counter Component using Cypress.
Scenario Covered:
- Scenario for when we do the increment by clicking on the (+) icon.
- Scenario for when we do the decrement by clicking on the (-) icon.
Let’s create the Cypress Test cases (it block).
cy.mount(
//Two time Increment the Count
cy.get(incrementSelector).click();
cy.get(incrementSelector).click();
// Assert
cy.get(counterSelector).should(“contain.text”, 2);
//Do the decrement
cy.get(decrementSelector).click();
// Assert
cy.get(counterSelector).should(“have.text”, “1”);
// Assert color
cy.get(decrementSelector)
.should(“have.css”, “color”)
.and(“eq”, “rgb(0, 0, 0)”);
// Assert background color
cy.get(decrementSelector)
.should(“have.css”, “background-color”)
.and(“eq”, “rgb(0, 128, 0)”);
});
it(“Two Time decrement then Increment the count “, () => {
cy.mount(
//Two time decrement the count
cy.get(decrementSelector).click();
cy.get(decrementSelector).click();
// Assert
cy.get(counterSelector).should(“have.text”, “-2”);
//Then increment the count
cy.get(incrementSelector).click();
cy.get(counterSelector).should(“have.text”, “-1”);
// Assert color
cy.get(decrementSelector)
.should(“have.css”, “color”)
.and(“eq”, “rgb(0, 0, 0)”);
// Assert background color
cy.get(decrementSelector)
.should(“have.css”, “background-color”)
.and(“eq”, “rgb(0, 128, 0)”);
});
});” data-lang=”text/javascript”>
import Counter from "../../src/QAAutomationLab";

describe("<Counter>", () => {
  const counterSelector="[data-cy="counter"]";
  const incrementSelector = "[aria-label=increment]";
  const decrementSelector = "[aria-label=decrement]";
  it("Two Time Increment then decrement the count ", () => {
    cy.mount(<Counter ></Counter>);

    //Two time Increment the Count
    cy.get(incrementSelector).click();
    cy.get(incrementSelector).click();

    // Assert
    cy.get(counterSelector).should("contain.text", 2);

    //Do the decrement
    cy.get(decrementSelector).click();

    // Assert
    cy.get(counterSelector).should("have.text", "1");

    // Assert color
    cy.get(decrementSelector)
      .should("have.css", "color")
      .and("eq", "rgb(0, 0, 0)");
    // Assert background color
    cy.get(decrementSelector)
      .should("have.css", "background-color")
      .and("eq", "rgb(0, 128, 0)");
  });
  it("Two Time decrement then Increment the count ", () => {
    cy.mount(<Counter ></Counter>);

    //Two time decrement the count
    cy.get(decrementSelector).click();
    cy.get(decrementSelector).click();
    // Assert
    cy.get(counterSelector).should("have.text", "-2");

    //Then increment the count
    cy.get(incrementSelector).click();

    cy.get(counterSelector).should("have.text", "-1");
    // Assert color
    cy.get(decrementSelector)
      .should("have.css", "color")
      .and("eq", "rgb(0, 0, 0)");
    // Assert background color
    cy.get(decrementSelector)
      .should("have.css", "background-color")
      .and("eq", "rgb(0, 128, 0)");
  });
});
Run the command to run the above test cases
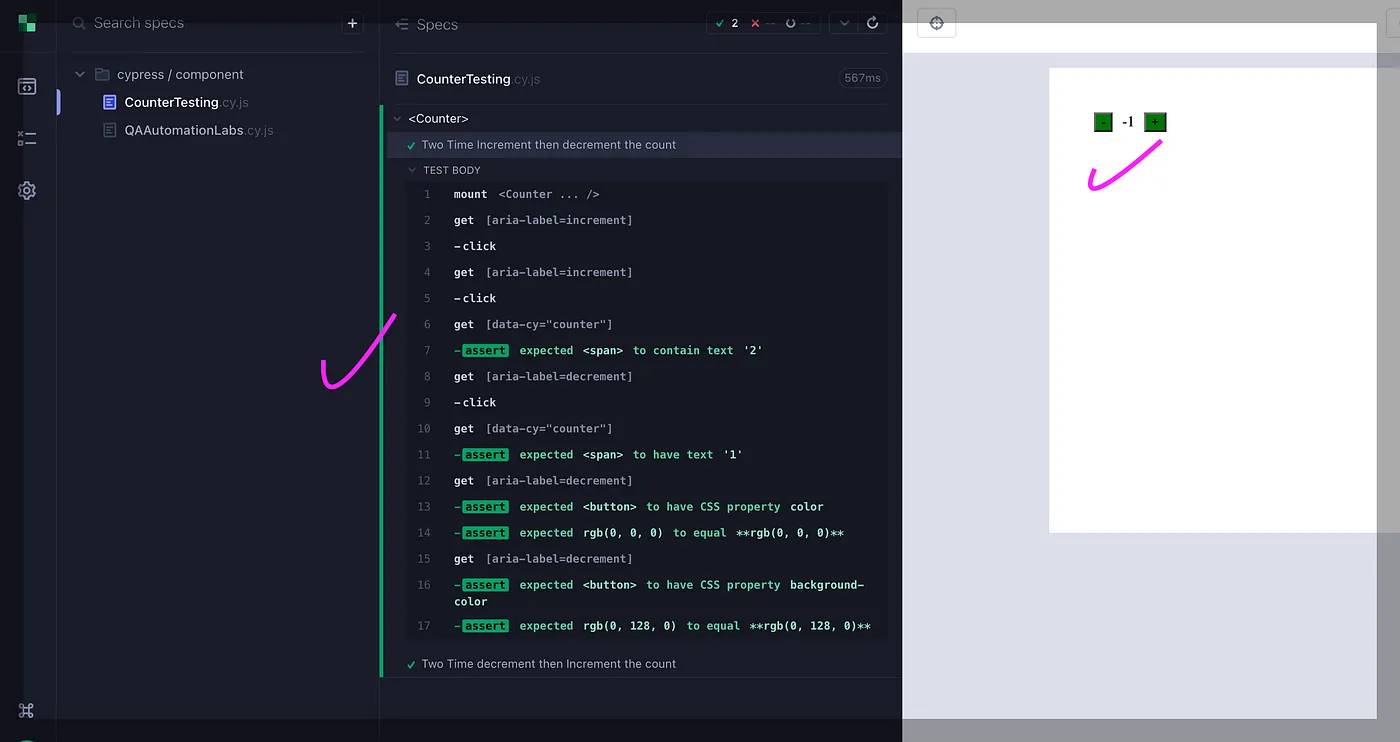
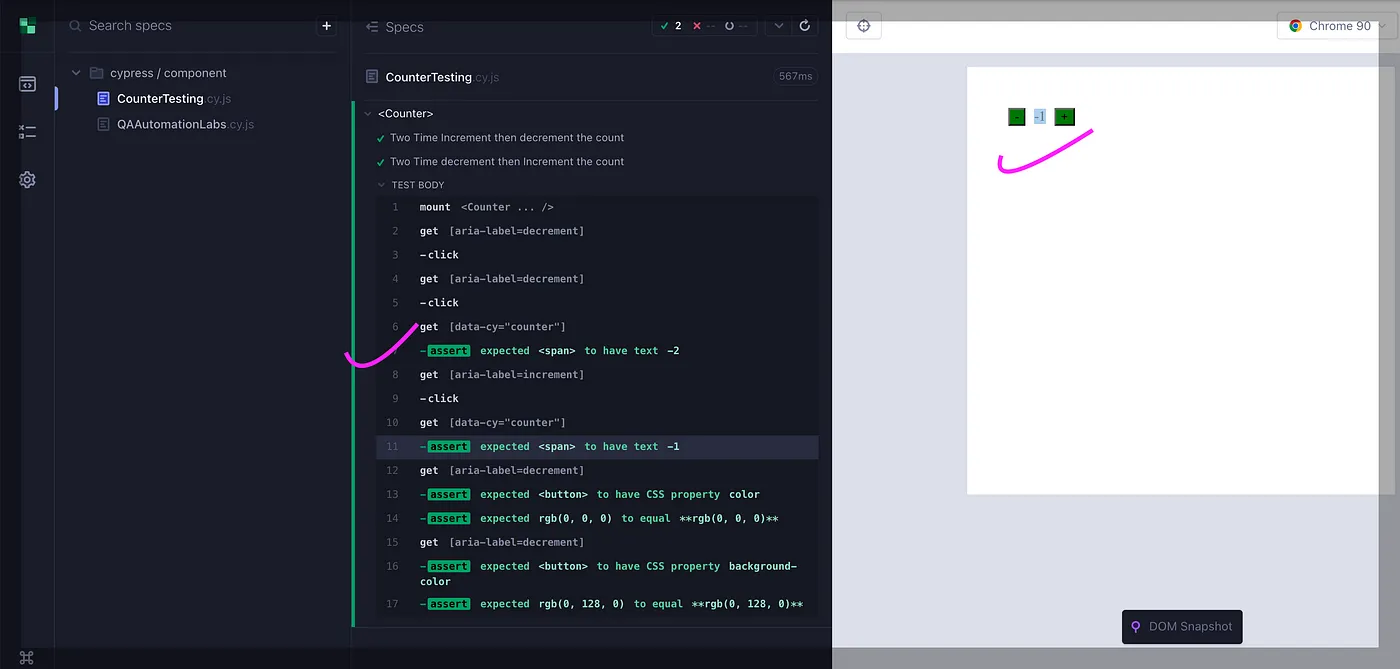
npx cypress open --componentOutput
Below is the output of the test cases that are executed against testing the “Counter” Component.
Wrap-Up
Component testing, along with Cypress, is beneficial for several reasons. It allows for early detection of bugs, improves code quality, increases confidence in code changes, facilitates refactoring, simplifies integration testing, and is cost-effective.
Additionally, by writing tests for individual components, developers are forced to think about the design and functionality of their code, which can lead to better code quality and maintainability.
Source link
