Face recognition, as a biometric recognition technology based on artificial intelligence, has been widely applied in many fields in recent years. In web applications, facial recognition-based identity authentication is also becoming increasingly popular. At the same time, the user experience continues to improve. This article will introduce how to integrate FaceIO in Vue.js and Golang to achieve identity authentication for facial recognition.
In web applications, the security and convenience factors brought by facial recognition-based identity authentication can enhance the user experience.
FaceIO, as a third-party technology service provider, provides facial identity recognition services based on artificial intelligence. Moreover, FaceIO provides an online JavaScript library. It can be integrated very easily into web applications. The reference to the online JavaScript library can be found in the following code:
<script src="https://cdn.faceio.net/fio.js"></script>The project code corresponding to this article has been uploaded to GitHub. The uploaded code is a complete project code. The code is based on the MIT protocol and has no restrictions.
Technology Stack
Front-end: Vue.Js v2.7.14, Node.Js v18.13.0, JQuery
Back-end: Golang v1.13.15
Development Tool: GoLand 2019
If you are interested, you can download it from GitHub. The UI framework for the front end of this project uses Bootstrap and references the use of Gentella. Take a screenshot of the login below
Before integrating web applications, you need to first apply for a Public ID for your application from FaceIO’s official website. The application process is very simple and offers a free trial count. This article will not introduce the application process. If you are interested, you can log in to FaceIO’s official website to take a look.
How To Integrate FaceIO in the Front End of Vue.js
Step 1: Create Vue Engineering Files in the Development Tool GoLand
This project uses Node.Js version 18.13.0. After installing the plugin Vue.js in GoLand, we can create Vue project files. To install plugins, you need to enter Vue.js in “File>Settings>Plugins” to find and install them.
Step 2: Reference “fio.js” in Index. HTML in the Directory “Public”
The code is shown below:
<body>
    <div id="app"></div>
    <!-- built files will be auto injected -->
  </body>
  <script src="https://cdn.faceio.net/fio.js"></script>
  <script src="ajaxScript.js"></script>
  <script src="jquery.min.js"></script>
  <script type="text/javascript">
    let myFaceIO
    function initFaceIO(result) {
      myFaceIO = new faceIO(result.Result.FaceIOAppCode);
      window.myFaceIO=myFaceIO
    }
    jPost("config","",initFaceIO)
  </script>
In the above code, use JQuery to obtain the Public ID registered by the web application in FaceIO from the back end. The purpose of this design is to prevent the Public ID from being directly exposed in the code. If the Public ID is written dead in the code, the flexibility is very low.
In my customized JavaScript file “ajaxScript.js,” I implemented a common function for communicating with the back-end through JQuery. The custom function jPost() is responsible for interacting with the back end. At the same time, after data interaction, call the callback function initFaceIO() in the result. All data interactions use JSON data format. In the callback function initFaceIO(), initialize the FaceIO object.
Code for initializing FaceIO:
myFaceIO = new faceIO(result.Result.FaceIOAppCode);After initialization, use:
This will make myFaceIO a global variable. It can take effect in Vue’s framework code and can be used.
Please note that the JavaScript files “ajaxScript.js” and “jquery.min.js” referenced here are both in the directory “public” and do not use Vue’s library files.
Step 3: How To Use FaceIO in the Vue Framework
In this project, I used JQuery in the Vue framework and customized the JavaScript library file “scripts.js.” In this JavaScript library file, JQuery has been re-encapsulated, and some operation functions have been customized. So, in order to be globally effective, a reference was made in the file “main.js.” At the same time, the code also uses the UI framework Bootstrap, which needs to be referenced in the file “main.js.” The code for the file “main.js” is shown below:
import Vue from 'vue'
import App from './App.vue'
import router from './router/index.js'
import {AjaxPost} from './assets/build/js/scripts.js'
import './assets/vendors/bootstrap/dist/css/bootstrap.min.css'
import './assets/vendors/font-awesome/css/font-awesome.min.css'
import 'bootstrap/dist/js/bootstrap.min.js'

Vue.prototype.AjaxPost = AjaxPost
Vue.config.productionTip = false

new Vue({
    el: '#app',
    router,
    render: h => h(App)
})
Set the HTTP access address of the back-end service in the custom JavaScript library file “scripts.js”
const serverUrl="http://127.0.0.1:8888/"Because in this project, the front-end and back-end are separate development frameworks. I implemented the back end using Golang. After this back-end is started, it is an independent HTTP server that will occupy the port number. 8888 is my custom listening port number. The interface address of this back-end service can be customized and deployed according to your own project situation, and you can modify the value of the custom constant “serverUrl.”
After completing the above code, you can use the FaceIO function in the Vue file.
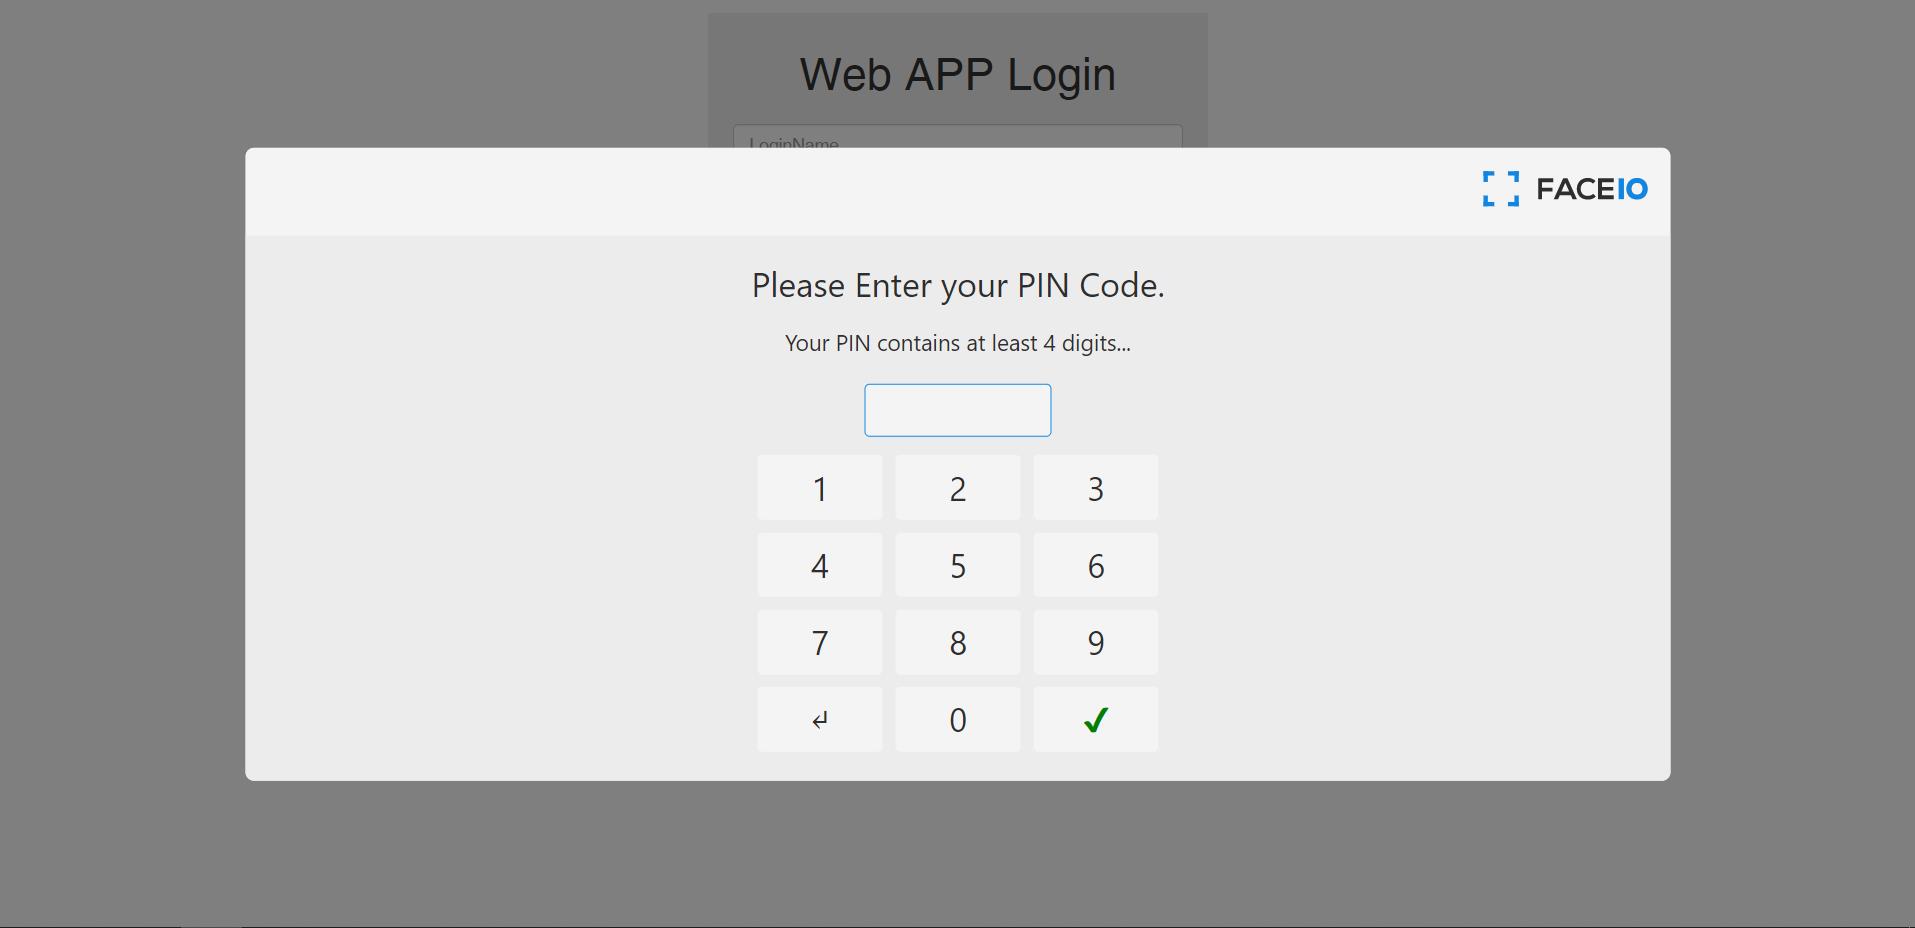
For example, in “userLogin. vue”, the usage of the facial authentication code is shown below:
window.myFaceIO.authenticate({
    "locale": "auto"
}).then(userInfo => {
    checkFaceLogin(userInfo);
}).catch(errCode => {
    console.log(errCode);
    window.myFaceIO.restartSession();
})
Among them, the function checkFaceLogin() is a custom callback function. It is used to process the user authentication result data returned by FaceIO after authentication. We can proceed with the next step of business logic processing based on the verification result data returned by FaceIO. Take a screenshot of the runtime as shown below:
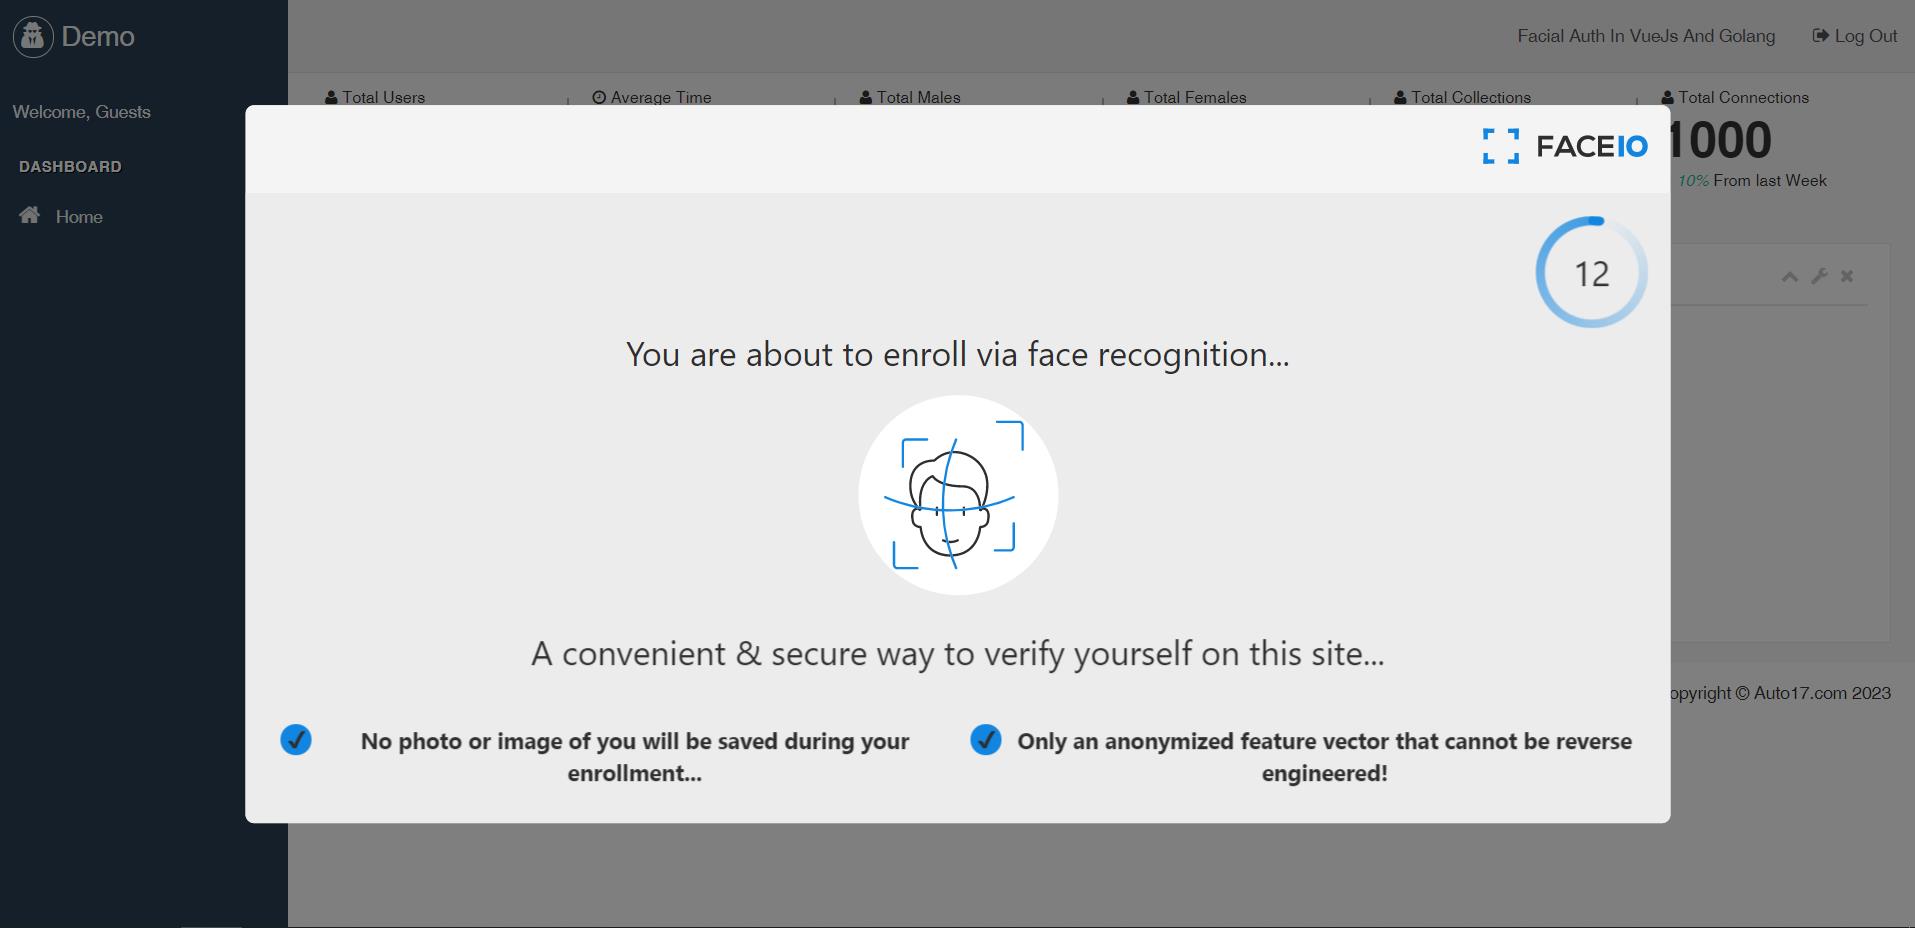
For example, in ‘sysDashboard.vue’, the usage of facial identity registration codes can be found below:
<script>
    export default {
        name: 'sysDashboard',
        activated() {
            this.AjaxPost("dashboard","",initData);
            function initData(result) {
                if(result.Code===1){
                    let fid=result.Result.FacialId
                    if(fid.length>4){
                        document.getElementById("myFacialId").innerHTML=fid
                        document.getElementById("FacialIdReg").disabled=true;
                    }
                }
            }
        },
        methods: {
            faceReg: function() {
                const that=this
                window.myFaceIO.enroll({
                    "locale": "auto"
                }).then(userInfo => {
                    addFacialAuth(userInfo);
                }).catch(errCode => {
                    console.log(errCode);
                })
                function addFacialAuth(userInfo) {
                    let obj = {};
                    obj.FacialId = userInfo.facialId;
                    that.AjaxPost("userEdit",obj,addFacialAuthEnd);
                }
                function addFacialAuthEnd(result) {
                    if(result.Code===1){
                        document.getElementById("myFacialId").innerHTML=result.Result.FacialId
                        document.getElementById("FacialIdReg").disabled=true;
                    }else {
                        alert("add Facial Auth fail")
                    }
                }
            }
        }
    }
</script>
Among them, the function faceReg() is a custom facial recognition registration function.
The subfunction addFacialAuth() is a custom callback function. It is used to process the user registration result data returned by FaceIO after identity registration is completed. We can use the registration result data returned by FaceIO. Proceed to the next step of business logic processing.
Please note the calling method of the custom function AjaxPost() here. It is not directly called using the method of ‘this. AjaxPost()‘. But in the first line of the function faceReg()
Define a constant ‘that‘ before using ‘that. AjaxPost()‘ in the subfunction addFacialAuth(). This is because in the subfunction addFacialAuth(), ‘this. AjaxPost()‘ is invalid. Take a screenshot of the runtime as shown below:
How To Integrate FaceIO in Golang’s Back-End
In the code of this project, Golang is used to implement back-end services. Golang has good concurrency performance, memory management automation, and other advantages, so it has been widely used in building back-end services. Please install Golang first. In this project code, I am using version 1.13.15. After installing Golang, it is easy to create Golang project files in the Goland development tool.
Also, please note one point. In this project, there is no persistent data storage in Golang. The data is all in memory, and if the service is restarted, the data will be initialized. Because this project is a demo, it is just a simple example.
Step 1: Create an HTTP Server
In the code of this project, an HTTP server is created in the file “api_router. go”. Here is the code:
package routes

import (
   "../conf"
   "../handlers"
   "fmt"
   "log"
   "net/http"
)

func ApiRouter() {
   http.HandleFunc("/dashboard", handlers.Dashboard)
   http.HandleFunc("/config", handlers.Config)
   http.HandleFunc("/login", handlers.Login)
   http.HandleFunc("/loginWithFace", handlers.LoginWithFace)
   http.HandleFunc("/userEdit", handlers.UserEdit)
   port := conf.GetEnv().ServerPort
   if port == "" {
      port = "8080"
      log.Printf("Defaulting to port %s", port)
   }

   log.Printf("Listening on port %s", port)
   log.Printf("Open http://localhost:%s in the browser", port)
   log.Fatal(http.ListenAndServe(fmt.Sprintf(":%s", port), nil))
}
In the above code, use the ‘http.HandleFunc()’ function to register multiple router functions into the HTTP multiplexer. These router functions will handle all requests from the client.
Finally, call the ‘http.ListenAndServe()’ function to start listening to HTTP requests on the port. When the current end sends a request to the back end, the corresponding router function will be executed, and a response will be returned.
Step 2: Receive the Request From the Vue.js Front-End
To facilitate code management, I have included all these router functions in the package “handlers.” For example, obtaining the public ID of an application registered in FaceIO. The code for this function is in the file “config.go”, as shown below:
package handlers

import (
   "../conf"
   "../model"
   "encoding/json"
   "io"
   "net/http"
)

func Config(w http.ResponseWriter, r *http.Request) {
   w.Header().Set("Access-Control-Allow-Origin", "*")
   w.Header().Set("Access-Control-Allow-Headers", "*")
   result := make(map[string]string)
   result["FaceIOAppCode"] = conf.GetEnv().FaceIOAppCode
   jsonResult := new(model.JsonResult)
   jsonResult.Code = conf.GetEnv().CodeSuccess
   jsonResult.Msg = conf.GetEnv().MsgSuccess
   jsonResult.Result = result
   msg, _ := json.Marshal(jsonResult)
   _, _ = io.WriteString(w, string(msg))
}
Please note that in the above code, there are two lines of code.
w.Header().Set("Access-Control-Allow-Origin", "*")
w.Header().Set("Access-Control-Allow-Headers", "*")
This is the setting that allows cross-domain access. Because in my local development environment, the front-end startup is an independent HTTP server, and the back-end startup is also an independent HTTP server. The data interaction between the front-end and back-end belongs to cross-domain access. If you deploy in a production environment, you may be able to run using an HTTP server. For example, using Nginx, you can set up a reverse proxy. This belongs to the same domain access, so these two lines of code are not required.
Because in the code of this project, both the front-end and back-end data interactions use JSON data format. So, in the above code, call the function ‘json.Marshal()’ to format the data.
Viewing Application Usage on the FaceIO Console
As a facial recognition technology service provider, FaceIO provides many services on its console. For example, facial detection, facial search, facial authentication, live body detection, and so on these functions can be completed by simply calling its provided online JavaScript library. In addition, after you register and log in to its management back-end, you can create different applications and assign multiple public IDs based on your business scenario. There are records of the usage of each application, as shown in the screenshots below:

In this article, a brief explanation is provided to introduce how to integrate FaceIO using Vue.js and Golang to implement a facial recognition-based identity authentication system. In the Vue.js environment, FaceIO provides an online JavaScript library for facial detection and recognition. It can directly start the user’s computer’s camera, send the captured facial photos directly to the FaceIO server for processing, and return the recognition results to the front end. The facial photos taken do not need to go through our application.
Through this demonstration project, we can not only learn how to build complete web applications using two different programming languages but also learn how to integrate facial recognition technology to enhance application security and user experience. These skills and knowledge can help us better understand computer science and software development and enhance our professional competitiveness. Through practice, we can better understand the working principle of the code and master some practical skills and best practices. In this process, we can make new friends and colleagues, explore and create more valuable things together. I hope everyone can maintain an attitude of continuous learning and progress, constantly exploring and creating more value.
Source link